Image Thresholding in OpenCV
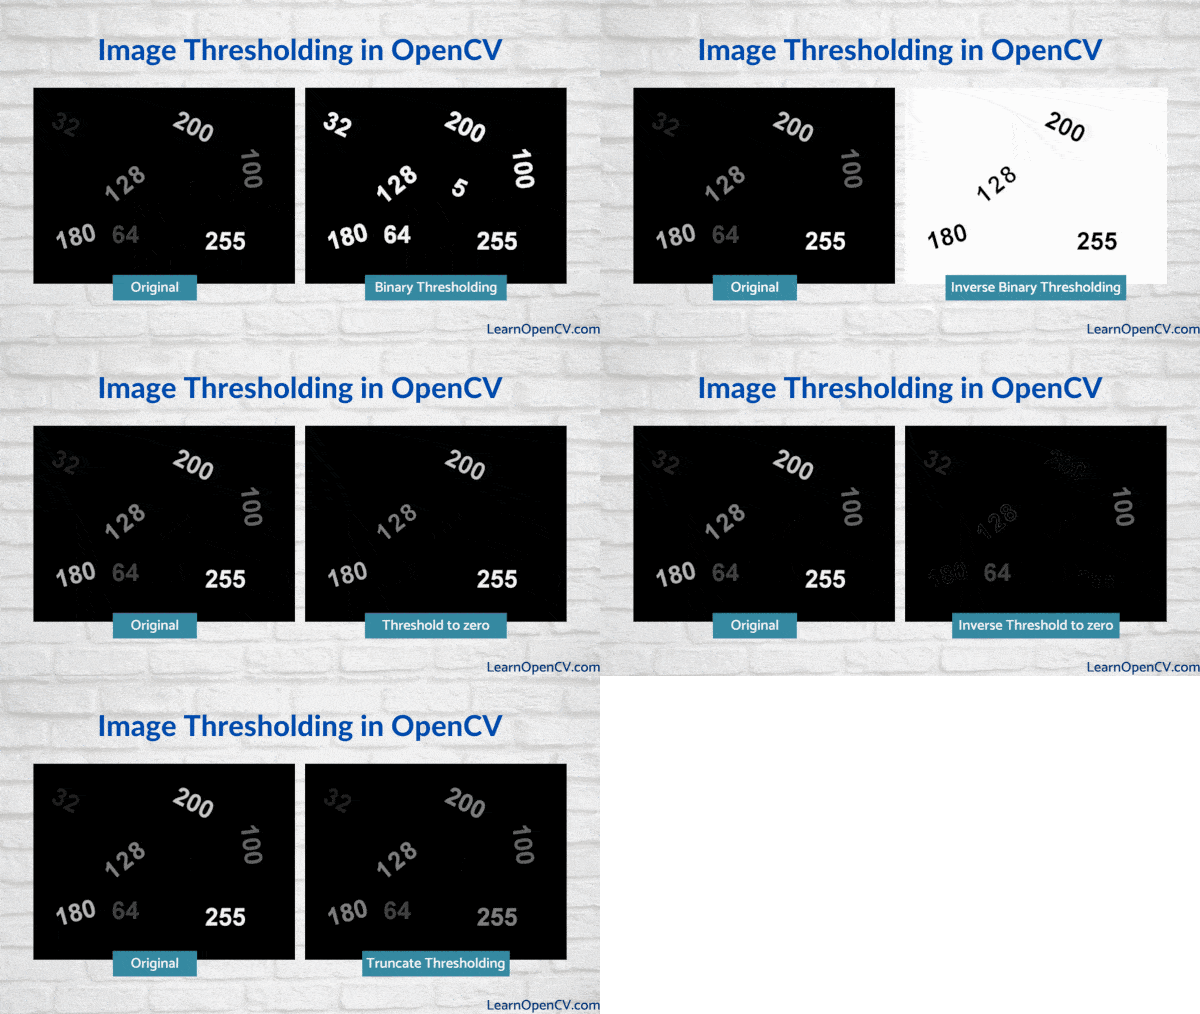
Carefully observe the animation below in Figure 1. How many numbers do you see? Most of you will see several numbers. But there is more to the image than meets the eye.
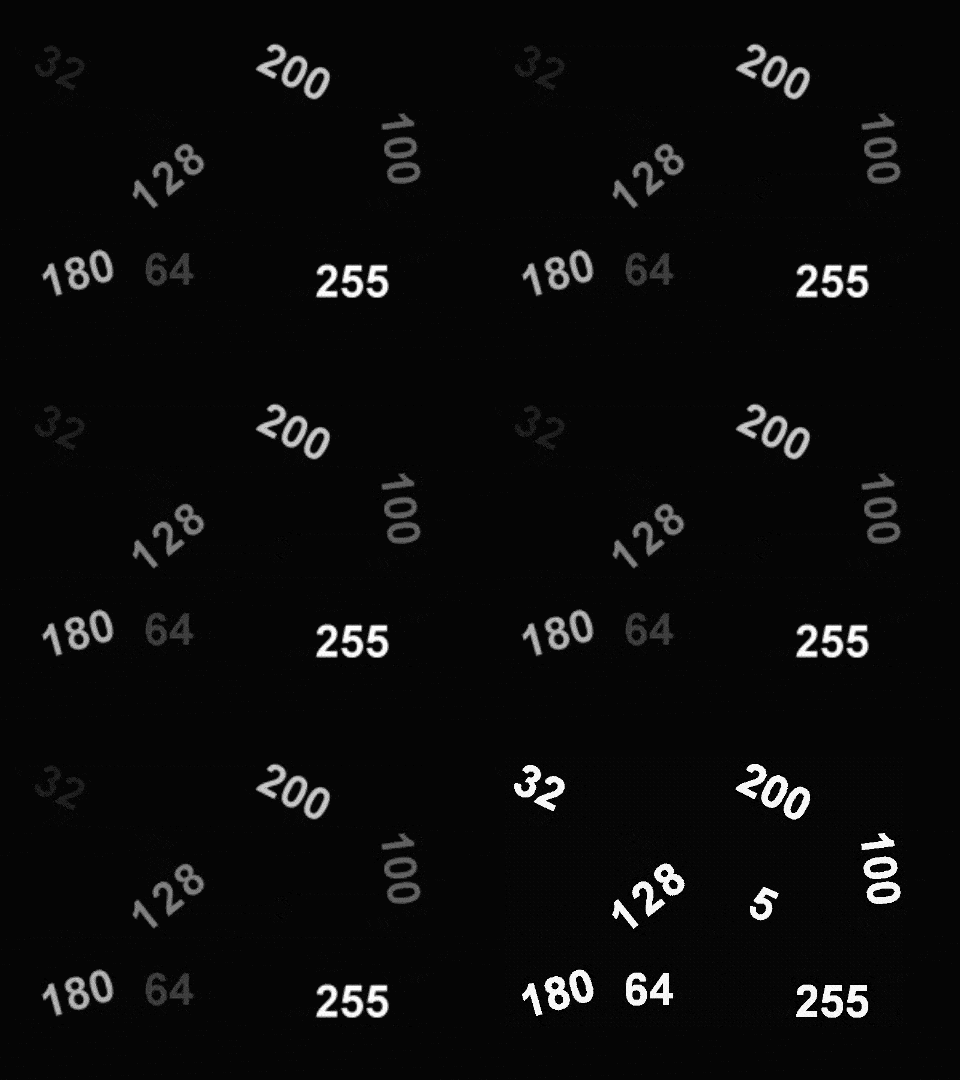
As the image cycles through the animation, you will see the thresholded version of the original image, where:
- All the numbers look completely white (i.e. they have a grayscale value of 255).
- You can also see the number ‘5’, which was present but invisible in the original image, simply because its grayscale value was 5.
In fact, all the numbers in the original image have a grayscale value equal to the value of the number. So, ‘255’ is the brightest and ‘5’ the darkest. Recall that grayscale intensities range from pure black (0) to pure white (255).
So, reading numbers in the thresholded image is much easier than reading numbers in the original image. Not surprisingly, even text-recognition algorithms find it easier to process a thresholded image over the original. Thresholding therefore has numerous applications in computer vision, and is often performed in the initial stages in many processing pipelines. There are several types of thresholding algorithms. Let’s focus on ‘global’ thresholding here.
This post is a part of the series Getting Started with OpenCV which consists of the following posts:
- Read, Display, and Write an Image using OpenCV
- Reading and Writing Videos using OpenCV
- Image Resizing using OpenCV
- Cropping an Image using OpenCV
- Image Rotation and Translation using OpenCV
- Annotating Images Using OpenCV
- Color spaces in OpenCV
- Image Filtering Using Convolution in OpenCV
- Image Thresholding in OpenCV
- Edge Detection using OpenCV
- Mouse and Trackbar using OpenCV GUI
- Contour Detection using OpenCV
- Deep Learning with OpenCV DNN Module: A Definitive Guide
Contents
- Global Thresholding
- Binary Thresholding
- Inverse-Binary Thresholding
- Truncate Thresholding
- Threshold to Zero
- Inverted Threshold to Zero
Global Thresholding
So, what is ‘global’ thresholding? When the thresholding rule is applied equally to every pixel in the image, and the threshold value is fixed, the operations are called global.
Global thresholding algorithms take a source image (src) and a threshold value (thresh) as input, and produce an output image (dst), by comparing the pixel intensity at source pixel location (x,y) to the threshold. If src(x,y) > thresh, then dst(x,y) is assigned some value. Otherwise, dst(x,y) is assigned some other value.
The simplest form of global thresholding is called Binary Thresholding.
- In addition to the source image (src) and the threshold value (thresh ), it takes another input parameter called the maximum value (
maxValue). - At each pixel location
(x,y), the pixel intensity at that location is compared to a threshold value, thresh .
If src(x,y) is greater than thresh, the thresholding operation sets the value of the destination image pixel dst(x,y) to the maxValue. Otherwise, it sets it to 0, as shown in the pseudo code below.
# Simple threshold function pseudo code
if src(x,y) > thresh
  dst(x,y) = maxValue
else
  dst(x,y) = 0
Thresholding algorithms vary, based on different threshold rules applied to src(x,y) to get dst(x,y). Here, we will examine five different threshold types available in OpenCV.
Threshold Examples: Python and C++
Let’s first look at the code that will demonstrate several thresholding rules. We will discuss each line in detail so that you understand it fully.
Python:
# import opencv
import cv2

# Read image
src = cv2.imread("threshold.png", cv2.IMREAD_GRAYSCALE);

# Basic threhold example
th, dst = cv2.threshold(src, 0, 255, cv2.THRESH_BINARY);
cv2.imwrite("opencv-threshold-example.jpg", dst);

# Thresholding with maxValue set to 128
th, dst = cv2.threshold(src, 0, 128, cv2.THRESH_BINARY);
cv2.imwrite("opencv-thresh-binary-maxval.jpg", dst);

# Thresholding with threshold value set 127
th, dst = cv2.threshold(src,127,255, cv2.THRESH_BINARY);
cv2.imwrite("opencv-thresh-binary.jpg", dst);

# Thresholding using THRESH_BINARY_INV
th, dst = cv2.threshold(src,127,255, cv2.THRESH_BINARY_INV);
cv2.imwrite("opencv-thresh-binary-inv.jpg", dst);

# Thresholding using THRESH_TRUNC
th, dst = cv2.threshold(src,127,255, cv2.THRESH_TRUNC);
cv2.imwrite("opencv-thresh-trunc.jpg", dst);

# Thresholding using THRESH_TOZERO
th, dst = cv2.threshold(src,127,255, cv2.THRESH_TOZERO);
cv2.imwrite("opencv-thresh-tozero.jpg", dst);

# Thresholding using THRESH_TOZERO_INV
th, dst = cv2.threshold(src,127,255, cv2.THRESH_TOZERO_INV);
cv2.imwrite("opencv-thresh-to-zero-inv.jpg", dst);
C++:
#include "opencv2/opencv.hpp"

using namespace cv;
using namespace std;

int main( int argc, char** argv )
{

	// Read image
	Mat src = imread("threshold.png", IMREAD_GRAYSCALE);
	Mat dst;

	// Basic threhold example
	threshold(src,dst,0, 255, THRESH_BINARY);
	imwrite("opencv-threshold-example.jpg", dst);

	// Thresholding with maxval set to 128
	threshold(src, dst, 0, 128, THRESH_BINARY);
	imwrite("opencv-thresh-binary-maxval.jpg", dst);

	// Thresholding with threshold value set 127
	threshold(src,dst,127,255, THRESH_BINARY);
	imwrite("opencv-thresh-binary.jpg", dst);

	// Thresholding using THRESH_BINARY_INV
	threshold(src,dst,127,255, THRESH_BINARY_INV);
	imwrite("opencv-thresh-binary-inv.jpg", dst);

	// Thresholding using THRESH_TRUNC
	threshold(src,dst,127,255, THRESH_TRUNC);
	imwrite("opencv-thresh-trunc.jpg", dst);

	// Thresholding using THRESH_TOZERO
	threshold(src,dst,127,255, THRESH_TOZERO);
	imwrite("opencv-thresh-tozero.jpg", dst);

	// Thresholding using THRESH_TOZERO_INV
	threshold(src,dst,127,255, THRESH_TOZERO_INV);
	imwrite("opencv-thresh-to-zero-inv.jpg", dst);
}
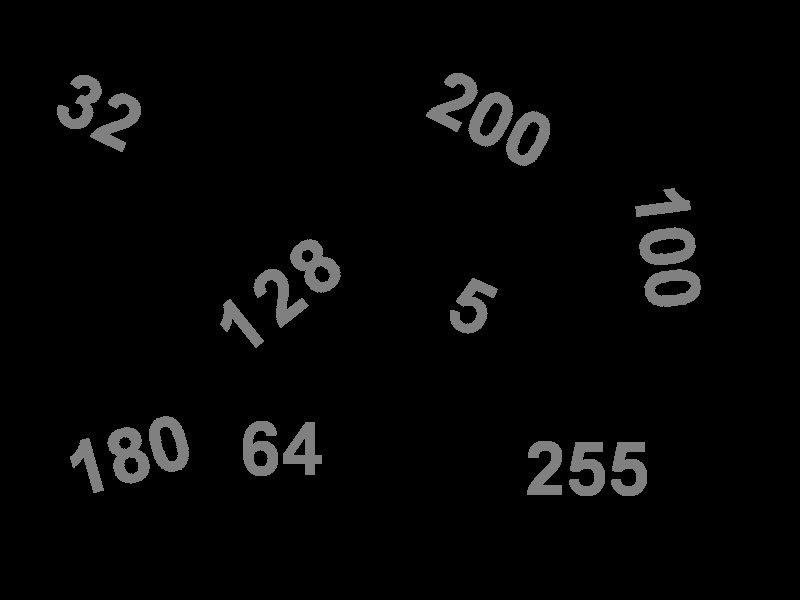
Input Image
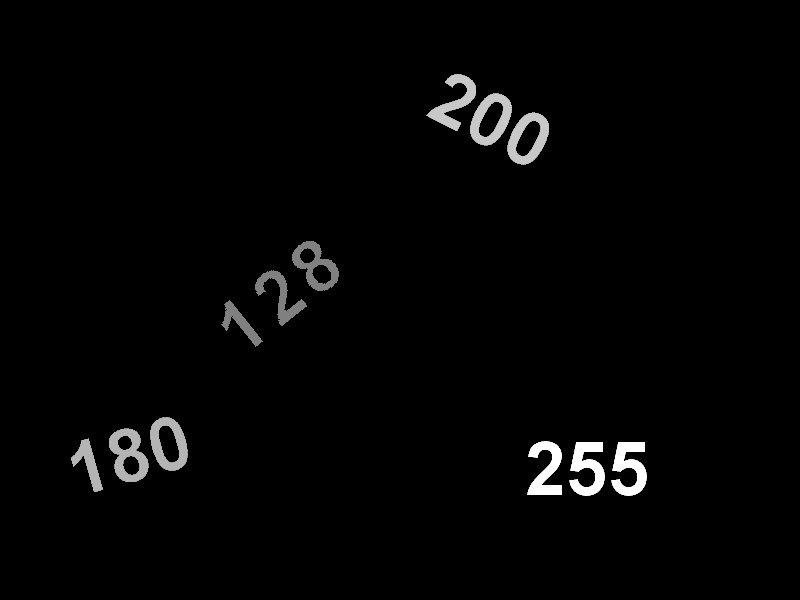
In the following examples, we will use this image as input. The input image contains numbers written with intensity (grayscale value) equal to the number itself. For example, the pixel intensity of the number ‘200’ is 200, and the intensity of the number ‘32’ is 32. No wonder ‘32’ appears much darker than ‘200’.
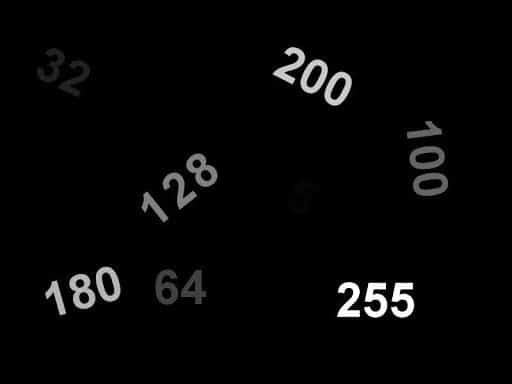
In each example below, we will explain the thresholding rule via pseudo-code, and then provide the actual Python and C++ code, for the example as well as the thresholded output image.
1. Binary Thresholding ( THRESH_BINARY )
This is the most common and simplest type of thresholding.
Thresholding rule
# Binary Threshold
if src(x,y) > thresh
  dst(x,y) = maxValue
else
  dst(x,y) = 0
Python:
# import opencv
import cv2

# Read image
src = cv2.imread("threshold.png", cv2.IMREAD_GRAYSCALE)

# Set threshold and maxValue
thresh = 0
maxValue = 255

# Basic threshold example
th, dst = cv2.threshold(src, thresh, maxValue, cv2.THRESH_BINARY);
C++:
using namespace cv;

// Read image
Mat src = imread("threshold.png", IMREAD_GRAYSCALE);
Mat dst;

// Set threshold and maxValue
double thresh = 0;
double maxValue = 255;

// Binary Threshold
threshold(src,dst, thresh, maxValue, THRESH_BINARY);
Result of Binary Threshold
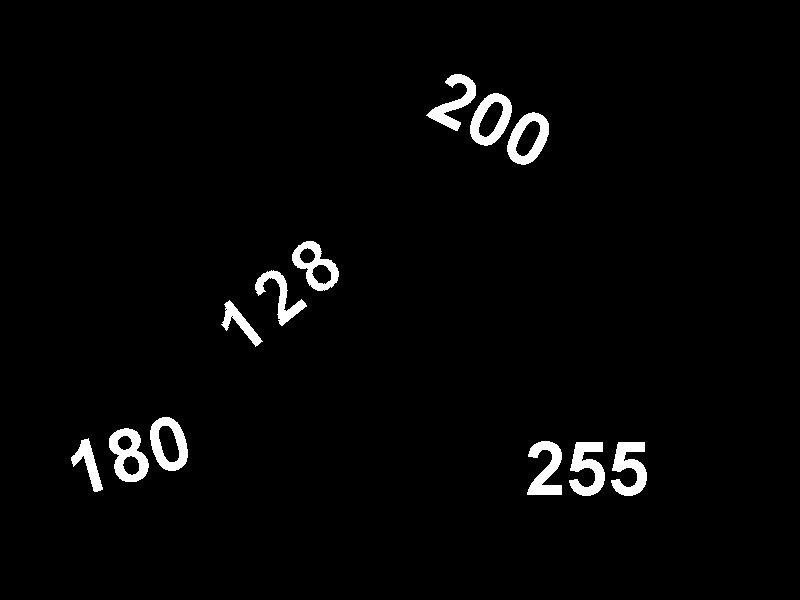
Figure 3 shows the result of applying binary thresholding to the input image, with thresh = 0 and maxValue = 255.
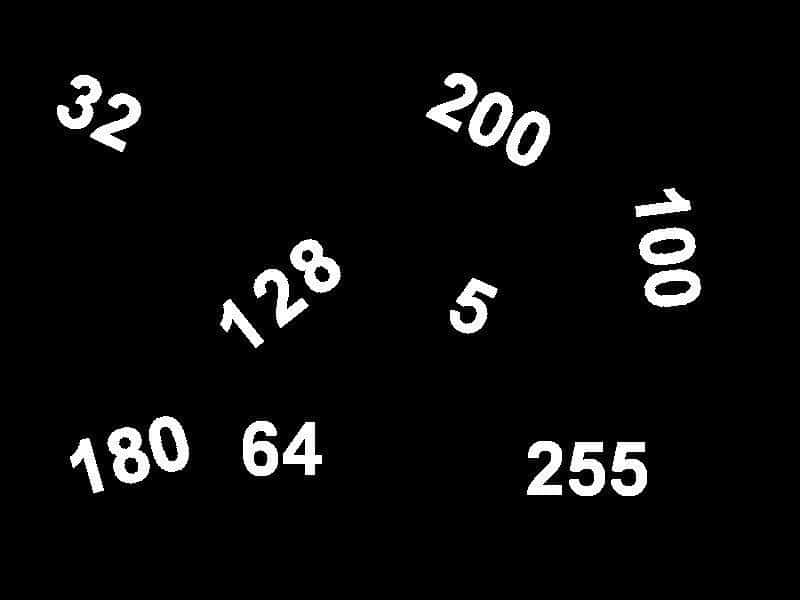
Changing thresh to 127 removes all numbers less than or equal to 127.
Changing maxValue to 128 sets the value of the thresholded regions to 128.
2. Inverse-Binary Thresholding ( THRESH_BINARY_INV )
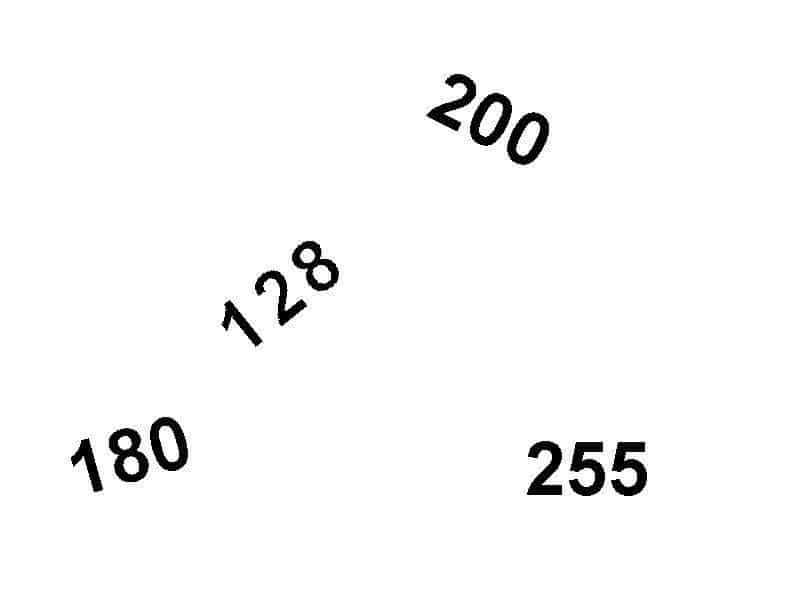
Inverse-Binary Thresholding is just the opposite of Binary Thresholding. The destination pixel is set to:
- zero, if the corresponding source pixel is greater than the threshold
-
maxValue, if the source pixel is less than the threshold
Thresholding rule
# Inverse Binary Threshold
if src(x,y) > thresh
  dst(x,y) = 0
else
  dst(x,y) = maxValue
Python:
th, dst = cv2.threshold(src, thresh, maxValue, cv2.THRESH_BINARY_INV)
C++:
threshold(src,dst, thresh, maxValue, THRESH_BINARY_INV);
Result of Inverse-Binary Threshold
Note how the result of Inverse-Binary Thresholding, shown in Figure 6, is exactly the inverse of Figure 4.
3. Truncate Thresholding ( THRESH_TRUNC )
In this type of thresholding:
- The destination pixel is set to the threshold (
thresh), if the source pixel value is greater than the threshold. - Otherwise, it is set to the source pixel value
- The
maxValueis ignored
Thresholding rule
# Truncate Threshold
if src(x,y) > thresh
  dst(x,y) = thresh
else
  dst(x,y) = src(x,y)
Python:
th, dst = cv2.threshold(src, thresh, maxValue, cv2.THRESH_TRUNC)
C++:
threshold(src,dst, thresh, maxValue, THRESH_TRUNC);
Result of Truncate Thresholding
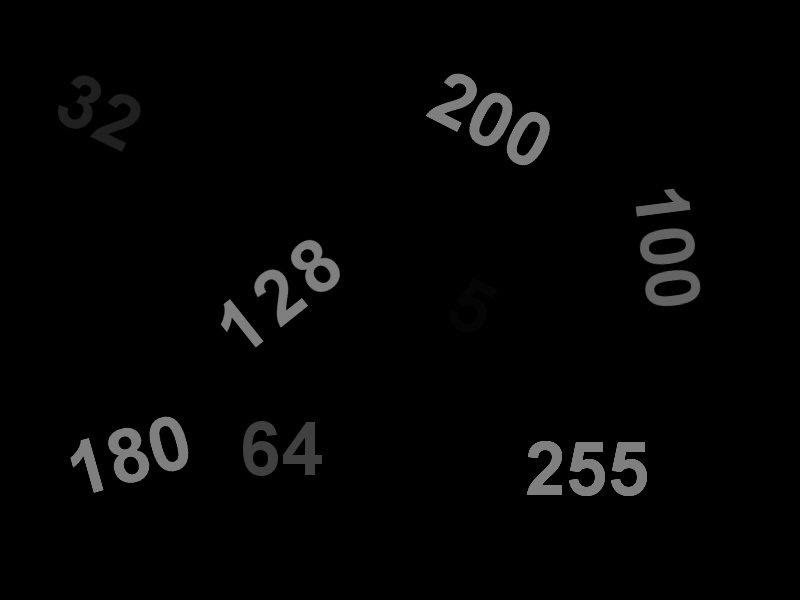
Figure 7 shows the result of applying Truncate Thresholding to the input image. Note that:
- All values above the threshold (127) are set to 127
- All values less than or equal to 127 are unchanged
- The
maxValueis ignored.
4. Threshold to Zero ( THRESH_TOZERO )
In this type of thresholding,
- The destination pixel value is set to the pixel value of the corresponding source , if the source pixel value is greater than the threshold.
- Otherwise, it is set to zero
- The
maxValueis ignored
Thresholding rule
# Threshold to Zero
if src(x,y) > thresh
  dst(x,y) = src(x,y)
else
  dst(x,y) = 0
Python:
th, dst = cv2.threshold(src, thresh, maxValue, cv2.THRESH_TOZERO)
C++:
threshold(src,dst, thresh, maxValue, THRESH_TOZERO);
Result of Threshold to Zero
5. Inverted Threshold to Zero ( THRESH_TOZERO_INV )
In Inverted Threshold to Zero,
- The destination pixel value is set to zero, if the source pixel value is greater than the threshold.
- Otherwise, it is set to the source pixel value
- The
maxValueis ignored
Thresholding rule
# Inverted Threshold to Zero
if src(x,y) > thresh
  dst(x,y) = 0
else
  dst(x,y) = src(x,y)
Python:
th, dst = cv2.threshold(src, thresh, maxValue, cv2.THRESH_TOZERO_INV)
C++:
threshold(src,dst, thresh, maxValue, THRESH_TOZERO_INV);
Result of Inverted Threshold to Zero
Figure 9 shows the result of applying Inverted Threshold to Zero to the input image.
- The numbers below the threshold retain their grayscale value
- The numbers above the threshold are 0, except for the boundary
Check out the artifacts on the boundary of some of the numbers! When the pixel values at the boundary transition from 0 to the value of the number, over very few pixels, some of the boundary pixels fall below the threshold. So, you get these artifacts.

Summary
We discussed how thresholding can be used to isolate certain objects in an image. Several global-thresholding algorithms were demonstrated, and we provided code examples for each. You learned how even a single function in OpenCV can perform different types of thresholding, by simply passing the appropriate thresholding flag.


