Read, Display and Write an Image using OpenCV

Reading, displaying, and writing images are basic to image processing and computer vision. Even when cropping, resizing, rotating, or applying different filters to process images, you’ll need to first read in the images. So it’s important that you master these basic operations.
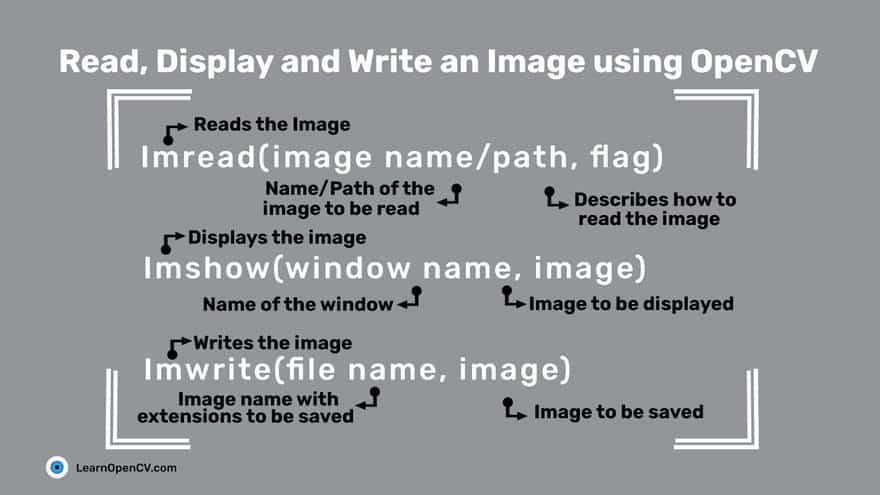
OpenCV, the largest computer vision library in the world has these three built-in functions, let’s find out what exactly each one does:
imread()helps us read an imageimshow()displays an image in a windowimwrite()writes an image into the file directory
We will use the following image to demonstrate all the functions here.

First, go through this code example. It reads and displays the above image. See, how it contains all the three functions, we just mentioned. As you proceed further, we will discuss every single function used in this implementation.
Python
# import the cv2 library
import cv2

# The function cv2.imread() is used to read an image.
img_grayscale = cv2.imread('test.jpg',0)

# The function cv2.imshow() is used to display an image in a window.
cv2.imshow('graycsale image',img_grayscale)

# waitKey() waits for a key press to close the window and 0 specifies indefinite loop
cv2.waitKey(0)

# cv2.destroyAllWindows() simply destroys all the windows we created.
cv2.destroyAllWindows()

# The function cv2.imwrite() is used to write an image.
cv2.imwrite('grayscale.jpg',img_grayscale)
C++
//Include Libraries
#include<opencv2/opencv.hpp>
#include<iostream>

// Namespace nullifies the use of cv::function();
using namespace std;
using namespace cv;

// Read an image
Mat img_grayscale = imread("test.jpg", 0);

// Display the image.
imshow("grayscale image", img_grayscale);

// Wait for a keystroke.
waitKey(0);

// Destroys all the windows created
destroyAllWindows();

// Write the image in the same directory
imwrite("grayscale.jpg", img_grayscale);
Let’s begin by importing the OpenCV library in Python and C++ (as shown below).
Python:
# import the cv2 library
import cv2
In C++, use #include (as shown below) to accomplish the same. Also specifying the namespaces for it lets you refer to function names directly. No need to prepend them with the namespace (e.g. instead of cv::imread(), you can just directly use read()).
C++:
//Include Libraries
#include<opencv2/opencv.hpp>
#include<iostream>

// Namespace nullifies the use of cv::function();
using namespace std;
using namespace cv;
Reading an Image
For reading an image, use the imread() function in OpenCV. Here’s the syntax:
imread(filename, flags)
It takes two arguments:
- The first argument is the image name, which requires a fully qualified pathname to the file.
- The second argument is an optional flag that lets you specify how the image should be represented. OpenCV offers several options for this flag, but those that are most common include:
cv2.IMREAD_UNCHANGEDor-1cv2.IMREAD_GRAYSCALEor0cv2.IMREAD_COLORor1
Master Generative AI for CV
The default value for flags is 1, which will read in the image as a Colored image. When you want to read in an image in a particular format, just specify the appropriate flag. To check out the different flag options, click here
It’s also important to note at this point that OpenCV reads color images in BGR format, whereas most other computer vision libraries use the RGB channel format order. So, when using OpenCV with other toolkits, don’t forget to swap the blue and red color channels, as you switch from one library to another.
As shown in the code sections below, we will first read in the test image, using all three flag values described above.
Python
# Read an image
img_color = cv2.imread('test.jpg',cv2.IMREAD_COLOR)
img_grayscale = cv2.imread('test.jpg',cv2.IMREAD_GRAYSCALE)
img_unchanged = cv2.imread('test.jpg',cv2.IMREAD_UNCHANGED)
C++
// Read an image
Mat img_color = imread("test.jpg", IMREAD_COLOR);
Mat img_grayscale = imread("test.jpg", IMREAD_GRAYSCALE);
Mat img_unchanged = imread("test.jpg", IMREAD_UNCHANGED);
Or
Python
img_color = cv2.imread('test.jpg',1)
img_grayscale = cv2.imread('test.jpg',0)
img_unchanged = cv2.imread('test.jpg',-1)
C++
Mat img_color = imread("test.jpg", 1);
Mat img_grayscale = imread("test.jpg", 0);
Mat img_unchanged = imread("test.jpg", -1);
Displaying an Image
In OpenCV, you display an image using the imshow() function. Here’s the syntax:
imshow(window_name, image)
This function also takes two arguments:
- The first argument is the window name that will be displayed on the window.
- The second argument is the image that you want to display.
To display multiple images at once, specify a new window name for every image you want to display.
The imshow() function is designed to be used along with the waitKey() and destroyAllWindows() / destroyWindow() functions.
The waitKey() function is a keyboard-binding function.
- It takes a single argument, which is the time (in milliseconds), for which the window will be displayed.
- If the user presses any key within this time period, the program continues.
- If 0 is passed, the program waits indefinitely for a keystroke.
- You can also set the function to detect specific keystrokes like the Q key or the ESC key on the keyboard, thereby telling more explicitly which key shall trigger which behavior.
The function destroyAllWindows() destroys all the windows we created. If a specific window needs to be destroyed, give that exact window name as the argument. Using destroyAllWindows() also clears the window or image from the main memory of the system.The code examples below show how the imshow() function is used to display the images you read in.
Python
#Displays image inside a window
cv2.imshow('color image',img_color)
cv2.imshow('grayscale image',img_grayscale)
cv2.imshow('unchanged image',img_unchanged)

# Waits for a keystroke
cv2.waitKey(0)

# Destroys all the windows created
cv2.destroyAllwindows()
C++
// Create a window.
namedWindow( "color image", WINDOW_AUTOSIZE );
namedWindow( "grayscale image", WINDOW_AUTOSIZE );
namedWindow( "unchanged image", WINDOW_AUTOSIZE );

// Show the image inside it.
imshow( "color image", img_color );
imshow( "grayscale image", img_grayscale );
imshow( "unchanged image", img_unchanged );

// Wait for a keystroke.
waitKey(0);

// Destroys all the windows created
destroyAllWindows();
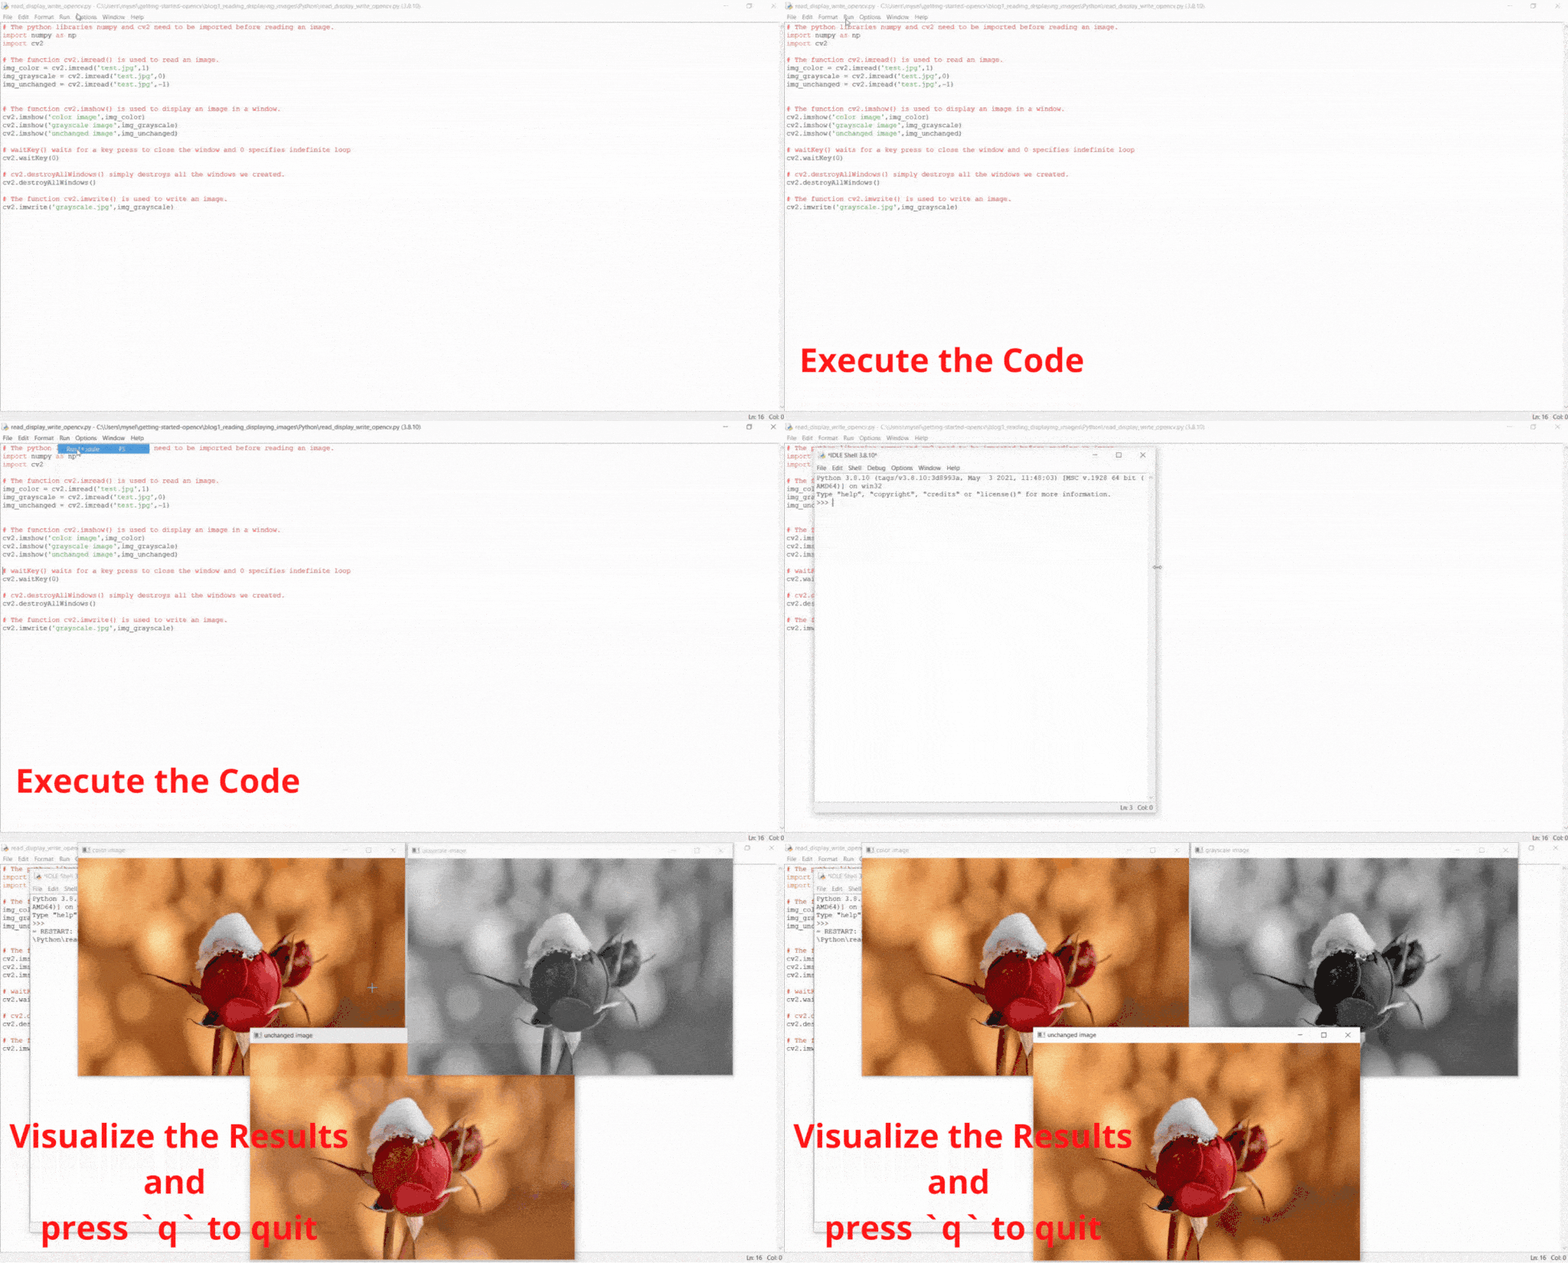
Below is the GIF demonstrating the process of executing the code, visualizing the outputs, and closing the output window:

In the three output screens shown below, you can see:
- The first image is displayed in color
- The next as grayscale
- The third is again in color, as this was the original format of the image (which was read using
cv2.IMREAD_UNCHANGED)

imshow() function.
imshow() function.
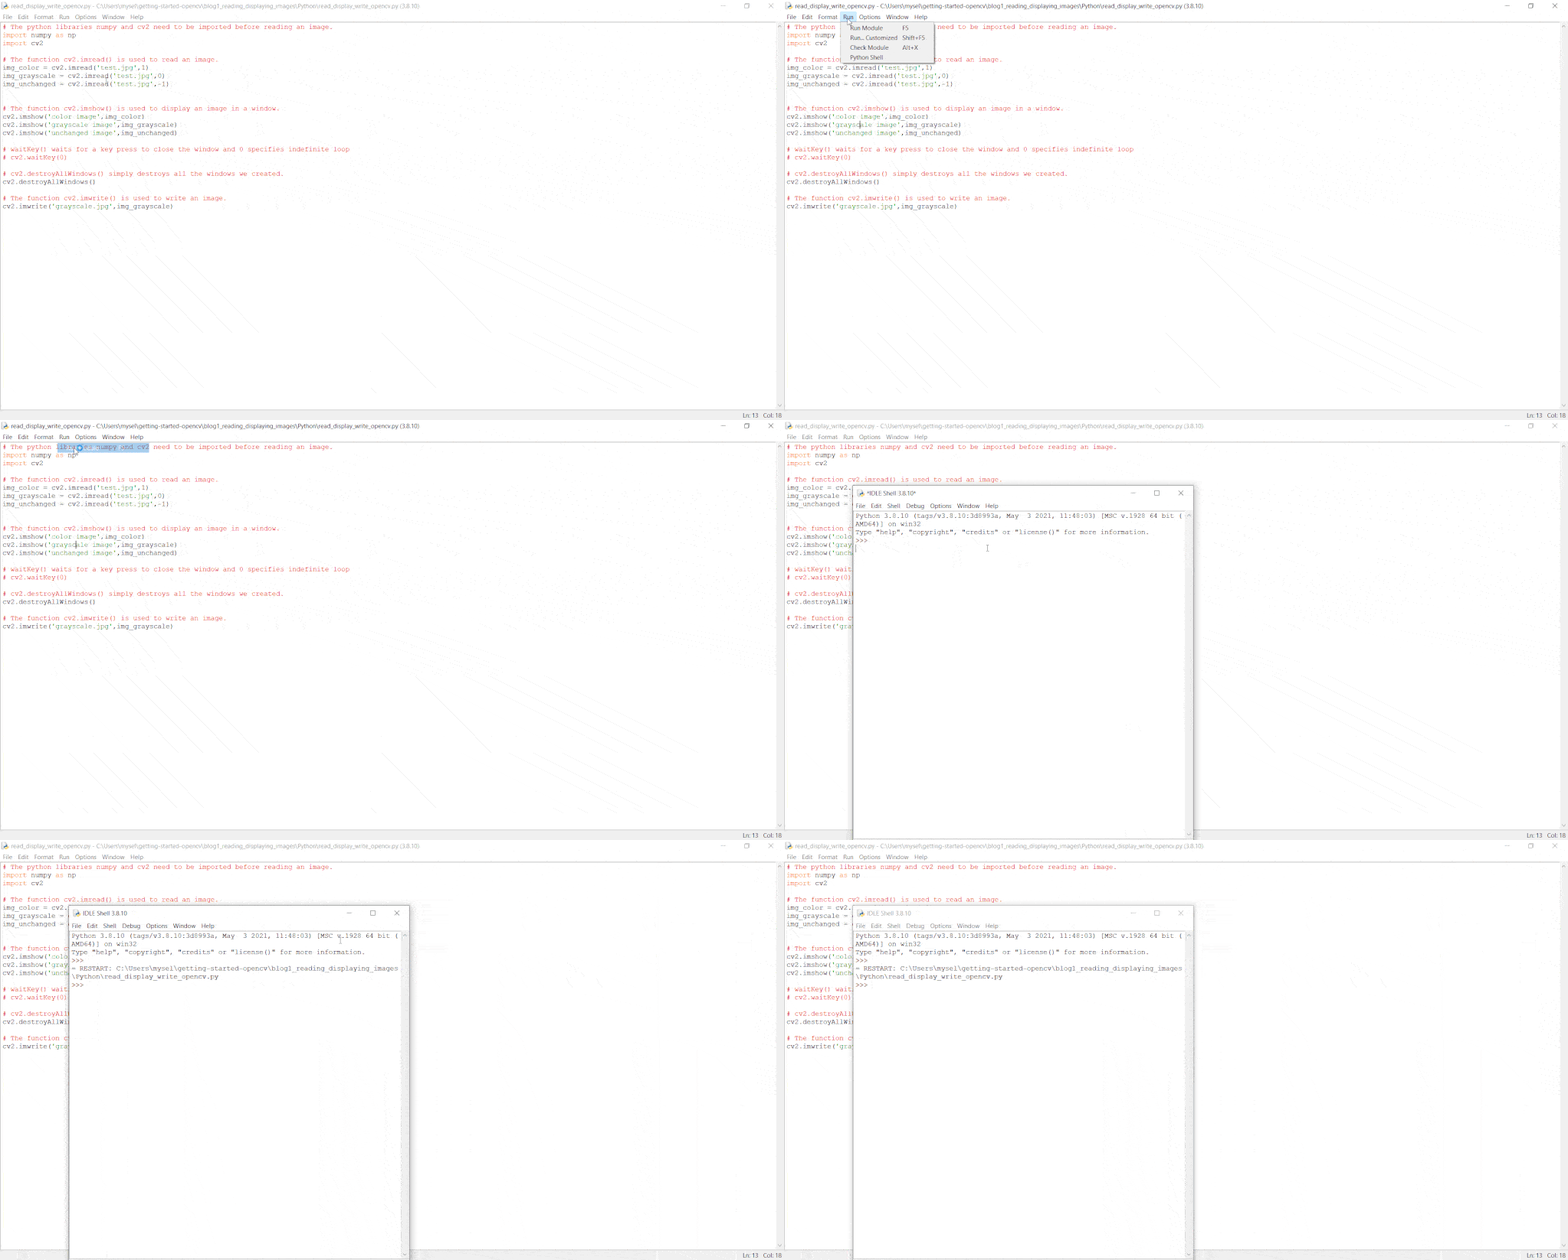
imshow() function.The below GIF shows execution of the code to read and display the image but without waitKey(). The window gets destroyed within milliseconds, and no output is shown on the screen.
Writing an Image
Finally, let’s discuss how to write/save an image into the file directory, using the imwrite() function. Check out its syntax:
imwrite(filename, image).
- The first argument is the filename, which must include the filename extension (for example .png, .jpg etc). OpenCV uses this filename extension to specify the format of the file.
- The second argument is the image you want to save. The function returns
Trueif the image is saved successfully.
Take a look at the code below. See how simple it is to write images to disk. Just specify the filename with its proper extension (with any desired path prepended). Include the variable name that contains the image data, and you’re done.
Python
cv2.imwrite('grayscale.jpg',img_grayscale)
C++
imwrite("grayscale.jpg", img_grayscale);
Summary
Here, you learned to use the:
imread(),imshow()andimwrite()functions to read, display, and write imageswaitKey()anddestroyAllWindows()functions, along with the display function to- close the image window on key press
- and clear any open image window from the memory.
You have to experiment a lot when it comes to the waitkey() function, for it can be quite confusing. The more familiar you get with it, the better you can use it. Do download the complete code to get some hands-on experience. Practice well, as these are the basic building blocks that can actually help you learn and master the OpenCV library → OpenCV colab notebook.


