

What is YOLOX?
YOLOX is a single-stage real-time object detector. It was introduced in the paper YOLOX: Exceeding YOLO Series in 2021. The baseline model of YOLOX is YOLOv3 SPP with Darknet53 backbone. YOLOX object detector is a very interesting addition to the YOLO family. With some unique feature addition, YOLOX is able to deliver results that are on par with state-of-the-art models. This blog post will take you through a detailed discussion of YOLOX paper and how to train YOLOX on a custom dataset.
| In summary, you will get a detailed and intuitive explanation of the following. 1. YOLOX and its salient features 2. How YOLOX work? 3. How to train YOLOX on a custom dataset? 4. How to prepare a dataset for optimal result? 5. Performance comparison of YOLOX models |
- What’s New in YOLOX?
- What are Anchors in Object Detection?
- What are Anchor Free Detectors?
- Anchor Free YOLOX
- Multi-Positives in YOLOX to Improve the Recall
- Introducing the Decoupled Head in YOLOX
- simOTA Advanced Label Assignment Strategy
- Strong Data Augmentation in YOLOX
- Custom Drone Dataset for Training YOLOX
- Setting up YOLOX Training Environment
- Setting up YOLOX Model Configurations for Training
- Training YOLOX on Custom Dataset
- YOLOX Inference Tests and Observations
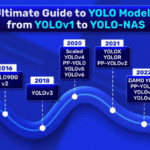
YOLO Master Post – Every Model Explained
Don’t miss out on this comprehensive resource — Mastering All Yolo Models for a richer, more informed perspective on the YOLO series.
What’s New in YOLOX?
Released in July 2021, YOLOX has switched to the anchor free approach which is different from previous YOLO models. It also introduces advanced detection techniques like Decoupled Head and simOTA label assignment strategy. Moreover, strong data augmentation like MOSAIC and mixUP are incorporated for robust training. YOLOX began with the YOLOv3 SPP model as baseline and performed these modifications one after another.
In short, salient features of YOLOX are,
- Anchor free design
- Decoupled head
- simOTA label assignment strategy
- Advanced Augmentations: Mixup and Mosaic
What are Anchors in Object Detection?
Anchors are essentially a large set of bounding box presets tiled across an image during detection. The detector is trained to classify whether each anchor box overlaps with the ground truth or not. Since the scale and location of the objects are unknown, a large number of anchors of various sizes and aspect ratios are required. The anchors based design improved upon the sliding window approach, used in early object detection models.

With the anchor box approach, the whole image can be processed at once which makes real-time object detection possible. It was so successful that until now almost all CNN-based object detectors use an anchor-based pipeline to attain optimal detection performance. The same goes for the previous versions of the YOLO family, except YOLOv1.
Drawbacks of Anchor Based Approach
Although the anchor-based approach is widely accepted, it has two drawbacks.
- It needs a large set of anchor boxes. For example, it is more than 100k in RetinaNet.
- The anchor boxes require a lot of hyperparameters and design tweaks. For example,
- Number of anchors
- Size of the anchors
- The aspect ratio of the boxes
- The number of sections the image should be divided into
- IoU value, to decide labels ( +ve or -ve), etc.
It gets even more complicated for a multi-scale approach. These hyperparameters impact the end result even with the slightest change. In the end, processing anchors introduce a significant amount of delay.


What are Anchor Free Object Detectors?
Anchor-based Detectors use pre-defined boxes of various sizes as proposals for predicting the location of the object in an image. This leads to too many hyper-parameters related to anchors and large computation requirements. Anchor-free methods try to localize the objects directly without using the boxes as proposals but using centers or key points. As you will see, this makes the approach more simple, flexible, and intuitive!
Over the years, anchor free detectors have evolved to be on par with or even better than anchor based detectors. Some examples of anchor free detectors are, CornerNet, CenterNet, and FCOS.
???? You might be surprised to know that the popular YOLOv1 detector was also anchor-free!
Anchor free detectors can be categorized into two types:
- Key-point based
- Center-based
Keypoint-based detectors locate several predefined (or self-learning) key points throughout the object. The spatial extent of the object is obtained through these clusters of key points.

Whereas, center-based detectors find positives in the center (or center region), then predict four distances from positives to the boundary.

We also have a dedicated article on center-based anchor-free detector CenterNet. Check out the blog post for more insight on anchor-free detectors.
Anchor-based or anchor-free mechanisms are essentially based on how labels (positive, negative) are assigned to a sample. Anchor free does not mean the removal of bounding boxes. It is just a different design strategy where an anchor preset is not required.
Anchor Free YOLOX
YOLOX adopts the center-based approach which has a per-pixel detection mechanism. In anchor based detectors, the location of the input image acts as the center for multiple anchors.
YOLOv3 SPP outputs 3 predictions per location. Each prediction has an 85D vector with embeddings for the following values.
- Class score
- IoU score
- Bounding box coordinates ( center x, center y, width, height)
Based on these scores, anchors are labeled positive or negative.

On the other hand, YOLOX reduced the predictions at each location (pixel) from 3 to 1. The prediction contains only a single 4D vector, encoding the location of the box at each foreground pixel.
T = {left, top, right, bottom}
Here, left, top, right, and bottom are the distances from the location to the four sides of the bounding box.

The locations inside a GT (Ground Truth) clustered around the center, are considered positive. This concept of centeredness is inspired by previous research like CornerNet, CenterNet, and FCOS. It simplifies the complexity of anchor based mechanisms to a great extent. The training inputs in YOLOX are very much less than anchor based networks.
We will discuss FCOS in a separate blog post to understand anchor free design better. Do keep checking our blog for updates.
Introducing the Decoupled Head in YOLOX
Every YOLO architecture consists of three parts. The backbone, neck, and head. The features of the input image are extracted by the backbone. These features are passed through the neck, where aggregation of multiscale features takes place. Further, the head uses these feature maps to output localization and classification scores.

Shared Head in YOLO
Earlier YOLO networks used a coupled head architecture. All the regression and classification scores are obtained from the same head.

The Need for Decoupling the YOLO Head
Coupled or shared head is the most commonly used architecture. It was doing fine until researchers at Microsoft pointed out the loopholes in 2020. The paper Rethinking Classification and Localization for Object Detection proved that there is a conflict between the regression (localization) and classification task. It happens due to the misalignment of features as shown below.

Ideally, a higher classification score of a prediction would mean high localization confidence. However, that is not always the case. Due to spatial misalignment of features, the scores may not synchronize. Consequently, this hurts the training process. The following illustration shows mismatching IoU and Class confidence.

The arrival of Decoupled Head in YOLOX
YOLOX implemented a decoupled head for classification and regression tasks. It contains a 1 × 1 Conv layer to reduce the channel dimension, followed by two parallel branches with two 3 × 3 Conv layers respectively.

This approach resulted in better performance. Compared to a shared head, which converges in 300 epochs; YOLOX can converge in 200 epochs.
Multi-Positives in YOLOX to Improve the Recall
With anchor-based methods, there was a significant amount of true positives per ground truth. However, after switching to the center-based method, the total number of positive anchors reduced drastically. Consequently, the recall value was reduced, leading to an imbalance in the training data.
Confused about how the recall is calculated? We have an excellent article that will help you brush up on the basics of precision and recall – Intersection Over Union(IoU).
YOLOX experimented with multi-positive center sampling to fix it. A 3×3 area in the neighborhood of the positive location is also considered a positive sample. Thereby increasing the positive candidates to some extent. Please also note that this is not the finally accepted label-assigning strategy.
simOTA Advanced Label Assignment Strategy
Label assignment is the step where ‘positive’, ‘negative’, and ‘don’t-care’ labels are assigned to the anchors. The previous stage object detectors used hand-crafted label-assigning rules. For example, IoU (Intersection over Union) threshold is used to determine whether an anchor should be labeled positive. It deals with ground truths (GT) independently. However, this method suffers from problems when dealing with ambiguous anchors. For example, it is difficult to decide which GT box should get the ambiguous anchors in the image below.

Ambiguity may lead to biased learning which is not desirable. Hence, it is very important to assign labels in the most optimal way possible.
Optimizing Label Assignment
The research paper, OTA: Optimal Transport Assignment for Object Detection, solves the issue by considering the label assignment task as a Transport Problem. It increases the average precision (AP) significantly.
We know that Transport Problem in statistics is a special type of Linear Programming Problem. It requires a huge number of iterations to go through one sample. Algorithms like Sinkhorn Knopp can solve the Transport Problem through iterations. However, due to the sheer number of iterations, OTA increases the training cost by 25%.
You may wonder, then why use OTA if training time is more? You are absolutely right! Although OTA improves accuracy, increased training cost is not a desirable feature. Hence YOLOX worked on simplifying the strategy to simOTA and got the best out of it.
“More Accuracy + Less Training Cost”
What is simOTA in YOLOX?
Simplified OTA or simOTA is the redesigned Optimal Transport Assignment strategy. The training cost does not increase but average precision(AP) is definitely improved. It is shown with empirical evidence in the paper.
In simOTA, iteration is not performed for every positive label. A strategy called Dynamic Top K is used to estimate the approximate number of positive anchors for each ground truth. Here, only the top K number of positive labels are selected. This reduces the number of iterations by many folds.
The number of positive labels per ground truth (GT) varies due to the following factors.
- Size
- Scale
- Occlusion conditions etc.
However, it is difficult to model a mapping function from these factors to the positive anchor number K. Hence it is done on the basis of IoU value. The IoU values of the anchors to the ground truth(GT) are summed up to represent the GT’s estimated number of positive anchors.
The intuition is such that the number of positive anchors for a certain GT should be positively correlated with the number of anchors that have well regressed.
Strong Data Augmentation in YOLOX
YOLOX incorporates MOSAIC and MixUP augmentation which improves the performance further.
Mixup Augmentation
MixUp augmentation is the weighted addition of two images. It was initially used for classification tasks but later got introduced to object detection as well.

Mosaic Augmentation
It was first introduced by Glen Jocher in the YOLOv3 Ultralytics repository. MOSAIC augmentation combines 4 training images into one like a plain collage and then crops in a certain ratio. MOSAIC Augmentation helps the network learn to detect smaller objects better.

Custom Drone Dataset for Training YOLOX
Let’s examine the dataset that we have used for training YOLOX. We are using the Drone Yolo Detection dataset from Kaggle which consists of 4014 labeled images.

We observed that the out-of-the-box dataset has several issues. Most images are sequential video frames. These are similar repeating samples that lack diversity. Missing annotations and poor annotations were also observed in the dataset.
Therefore, we extracted 600 images from the set and annotated them properly in Roboflow. Some examples of issues and their modifications are shown below. We have also added 188 more images from our side. The updated version of the dataset is available on Kaggle.
Dataset Modification


The modified dataset is in PASCAL VOC format. In YOLOX, the folder structure is required to be in the following hierarchy.

The JPEGImages folder contains the images. All annotations in .xml format are in the Annotations directory. We have already structured the dataset for you. If you want to use your custom dataset, use the DataGenerator.ipynb notebook provided in the download code.

Setting up YOLOX Training Environment
YOLOX installation is pretty straightforward. Just clone the YOLOX GitHub repository and follow the installation instructions provided in the markdown. However, we did face a few issues while testing on different setups. Hence, we are documenting it for your convenience. Feel free to put comments below if you have any other issues. We will also add a link to the colab notebook which is free from dependency issues.
TEST SETUP CONFIGURATIONS
- Intel i7 6th Gen, GTX 1080 Ti, Ubuntu 20.04
- Ryzen 5 4th Gen, GTX 1650 Notebook, Ubuntu 20.04, and Windows 10
- Intel i7 8th Gen, GTX 1060 Notebook 6 GB, Ubuntu 20.04
Create a New Environment Using Conda
conda create --name yolox python=3.10 -y
conda activate yolox
Install Jupyter and ipykernel for the Environment
This is necessary as otherwise, your notebook will use the base kernel.
pip install ipykernel
pip install jupyter
python -m ipykernel install --user --name yolox --display-name yolox
Clone YOLOX GitHub Repository
git clone https://github.com/Megvii-BaseDetection/YOLOX.git
cd YOLOX
Install Dependencies
Check the requirements.txt file that you have cloned in the YOLOX GitHub repository. It has torch and torchvision which requires CUDA to be set up globally beforehand. If you haven’t done it before, it will install the CPU versions. This is for utilizing the GPU. You may otherwise skip this.
conda install pytorch torchvision torchaudio cudatoolkit=11.3 -c pytorch
We also faced conflicts with onnx while installing. Hence we will skip the installation as it is not needed for training. If needed later, you can install them by removing specific versions. Now go ahead and comment out the following in the requirements.txt file. Don’t forget to save the changes.
# torch>=1.7
# torchvision
# onnx==1.8.1
# onnxruntime==1.8.0
# onnx-simplifier==0.3.5
Install the rest of the dependencies using the following command.
pip install -v -e .
Wget, Stream Editor, and Tensorboard Installation
We will be using wget to download files. You can install it using sudo apt install wget on Linux. If you are on windows, check out wget install. Unzip the binaries in any location, preferably a folder in C Drive. Then add it to the path in environment variables. Alternatively, the files can be downloaded manually.
Stream editor is required for modifying texts. Install it using sudo apt install sed. For windows, check out sed installation for windows.
We will also install tensorboard pip install tensorboard to monitor training logs in real-time.
Setting Up YOLOX Model Configurations for Training
Training is pretty much straightforward with a single line of command. But there are a few configurations that we need to set up properly. Let’s take a look at the YOLOX GitHub repository structure.

1. datasets
It contains the dataset on which we want to train our models. YOLOX supports datasets in PASCAL VOC and COCO format. We need to copy the prepared dataset to this directory.
2. exps
YOLOX requires a configuration script for training and inference. It is a python script in which training parameters are defined. This directory contains model-specific default scripts and an example script in the following manner.

In YOLOX, training params are stored in python scripts called experiment files. Example scripts are available in exps/example/yolox_voc/ directory. These scripts contain the following parameters that we need to modify.
- Network Width
- Network Depth
- Number of Classes
- Number of Epochs
- Augmentation info
- Path to Training and Validation dataset etc.
The width and Depth for various models are as follows. Check out exps -> defaults for more information.

The rest of the defaults are available in yolox/exp/yolox_base.py. Note that YOLOX has already set the prefixes for Train and Validation data path.
datasets/VOCdevkit/VOC + str(year) + /ImageSets/Main.
Hence, we only need to specify the year 2007 or 2012 in the get_dataloader and get_eval_loader functions respectively.
i.e.,
image_sets=[('2012', 'train)],
image_sets=[('2012','valid')],
3. yolox
In this directory, we need to define the number of classes. Since we are using the PASCAL VOC format, voc_classes.py has to be modified. The path to this file is, yolox/data/datasets/voc_classes.py.
By default, it has 20 classes. It should be modified according to the dataset. For example, if a dataset contains bottle, plastic bag, and soda can; it will look like the following.
VOC_CLASSES = ( bottle, plastic bag, soda can, )
Notice the comma “,” at the end. Yes, the repository is designed this way. Even if there is one class, the comma has to be put.
4. YOLOX Weights File
Make sure to download the model.pth weights file before training. This is available in the YOLOX GitHub repo releases.
Training YOLOX on Custom Dataset
Let’s go through the training pipeline of the YOLOX Medium model step by step. You can easily switch between models using the correct configurations.
1. Installations
Clone the YOLOX GitHub repository and follow the installation instructions provided above. We will also choose the yolox kernel (created above) while opening the notebooks.
!git clone https://github.com/Megvii-BaseDetection/YOLOX.git
2. Define Classes
Modify voc_classes.py to contain drone labels.
from IPython.core.magic import register_line_cell_magic
@register_line_cell_magic
def writetemplate(line, cell):
   with open(line, 'w') as f:
       f.write(cell.format(**globals()))
Replace the class labels with your custom labels. In our case, it is drones. Again, don’t forget the comma at the end.
%%writetemplate yolox/data/datasets/voc_classes.py

VOC_CLASSES = (
 "drone",
)
3. Download the Drone Dataset
Download the dataset and unzip it in the datasets directory.
[Update]: Dropbox link has been updated with GitHub raw.
%cd datasets
!wget https://github.com/spmallick/learnopencv/blob/master/YOLOX-Object-Detection-Paper-Explanation-and-Custom-Training/Drone-dataset.zip?raw=true -O VOCdevkit.zip -q --show-progress
!unzip -qq VOCdevkit.zip
!rm VOCdevkit.zip
%cd ..
4. Download Exp Config Files
We have already created model-specific config scripts for you. Go ahead and download them in the exps directory.
# Download experiment config files.
%cd exps
!wget https://github.com/spmallick/learnopencv/blob/master/YOLOX-Object-Detection-Paper-Explanation-and-Custom-Training/ExpConfigs.zip?raw=true -O custom_exps.zip -qq --show-progress
!unzip custom_exps.zip
%cd ..
The parameters in the scripts are as follows.
Depth : 0.67
Width : 0.75
Epochs : 300
Number of Classes : 1
Train Data Path : image_sets=[(‘2012’, ‘train)],
Validation Data Path : image_sets=[(‘2012′,’valid’)],
Augmentation
- Mixup: 1.0
- Mosaic: 1.0
- HSV: 1.0
- FLIP: 0.5
Let’s modify the number of epochs to 25 using the stream editor.
MAX_EPOCH = 25
!sed -i -e 's/self.max_epoch = 300/self.max_epoch = {MAX_EPOCH}/g' "exps/ExpConfigs/yolox_voc_m.py"
We will keep the rest of the parameters as shown above. Feel free to experiment with the parameters. If you want to create exp.py file from scratch, check out the notebook in the download code.
5. How to Train YOLOX?
Run the following command to start training. Check out YOLOX GitHub documentation if required.
python ./tools/train.py -f exps/ExpConfigs/yolox_voc_m.py -d 1 -b 8 --fp16 -o -c yolox_m.pth
Arguments:
- -f: Path to the experiment file.
- -d: Devices for Training.
- -c: Checkpoint weights at intervals.
- -b: Batch size. Depends on your device. If it shows CUDA error, reduce the batch size. For example, batch size = 2 with GTX1650 4GB notebook edition. batch size = 16 works fine with google colab.
- -o: Occupy GPU memory for faster training. May need to turn it off if GPU memory is less than 4 GB.

6. Evaluate YOLOX
Evaluate YOLOX with the following command. As you can see, we are using the model with the best mAP value. Feel free to experiment with different checkpoints in the YOLOX_outputs/yolox_voc_m directory.
After training YOLOX medium model for 25 epochs, we are getting 83.1% mAP.
MODEL_PATH = "YOLOX_outputs/yolox_voc_m/best_ckpt.pth"
!python tools/eval.py -f exps/ExpConfigs/yolox_voc_m.py -c {MODEL_PATH} -b 8 -d 1 --conf 0.001
7. Download Test Images and Videos
# Download Images
%mkdir inference_media
%cd inference_media
!wget https://www.dropbox.com/s/1dy29ys1fkce8k3/bird-and-drone.png?dl=1 -O bird-and-drone.jpg -qq --show-progress
!wget https://www.dropbox.com/s/i0afm1nqm6iiuji/eagle-capturing-drone.png?dl=1 -O eagle-capturing-drone.jpg -qq --show-progress
!wget https://www.dropbox.com/s/kje4h0avj2scgjj/eagle-vs-drone.png?dl=1 -O eagle-vs-drone.jpg -qq --show-progress
!wget https://www.dropbox.com/s/jhjy3lfl5908vta/drone-vs-birds.jpg?dl=1 -O drone-vs-birds.jpg -qq --show-progress
!wget https://www.dropbox.com/s/u1kqu0yxj07e35e/Drones-1-original.mp4?dl=1 -O Drones-1-original.mp4 -qq --show-progress
%cd ..
8. Image Inference Command
!python tools/demo.py image -f exps/ExpConfigs/yolox_voc_m.py -c {MODEL_PATH} --path ./inference_media/ --conf 0.25 --nms 0.45 --tsize 640 --save_result --device gpu
9. Video Inference Command
!python tools/demo.py video -f exps/ExpConfigs/yolox_voc_m.py -c {MODEL_PATH} --path ./inference_media/Drones-1-original.mp4 --conf 0.25 --nms 0.45 --tsize 640 --save_result --device gpu
10. YOLOX Medium Inference Results
We deliberately chose challenging images from the internet to fool the model. With 25 epochs, we can not expect very good results. Given the number of training samples (750 images), we can say it is doing a pretty good job.

In the following image, the model is able to distinguish between the eagle and the drone.

YOLOX Inference Tests and Observations
We trained nano, tiny, small, medium, and large models on the same dataset. After training for 300 epochs, the mAP improved significantly. The best accuracy is achieved in the YOLOX large model at 86%. YOLOX tiny, small, and medium report comparable mAPs of 76, 80, and 84% respectively.
Note that the graphs have been smoothed for comparability.

Fig: Training Log 300 epochs
YOLOX FPS Comparison


To test the models, we collected real-world data from various sources. First, let’s check how they performed on the validation set. The following images have been picked from the validation dataset. You can click on the images to get an enlarged view.


Testing the Models on Real-World Data
Now let’s test the trained models on some real-world data. The following images have been selected for testing. Let’s number them 1-4 clockwise for our reference.

The nano model is detecting the drones in images 1-3. However, birds in image 2 are also being detected as drones. Taking a closer look, we can observe that, the birds have been detected as drones with confidence less than 50%. It is possible to filter those by setting the confidence threshold to 50. The same can not be said for image 4.

The results improve a bit on using the tiny model. We can see that the False Positive detection has reduced in image 2. However, the rest of the results haven’t improved much.

Switching to the small model generates drastic improvement, as we can see below. Almost all drones are being to be detected in image 1. In image 2, there are no false positive detections and correct detection is observed in image 4.

Contrary to the incremental improvements in the previous models, YOLOX medium is showing poor results comparatively. Is it possible due to incorrect hyper-parameters? We will investigate it more later and update our findings.

The following results are from YOLOX large model. As expected, it is more accurate and generates superior results.

Conclusion
So that’s all about the YOLOX paper explanation and Training YOLOX on a custom dataset. In summary, we discussed the following.
- YOLOX is anchor free.
- It introduced decoupled head.
- Label assignment strategy in YOLOX is simOTA.
- simOTA is simplified OTA (Optimal Transport Assignment) with Dynamic Top K estimation.
- YOLOX has implemented mixup and mosaic augmentation.
- How to set up the YOLOX training pipeline.
- How to prepare datasets for training a YOLOX model.
- YOLOX has experiment scripts for configuring model parameters.
I hope you enjoyed reading the article and understood what makes YOLOX fast and accurate. Have any doubts or suggestions? Feel free to comment below.
References
- Cornernet
- CenterNet
- FCOS
- Rethinking Classification and Localization for Object Detection
- Spatial misalignment of classification and localization heads
- Misalignment between classification confidence and localization accuracy
- OTA: Optimal Transport Assignment for Object Detection
- YOLOX GitHub


100K+ Learners
Join Free OpenCV Bootcamp3 Hours of Learning