EXIF data contains information on image and audio files. EXIF stands for Exchangeable Image File Format. It is required by image viewers or audio players to sort the files, display thumbnails, load camera information, and add other functionalities. However, EXIF data is not limited to basic image attributes. Using EXIF tags, you can find the name of the person who captured the image, the location, whether the image has been edited, and much more.
In this article, we will break down EXIF metadata and show how to access and modify it. We will also walk through an application that visualizes potholes of a city in Google Maps using EXIF tags.
- What Does EXIF Data Reveal?
- Why should you know about EXIF?
- How to access and modify EXIF data of an image?
- Application to Visualize Potholes on Google Maps
What Does EXIF Data Reveal?
Almost all camera manufacturers use EXIF to store information about the captured image. This information is called metadata which can include the following.
- Camera settings
- Model and Maker
- Image orientation
- Aperture
- Shutter Speed
- Focal length
- Metering mode
- ISO speed
- Image Metrics
- Pixel dimension
- Resolution
- Color space
- File size
- Date and Time information
- Location Information
- Thumbnail
- Description
- Copyright information etc.
Why Should You Know About EXIF?
As already mentioned above, EXIF tags are not limited to image viewer applications. You would be surprised to know the amount of information that can be obtained using EXIF data. Analyzing EXIF data of an image, it is possible to tell things like the following.
- The location where the image was taken.
- At what altitude the image was captured?
- Was the cameraman moving at that time?
- Which way the cameraman was facing during the capture?
- Whether the image has been manipulated etc.
Some Use Cases of EXIF Data
Insurance companies use EXIF tags extensively to catch fraudulent claims. Crime investigation bureaus use EXIF data to locate criminals.
- For example, a person submitted a fence damage claim dated September 2018 and Winterville, North Carolina, as the loss location. However, the image metadata revealed that the photo was actually taken in August 2015 in Pittsburgh, Atlanta. That’s three years and 500 miles apart.
- In 2013, John McAfee, founder of the anti-virus software McAfee was hiding from authorities, donning a disguise. Running away from a suspected crime. Interestingly, he was also blogging about his escapade leaving the authorities frustrated. Soon, his location was traced using the EXIF information shared through an image.
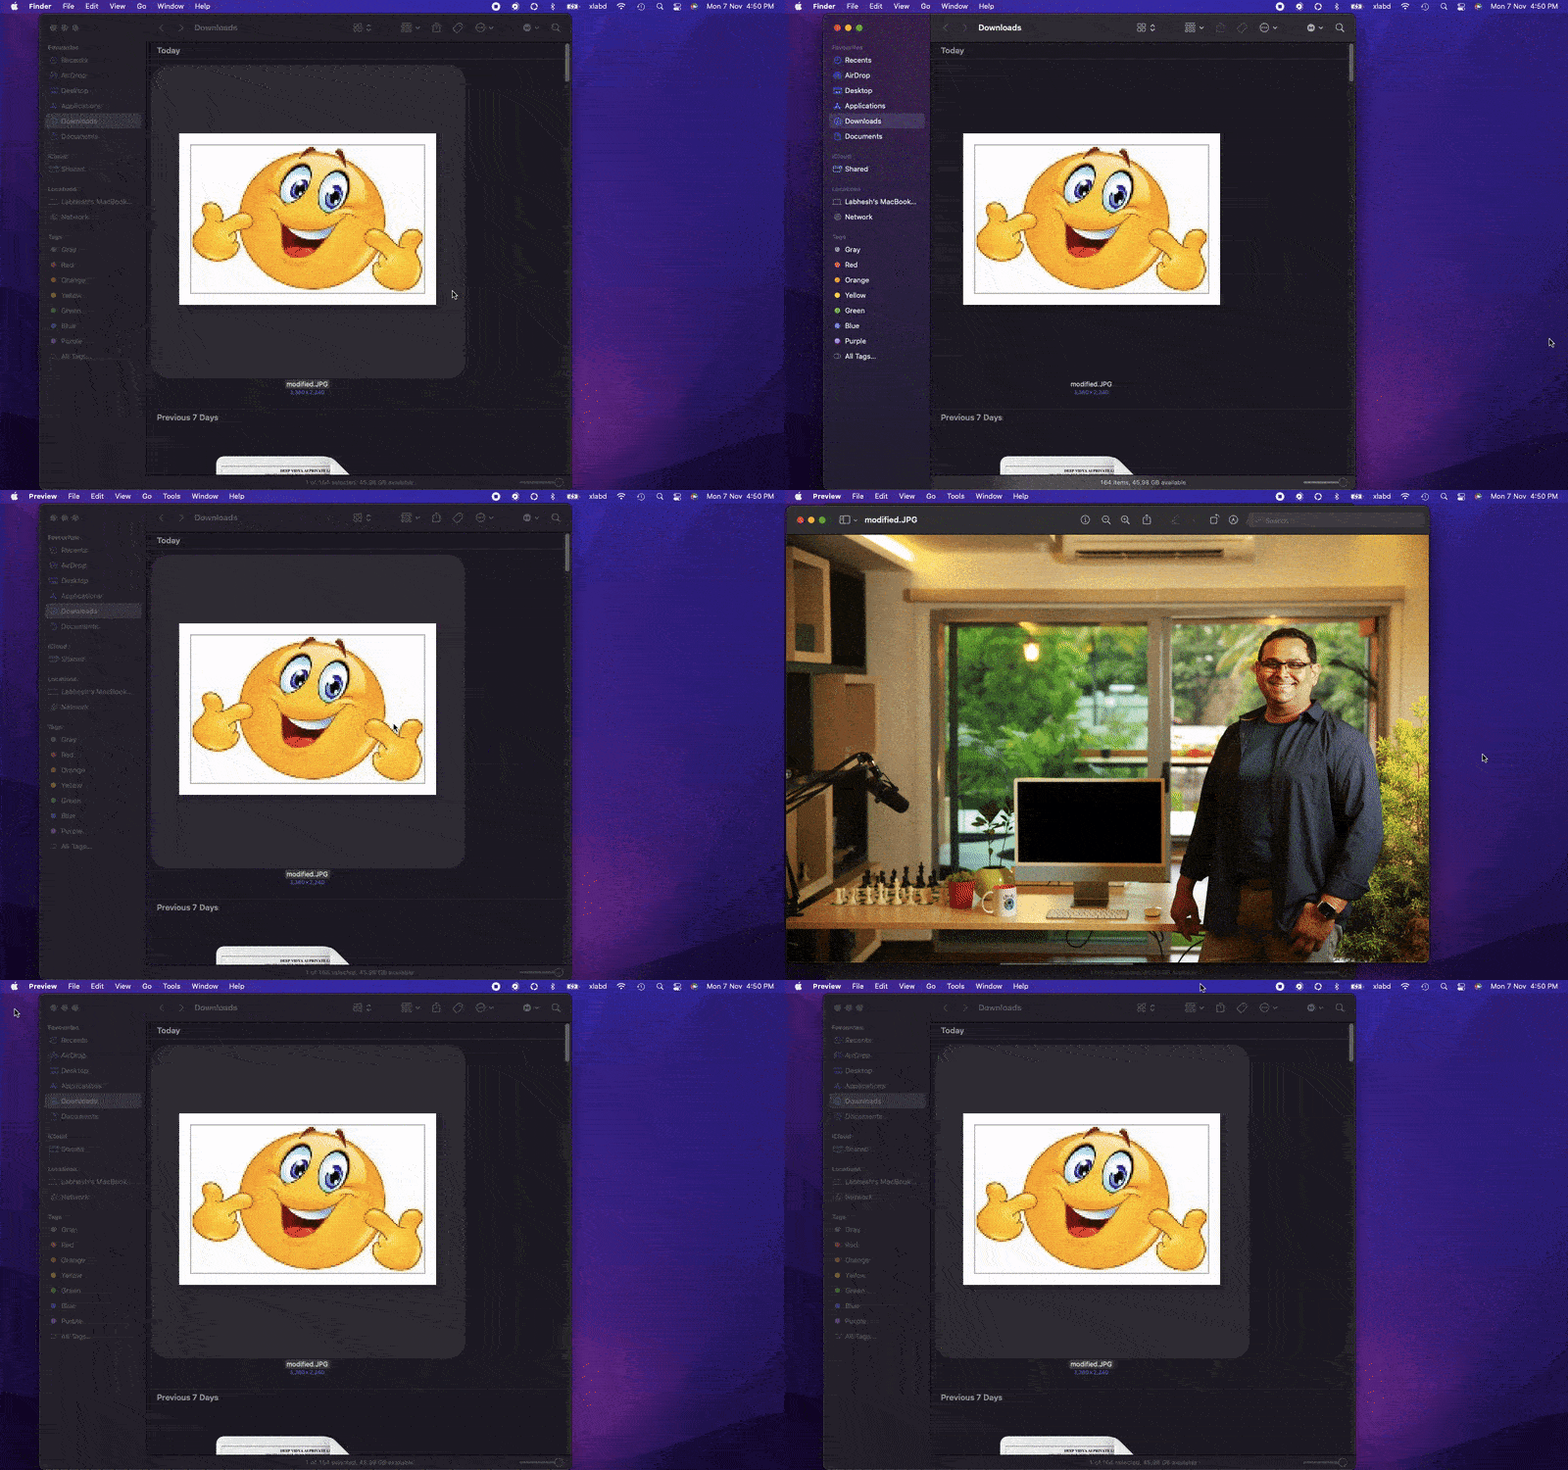
EXIF can be useful in many areas but oftentimes it also raises privacy concerns. There are examples where image editing software did not update the thumbnail after editing the image. Resulting in the leaking of sensitive information. In the following example, the image was cropped (left image), however, the thumbnail retained the original version.

Our objective however is to build an application that leverages EXIF data which is embedded with images.
Do you have to worry about EXIF data?
It is very easy to modify the EXIF Data. That’s why it is important to be careful with what we share. However, we don’t have to worry about basic issues like the thumbnail example. Photo editing software these days are free from such errors.
Most social media platforms discard EXIF data before sharing but again it is platform specific. For example, Facebook and WhatsApp do not contain EXIF info in the uploaded image. Whereas, Flickr preserves EXIF.
Also, note that EXIF remains intact when we share files directly. The following examples do not modify the metadata of the image.
- Email attachments
- Image shared as a Doc on WhatsApp
- Zip file
- Google Photos etc.
How to Access and Modify EXIF Metadata of an Image?
There are many ways to access and modify EXIF information. Here, we will use the PyPi package exif to parse the EXIF metadata of images. Let us go ahead and install the exif module using pip.
pip install exif
Check if the Image has EXIF Data
It is not necessary for all the images to have EXIF information. Some providers delete it deliberately before sharing the image. Many editing software does not preserve EXIF information. Computer Vision libraries like OpenCV also do not parse EXIF information entirely. Let’s see how to check the EXIF data of an image using the exif module that we have installed.
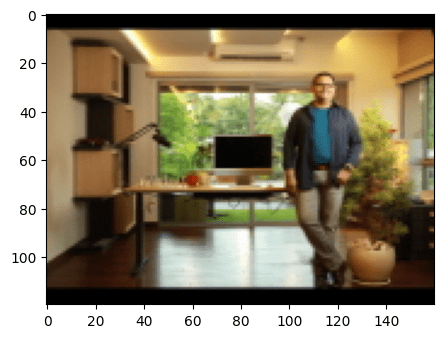
We are going to load the following image to check if it has EXIF data. We will save the same image using OpenCV imwrite and check the new image again.

import os
import cv2
import exif
import numpy as np
import matplotlib.pyplot as plt
The following function checks if the image has EXIF information embedded in the image.
def check_exif(img):
    if img.has_exif:
        print('The image contains EXIF information.')
    else:
        print('EXIF info not found.')
im_org = exif.Image('original.JPG')
check_exif(im_org)
The image contains EXIF information.OpenCV does not parse all the EXIF information except for basic attributes like rotation and shape. It can be verified by saving the image as shown below.
img = cv2.imread('original.JPG')
cv2.imwrite('OpenCV_write.JPG', img)
im_cv = exif.Image('OpenCV_write.JPG')
check_exif(im_cv)
EXIF info not found.After examining the size of the original image and the image written by OpenCV, it is clear that some information is lost.
# Check image sizes.
original_size = os.path.getsize('original.JPG')
print('Original Image Size : ', int(original_size/1024), 'kb')

opencv_img_size = os.path.getsize('OpenCV_write.JPG')
print('OpenCV Image Size : ', int(opencv_img_size/1024), 'kb')
Original Image Size : 2999 kb
OpenCV Image Size: 2043 kbCheck the EXIF Tags
The tagged metadata varies from image to image depending on the maker or modification software. While some are rich in information, some may only contain the bare minimum of information like resolution, colorspace, etc. Let’s examine the tags that the example image contains.
dir(im_org)
['_exif_ifd_pointer',
 '_gps_ifd_pointer',
 '_interoperability_ifd_Pointer',
 '_segments',
 'aperture_value',
 'artist',
 'body_serial_number',
 'camera_owner_name',
 'Color_space', ……………]
We will retrieve the following EXIF tags.
- Camera model
- Artist
- Location
- Thumbnail
im_org.get('make')
'Canon EOS 5D Mark IV'
im_org.get('artist')
'SELVAPRAKASH LAKSHMANAN'The latitude and longitude outputs are in Degrees, Minutes, and Seconds format. You can use the following formula to convert to decimal format.
Decimal degrees = Degrees + (Minutes/60) + (Seconds/3600)
im_org.get('gps_latitude')
(32.0, 46.0, 42.52439969016267)
im_org.get('gps_longitude')
(117.0, 4.0, 22.8216)EXIF retains thumbnail information in byteArray format. We need to convert it into a numpy array for visualization using matplotlib. The byteArray can be decoded using OpenCV function imdecode as shown below.
thumbnail = im_org.get_thumbnail()
decoded = cv2.imdecode(np.frombuffer(thumbnail, np.uint8), -1)
print(type(decoded))
<class 'numpy.ndarray'>
plt.figure(figsize = (5,5))
plt.imshow(decoded[...,::-1]);

Modifying EXIF Data in an Image
Modifying an EXIF tag is as easy as changing an element of a list. Let’s modify the camera model and the location as an example.
previous_model = img_org.get('model')
modified_model = 'Nikon'
img_org.model = modified_model
print('Previous Model : ', previous_model)
print('Modified Model : ', modified_model)
Previous Model :  Canon EOS 5D Mark IV
Modified Model :  Nikon
Let’s change the location to the White House, Washington DC. You can get decimal values of latitude and longitude from Google Maps. As mentioned above, we need to convert the latitude, and longitude decimal values to the hour, minute, and second format.
Latitude: 38° 53′ 52.8576’’
Longitude: 77° 2′ 11.706″
previous_lat = img_org.get('gps_latitude')
previous_long = img_org.get('gps_longitude')

img_org.gps_latitude = (38, 53, 52.8576)
img_org.gps_longitude = (77, 2, 11.706)

print('Previous Coordinates \n')
print('\t Latitude : ', previous_lat)
print('\t Longitude : ', previous_long)

print('\nUpdated Coordinates \n')
print('\t Latitude : ', img_org.get('gps_latitude'))
print('\t Longitude : ', img_org.get('gps_longitude'))
Previous Coordinates

	 Latitude :  (32.0, 46.0, 42.52439969016267)
	 Longitude :  (117.0, 4.0, 22.8216)

Updated Coordinates

	 Latitude :  (38.0, 53.0, 52.8576)
	 Longitude :  (77.0, 2.0, 11.706)
After making modifications, save the changes as shown below.
with open('original.jpg', 'wb') as file:
    file.write(img_org.get_file())
The following example shows a modified thumbnail of the original image. As you can see, it appears to be an image of a laughing emoji. Modified using ExifTool.

Visualize Potholes on Google Maps using EXIF Data
The following application is a part of an ongoing project. The objective is to detect potholes using a mobile device mounted on vehicles.
Potholes are a recurring phenomenon on all kinds of roads all over the world. Every year, it could cost authorities thousands of dollars in surveying potholes. The manual approach is not the best way to survey a huge network of roads. Since it is not cost-effective, the majority of the potholes remain undetected which increases the rate of accidents.
The application aims at simplifying the surveying process using AI-assisted pothole detection and logging. An entire city can be mapped using a few vehicles in a short period of time. For example, the road network in Bangalore, India is about 3000 Km. If we take 10 vehicles, each vehicle would need to cover 50 km per day over a period of 6 days.
Also, check out our previous experiments on pothole detection.
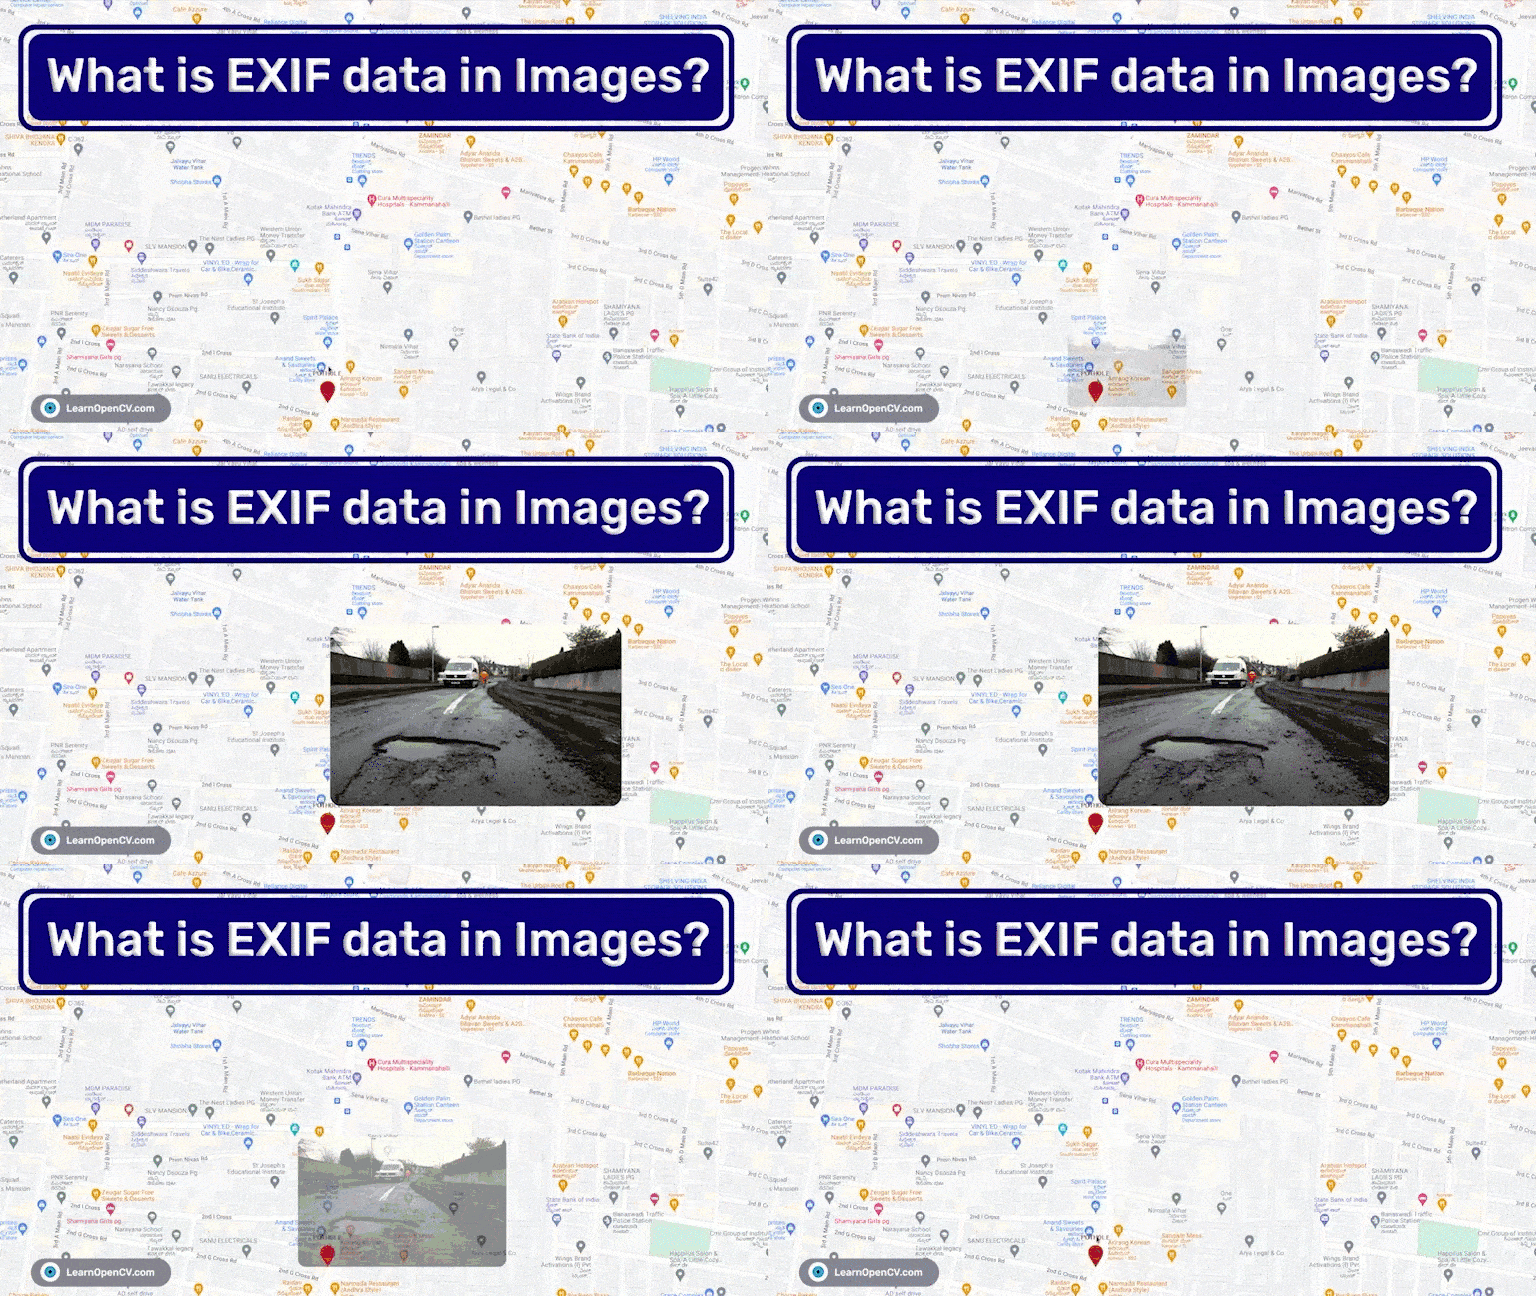
The pothole data can be visualized as shown above. It will help authorities make better decisions depending on various factors. The locations have been retrieved from EXIF data of the pothole images.
Pothole Visualizer Using EXIF Code Explanation
We have used the TkinterMapView PyPi package to visualize potholes on Google Maps. It is an extension for integrating maps with tkinter-based GUI applications. You can interact with the map using buttons, scroll wheel, and keyboard as usual.
Requirements
Download the code from the link above and install the requirements using the following command.
pip install requirements.txt
Imports
import exif
import tkinter
from PIL import Image, ImageTk
from tkinter mapview import TkinterMapView
Function to Convert to Decimal
def decimal(val):
	dec = val[0] + val[1]/60 + val[2]/3600
	return dec
Function to Return Location Coordinates
We are accessing the location information stored in EXIF tags. The following function returns latitude and longitude in decimal format.
def get_location(img):
	img = exif.Image(img)
	lat = img.gps_latitude
	lon = img.gps_longitude
	# Convert Degree, min, sec to decimal.
	lat = decimal(lat)
	lon = decimal(lon)
	return lat, lon
Function to Pin Pothole Markers
The window shows pothole locations pinned on Google Maps across various locations. We have set the zoom functionality in such a way that the image appears after a certain zoom level.
def mark_pothole(img):
	pothole = ImageTk.PhotoImage(Image.open(img).resize((360, 240)))
	lat, lon = get_location(img)
	marker = map_widget.set_marker(lat, lon, text='POTHOLE', image=pothole)
	marker.image_zoom_visibility=(19, 22)
	marker.hide_image(False)
GUI Part of Google Maps Pothole Visualizer
We are using tkinter to create a simple 1280×720 window to contain Google Maps. The code is pretty simple as shown below. Feel free to check out tkinter and TkinterMapView documentation if required.
root_tk = tkinter.Tk()
root_tk.geometry(f"{1280}x{720}")
root_tk.title("Pothole Visualization MAP")

# create map widget.
map_widget = TkinterMapView(root_tk,
	width=600,
	height=400,
	corner_radius=0)

map_widget.pack(fill="both", expand=True)

# google normal tile server.
map_widget.set_tile_server("https://mt0.google.com/vt/lyrs=m&hl=en&x={x}&y={y}&z={z}&s=Ga",
	max_zoom=22)


# The position of the primary marker.
# The application will set focus to this pin.
map_widget.set_position(13.014493, 77.634619)
map_widget.set_zoom(15)
map_widget.set_address("Kammanahalli, Bangalore", marker=True)

# Mark potholes.
mark_pothole('potholes/pothole3.jpg')
mark_pothole('potholes/pothole6.jpg')
mark_pothole('potholes/pothole9.jpg')
mark_pothole('potholes/pothole7.jpg')

root_tk.mainloop()
Summary
So that’s all about EXIF data in images and its usage in various applications. Although EXIF isn’t in the computer vision domain, it is important to know these minute details. It is very simple but can be super useful in various applications.
The following points were covered in this article.
- EXIF stands for Exchangeable Image File Format.
- EXIF contains metadata of images and audio.
- Metadata is like ‘data of data’.
- Access and modify EXIF tags.
- Building a tkinter application to visualize potholes across google maps.
Hopefully, this article has helped you understand what EXIF metadata is, its advantages and disadvantages, and how you can use it in various applications.
Must Read Articles
| Congratulations on making it this far. I appreciate your commitment to mastering Computer Vision. We have a few more articles that you might find interesting. 1. Pothole Detection using YOLOv7 2. Pothole Detection using YOLOv4 and Darknet |


100K+ Learners
Join Free OpenCV Bootcamp3 Hours of Learning