
As artificial intelligence (AI) technology advances, so does the ability to generate incredibly realistic computer-generated images. This raises an important question: can facial recognition technology work on these AI-generated face images as well as it does on real ones? In this blog post, we’ll explore this question by testing OpenCV Face Recognition, a state-of-the-art facial recognition tool, on both real and AI-generated faces. We’ll walk through the process of setting up OpenCV Face Recognition, testing its accuracy on real faces and doppelgangers, and finally, evaluating its performance on AI-generated faces. So, let’s dive in.
- Does Face Recognition Work on AI-Generated Faces?
- What is OpenCV Face Recognition?
- The Basics
- Advanced Features
- Conclusion
Does Face Recognition Work on AI-Generated Faces?
With the boom in AI-Generated artworks, the internet is flooded with generated images of people in various posing as astronauts, cowboys, superheroes, anime avatars, and whatnot. Now, do the generated images of these people identify as the original person when put through Face Recognition models? Let’s find out.
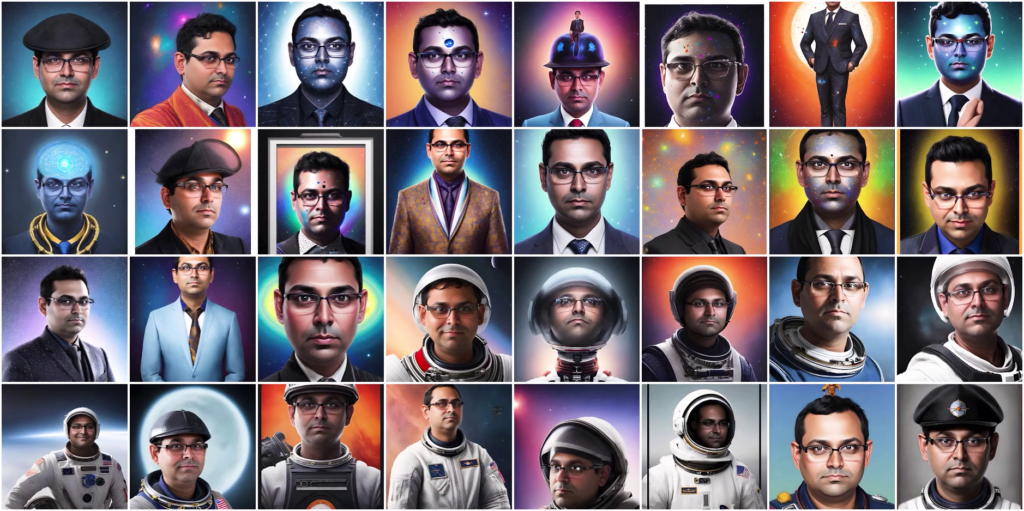
These are some images of Satya Mallick generated through the Lensa App. Lensa gives various avatars and variations of poses for the person. Similar images can be generated using other AI art generation tools.
Some of the above images represent the person’s features very well to the human eye, and some images very clearly don’t! But what do the Face Recognition models see?
Now to put these images to the test, we will be using one of the state-of-the-art face recognition technology, “OpenCV Face Recognition.” We will soon learn what OpenCV Face Recognition is, but before that, let’s see how well it really works at telling faces apart. An online demo is available to test just that.
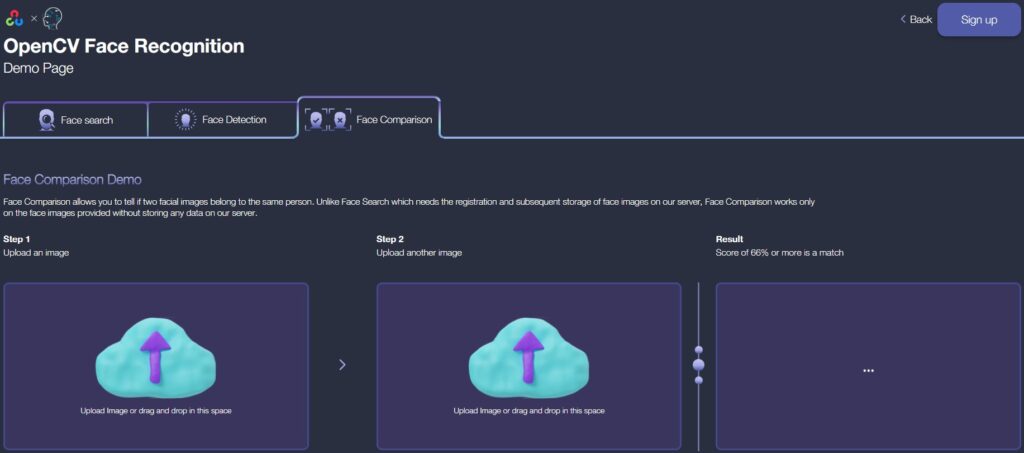
Sanity Check
First, just to do a sanity check, let’s upload some images of the same person. We will pick ‘Lionel Messi’ as an example. And as he keeps trying new styles, we can also try to fool the face recognizer with very diverse images.

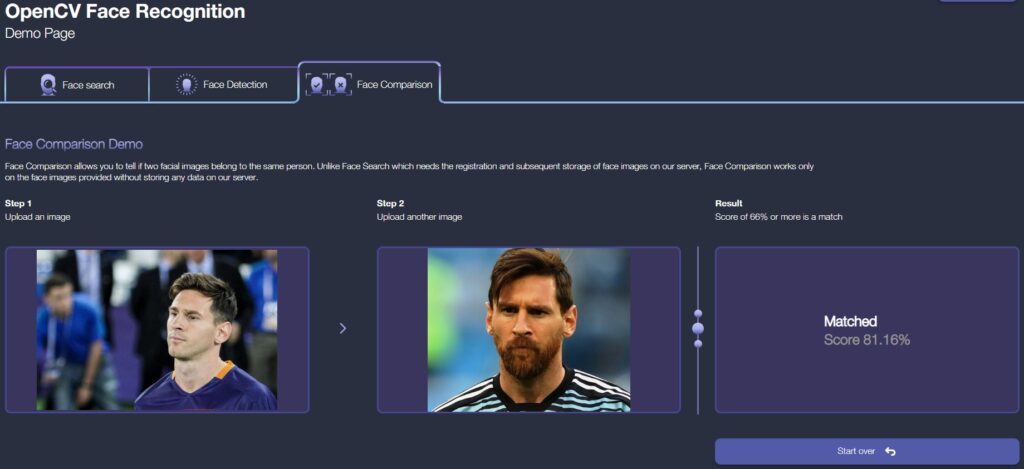
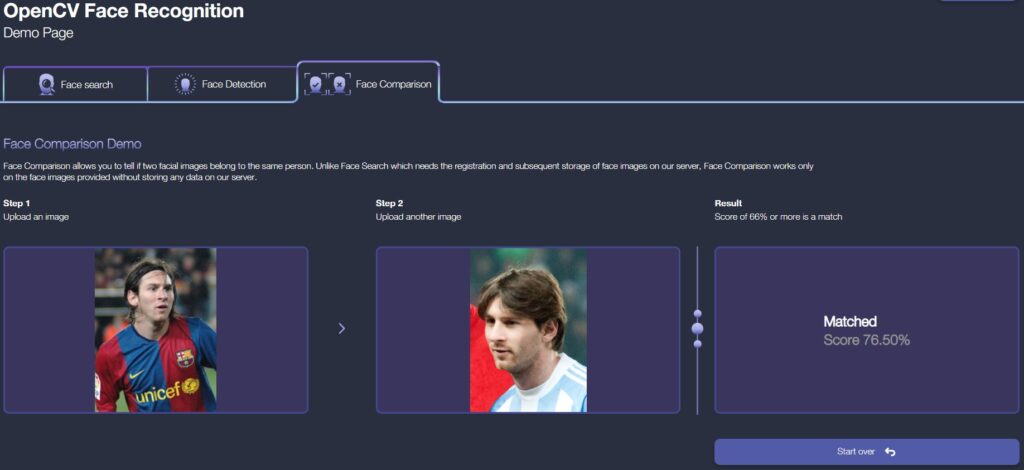
All of the results return positive, even with varying poses, facial expressions, hairstyles, and facial hair.
Doppelgangers
Let’s see how the recognizer performs on the faces of doppelgangers, i.e, faces of people that look very similar but in reality are different people. We expect the faces not to match.
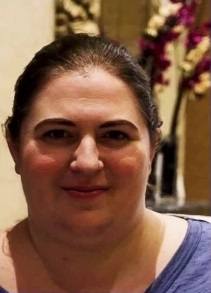
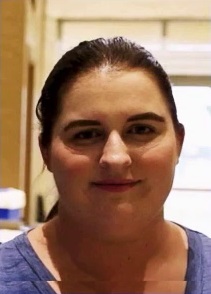
Here are images of 2 sets of doppelgangers.
Even after knowing these are indeed four different people, I can be fooled easily. Can OpenCV Face Recognition tell them apart?
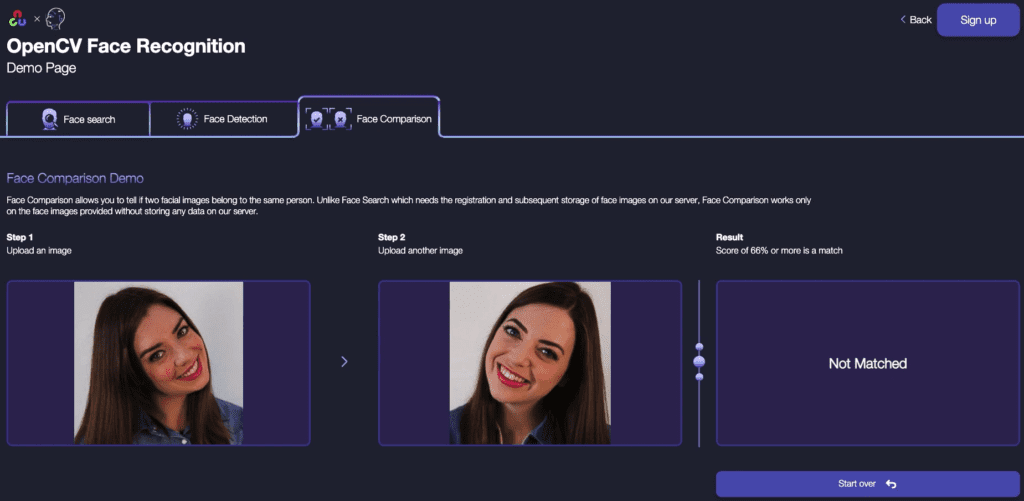

The threshold for a match is set at 66%, so if the faces match more than 66%, it is considered a match. Even with so many similarities between the faces, OpenCV Face Recognition can’t be fooled.
It is established that OpenCV Face Recognition is very good at identifying similar faces and differentiating faces of different people that are similar to even the human eye. What about AI-generated faces?
Generated Faces
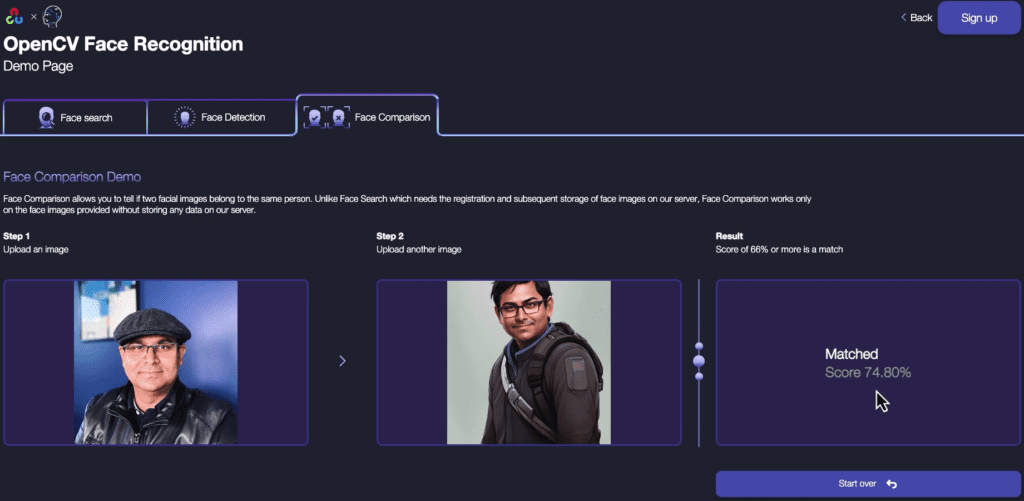
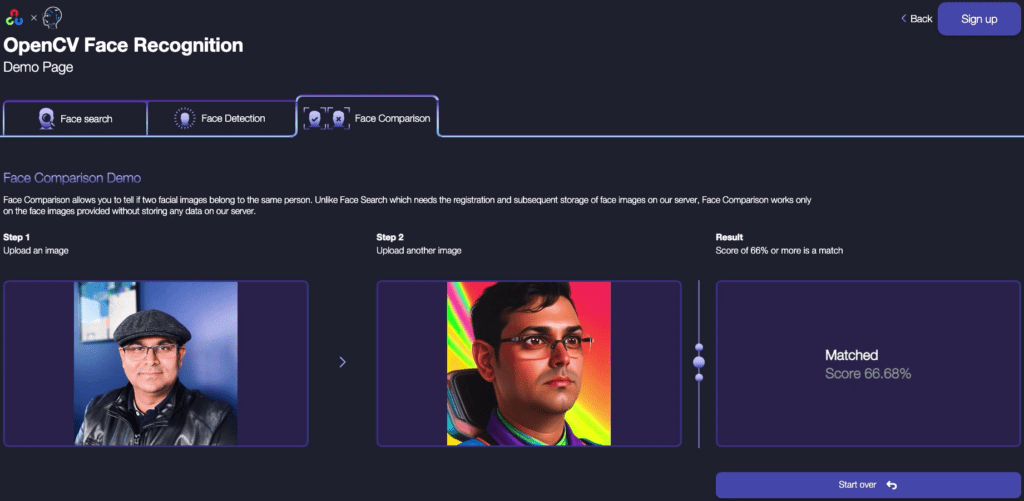
Now to answer the real question at hand, let’s pick some images generated from Lensa AI and put them through OpenCV Face Recognition.
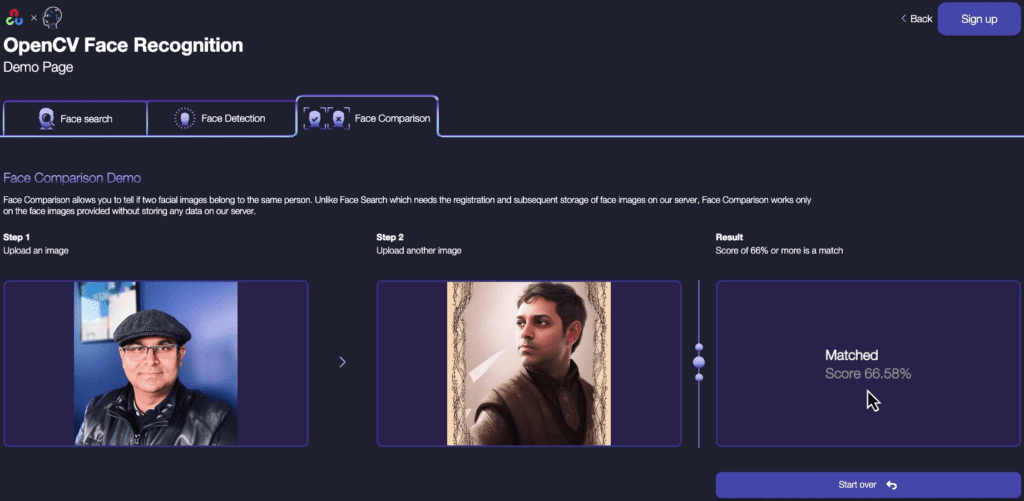
We can see the generated faces do pass as the real person. As the face moves away from the real deal, we observe the confidence of the matching going down and sometimes barely passing. At times the generated face differs so much that it falls under the threshold to be considered the same person.
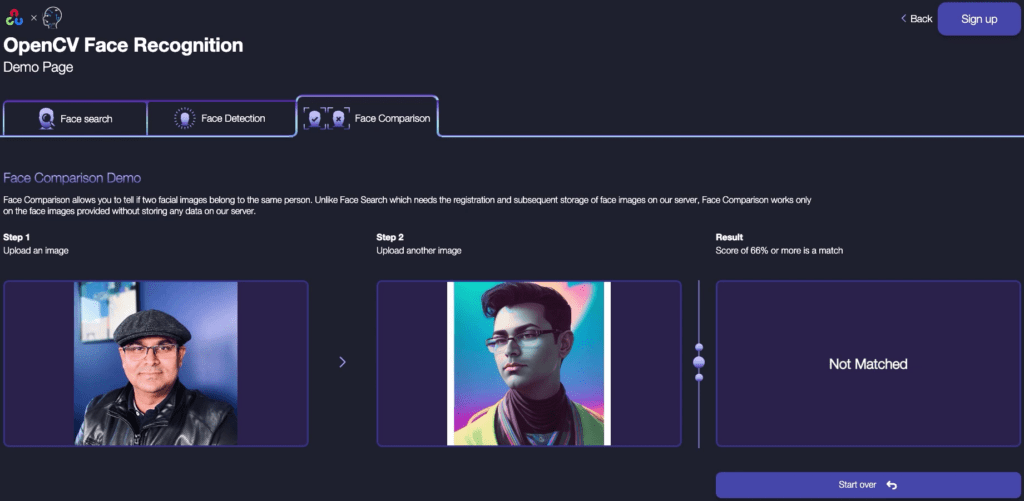
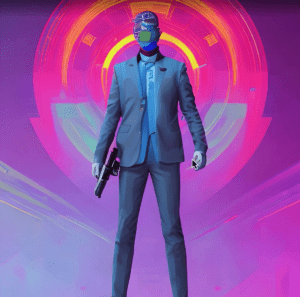
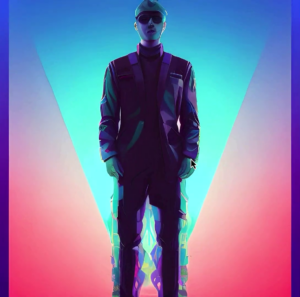
Now, some of the generated images given by AI don’t represent a convincing face, let alone resemble a real person. Below are some weird outputs given by Lensa AI for Satya’s face.
The peculiar thing observed is that these images are recognized by ‘Google Photos’ and are labeled as Satya Mallick (wonder why?). This means Lensa’s AI is able to preserve some features of the face that trick the Google Photos’ face recognizer into thinking this is Satya Mallick, which we can see is clearly not the case. So Will a State-of-the-art method be able to catch this?
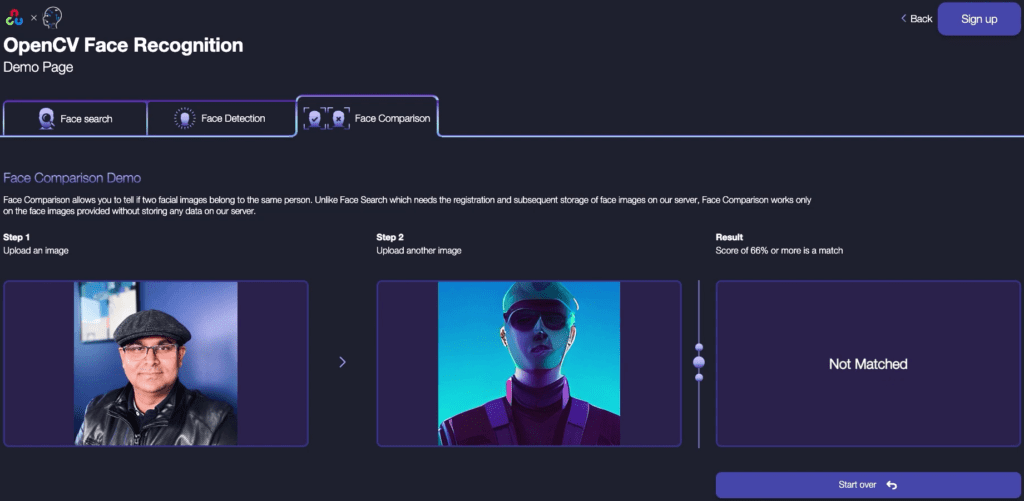
Sure enough, the OpenCV Face Recognition method is not fooled easily and does not match the poorly generated face with Satya’s real face. Very well, we can say with confidence OpenCV Face Recognition method is amongst the best. Let’s know more about it and see how we can use it ourselves.
What is OpenCV Face Recognition?
OpenCV Face Recognition is the State-of-the-Art Face Recognition service brought forth by the collaboration of OpenCV – the largest computer vision library, and Seventh Sense – creators of the world’s top-rated Face Recognition technology.
Thanks to OpenCV, you can add face recognition capabilities to your app in just a few minutes and with less than ten lines of code. We have released a beta package to the public.
Not only is it state of the art, scoring top 10 in the 2022 NIST face recognition challenge, but it also requires no prerequisite knowledge of machine learning or a GPU, as it operates purely through API calls.
You can use OpenCV Face Recognition via the available web interface and perform all the actions, but the real power is its API which makes easy integration with existing applications with minimal code to be added, the latter is what we will explore.
Does that sound interesting? Then let’s get started!
The Basics: Setting up OpenCV Face Recognition
Setup an Account
Before you can code anything, you first need to set up an account to be able to access the OpenCV Face Recognition API.
Sign up at developer.opencv.fr

If you encounter any issues while signing up, try clearing your cookies or switching web browsers.
Once you log in, you gain access to the web user interface, as well as your developer API key.

Install the OpenCV Face Recognition package
To begin using the API, you install the ‘opencv-face-recognition’ package via pip.
pip install opencv-face-recognition
Write a few lines of code
Now, we’ll walk through the code together.
In a text editor, we create a new python (or jupyter notebook) file.
nano opencv.py
Initialize
In that file, we start by importing the necessary packages and setting up some global variables.
from opencv.fr import FR

BACKEND_URL = "https://us.opencv.fr"
DEVELOPER_KEY = "YOUR_DEVELOPER_KEY"
The backend URL is whichever cloud storage region we choose to keep our data in. The developer key can be accessed via the website.
We will then use these two parameters to initialize the SDK.
from opencv.fr import FR
BACKEND_URL = "https://us.opencv.fr"
DEVELOPER_KEY = "YOUR_DEVELOPER_KEY"

sdk = FR(
  BACKEND_URL,
  DEVELOPER_KEY
)
Add a Person
To add a person to our database, we first need to import PersonBase.
Note: this is already installed as part of the opencv-face-recognition package.
From there, adding a person is as simple as specifying their name and a list of paths of images of them, followed by sending the request to the server.
As an example, we’ll add a picture of Keanu Reeves below:
from opencv.fr.persons.schemas import PersonBase

person = PersonBase(
  ["/path/to/your/image0.jpg"],
  name="Keanu Reeves"
)

person = sdk.persons.create(person)
Note: the accuracy of the evaluation is improved by the number of images, and for this reason, it is recommended that there are three or more images from different perspectives.
from opencv.fr.persons.schemas import PersonBase

person = PersonBase(
  [
      "/path/to/your/image0.jpg",
      "/path/to/your/image1.jpg",
      "/path/to/your/image2.jpg",
  ],
  name="Keanu Reeves"
)

person = sdk.persons.create(person)
For this example, we’ll add two people: Keanu Reeves and Elon Musk.
Here are three pictures of Keanu Reeves:
Here are three pictures of Elon Musk:
We added three pictures of Keanu Reeves and three pictures of Elon Musk to our PersonBase, just like the example above. Now we want to see if subsequent images match those we uploaded.
Verify
To search for people against database entries, we start by importing both SearchRequest and optionally SearchMode.
from opencv.fr.search.schemas import SearchRequest, SearchMode
Then, we search for the person by image, using the SearchRequest function, and send it to the server.
search_request = SearchRequest(["/path/to/image.png"])
result = sdk.search.search(search_request)
In the following example, we’re going to search using a new picture of Keanu Reeves.

Here, we see that the application successfully identified Keanu Reeves with a confidence of 89%.
from opencv.fr.search.schemas import SearchRequest, SearchMode

search_request = SearchRequest(["/home/varun/keanu_test.png"])
result = sdk.search.search(search_request)

print(result[0].person.name) # => Keanu Reeves
print(result[0].score) # => 0.8947
And that’s it for the basics! In just a few minutes and a few lines of code, we’ve already set up state-of-the-art face recognition in Python.
Advanced (creating user categories, increasing search specificity, verifying a person)
Of course, OpenCV provides more tools to users with more sophisticated needs.
The next three sections will cover:
- How to create user categories using collections
- How to increase search specificity
- How to verify that an image matches a person in the database
Creating User Categories
For categorizing multiple people added to the database, we can create a ‘collection’ to house those added faces.
To begin with that, we import CollectionBase. To create a collection, we give it a name and description and then pass the request to the server.
from opencv.fr import FR
from opencv.fr.collections.schemas import CollectionBase

sdk = FR(
  backend_url="https://us.opencv.fr",
  developer_key="DEV_KEY"
)

my_collection = CollectionBase(
  name="Hello World",
  description="My First Collection"
)

sdk.collections.create(my_collection)
Now, when adding a user, we can choose to add them to a collection. We’ll make two example collections: regular people, and celebrities.
from opencv.fr import FR
from opencv.fr.collections.schemas import CollectionBase

sdk = FR(
  backend_url="https://us.opencv.fr",
  developer_key="DEV_KEY"
)

normal_people = CollectionBase(
  name="Normal People",
  description="The Average People"
)

sdk.collections.create(normal_people)

celebrities = CollectionBase(
  name="Celebrities",
  description="(not us normal regular folks)"
)

sdk.collections.create(celebrities)
We’ll add Sam Bankman-Fried to the Celebrities collection:
# first, find the collection by id
celeb_collection = sdk.collections.get(COLLECTION_ID)

sbf = PersonBase(
  [
      "/home/varun/sbf_0.png",
      "/home/varun/sbf_1.png",
      "/home/varun/sbf_2.png",
  ],
  name="SBF"
)

# before sending the request, update the collection
sbf.collections.append(celeb_collection)

# now send it
sbf = sdk.persons.create(sbf)
Now, if we check the list of people, we can see that he’s been added to the celebrities collection.
persons = sdk.persons.list()
# contains:
# Keanu Reeves: collections: [],
# Elon Musk: collections: [],
# SBF: collections: ['Celebrities],
The API also supports updating information about people. If we create a new collection, we can add existing people to it.
To do that, we get the person by id (you can find their id by printing the list of users) using the “get” function. From there, we can update whatever property we need using the “update” method.
We’ll update a person’s name in the example below.
to_update = sdk.persons.get(PERSON_ID)
to_update.name = "A new name!"
to_update = sdk.persons.update(to_update)
Increasing Search Specificity
When searching, we can provide various parameters to increase specificity, including
- a minimum confidence score,
- which collection to search, and
- whether to prefer accuracy or speed.
Here’s an example:
from opencv.fr.search.schemas import SearchRequest, SearchMode

search_request = SearchRequest(
  images=['image/to/search/for.png'],
  min_score=0.7, # 0.7 for no masks, 0.6 for with masks
  collection_id=None, # search within a specific collection
  search_mode=SearchMode.FAST # as opposed to SeachMode.ACCURATE
)
Verifying a Person
If, instead of searching for a person, we only want to verify them, we can use a VerificationRequest.
Here’s an example below:
from opencv.fr.search.schemas import VerificationRequest

person_id = ELON_MUSK_ID
verification_request = VerificationRequest(
  person_id,
  ["/home/varun/sbf_0.jpg"]
)

print(sdk.search.verify(verification_request)) # prints 'person': None
Here, we’re trying to verify Sam’s face against Elon Musk’s. It doesn’t work, so Sam would not be able to hack into Elon Musk’s security system.
There are many more advanced features for users, including a test to quantify whether the person is real or a printed picture and more specific sorting functions!
If you want the full documentation on any of the functions provided by the SDK, check out the OpenCV developer docs at https://docs.opencv.fr/python.
We mentioned that this face recognition is state-of-the-art. So, let’s see how it holds up in some harder examples!
Verifying Keanu Reeves With Glasses
Let’s have it search for Keanu Reeves, but with sunglasses, at a different angle, and with worse lighting.

Can it still identify Keanu Reeves?
from opencv.fr.search.schemas import SearchRequest, SearchMode

search_request = SearchRequest(['home/varun/keanu_reeves_with_glasses.png'])

result = sdk.search.search(search_request)

print(result[0].person.name) # prints Keanu Reeves
print(result[0].score) # prints 0.7721
It looks like it. It’s 77% confident that this new image is Keanu Reeves.
Note: for most applications, a threshold of 70% works. For masked users, try 60.
Verifying Doppelgangers
How about doppelgangers? Let’s try these two people from an NYT article on them.
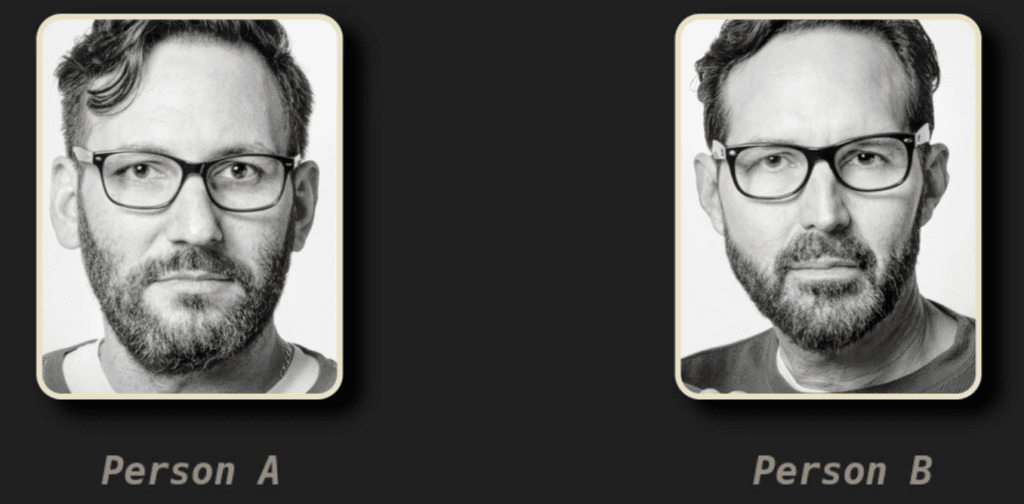
Could your evil look-alike hack into your building?
search_request = SearchRequest(['home/varun/doppelganger.png'])

result = sdk.search.search(search_request)

print(result) # prints []
Evidently not. The search says they aren’t a match. (The confidence score turns out to be 55%.)
Verifying Old Photos of Existing Users
How about if the picture of you is outdated? You don’t want to be constantly updating verification photos.
Let’s try this old picture of Elon Musk back in his PayPal days.
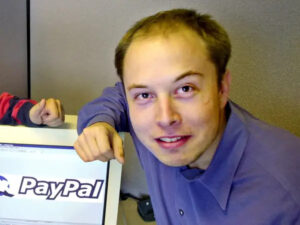
Can the neural network look through time?
search_request = SearchRequest(['home/varun/younger_elon.png'])

result = sdk.search.search(search_request)

print(result[0].person.name) # prints Elon
print(result[0].score) # prints 0.814
Of course, it can! 81% confidence even after the hair transplant.
As you can see, the OpenCV model holds up flawlessly, and you can be assured of its accuracy, regardless of the situation.
Conclusion
In conclusion, OpenCV Face Recognition is a state-of-the-art technology that can accurately identify and differentiate between faces, even when they look very similar. The tool is based on the collaboration between OpenCV, the largest computer vision library, and Seventh Sense. The tool has even been ranked in the top 10 of the 2022 NIST face recognition challenge. It is possible to integrate OpenCV Face Recognition into any application with minimal code using its API. It is intriguing to see how a state-of-the-art model works on AI-Generated images, and it can be concluded that face recognition works on AI-generated faces as well.








100K+ Learners
Join Free OpenCV Bootcamp3 Hours of Learning