This is an old blog and some information might be obsolete. We have published new instructions. You can find them here:
We already have a post for installing OpenCV 3 on Windows which covers how to install OpenCV3 from source for working with both C++ and Python codes. However, many readers have faced problems while installing OpenCV 3 on Windows from source. This post is for those readers who want to install OpenCV on Windows for writing Python code only.
If you are still not able to install OpenCV on your system, but want to get started with it, we suggest using our docker images with pre-installed OpenCV, Dlib, miniconda and jupyter notebooks along with other dependencies as described in this post.
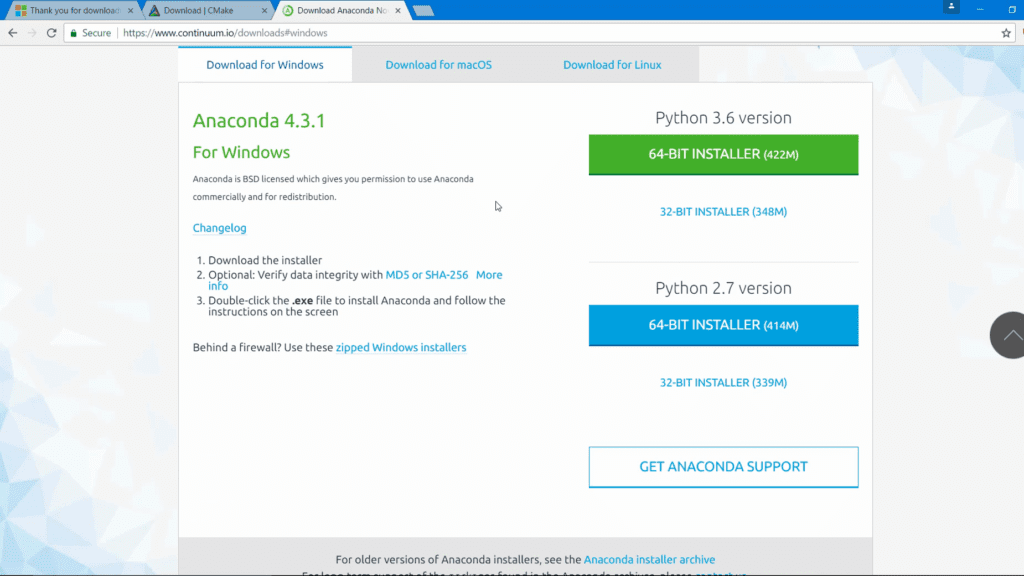
Step 1: Install Anaconda (a python distribution)
Download and install Anaconda 64-bit version from https://www.continuum.io/downloads.
It is advised to install Anaconda for Python 3.
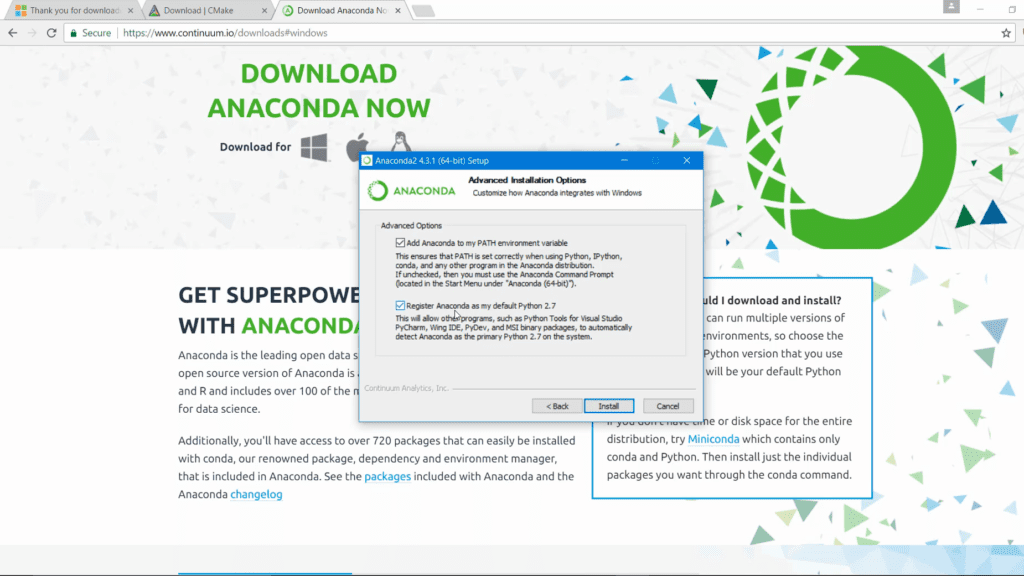
While installing Anaconda make sure that you check both options:
- Add Anaconda to my PATH environment variable
- Register Anaconda as my default Python
Step 2 : Create Virtual Environment
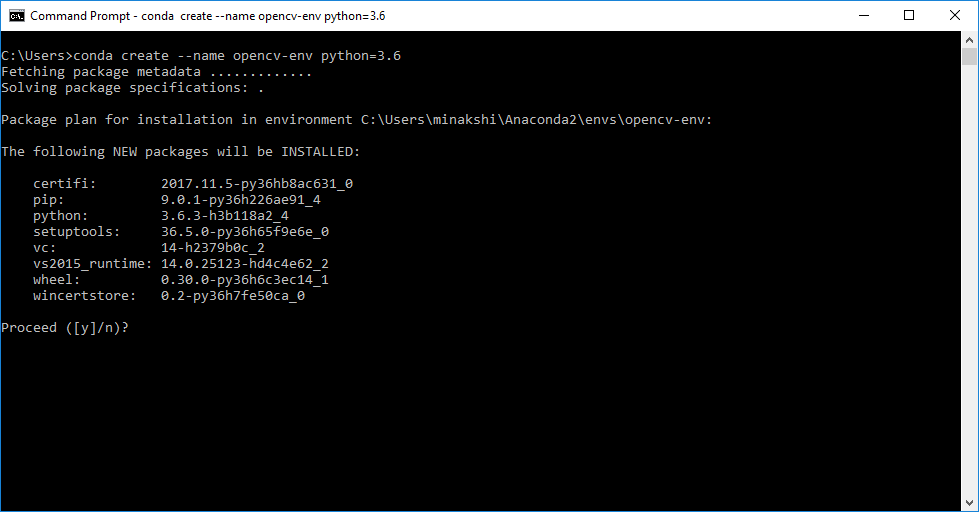
Open the command prompt and execute the following command.
conda create --name opencv-env python=3.6
You should get an output as shown below:
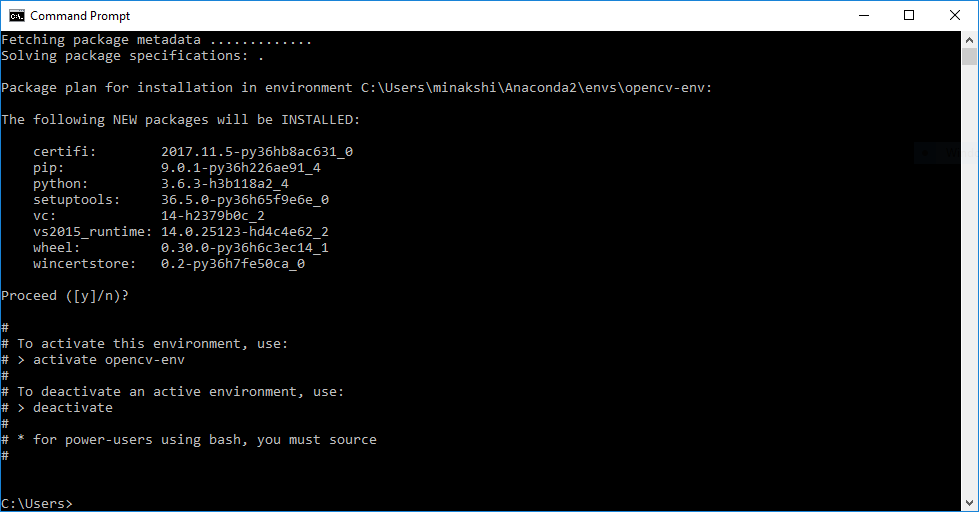
Press Enter and the environment will be installed and you should get an output as shown below :
Step 3 : Install OpenCV
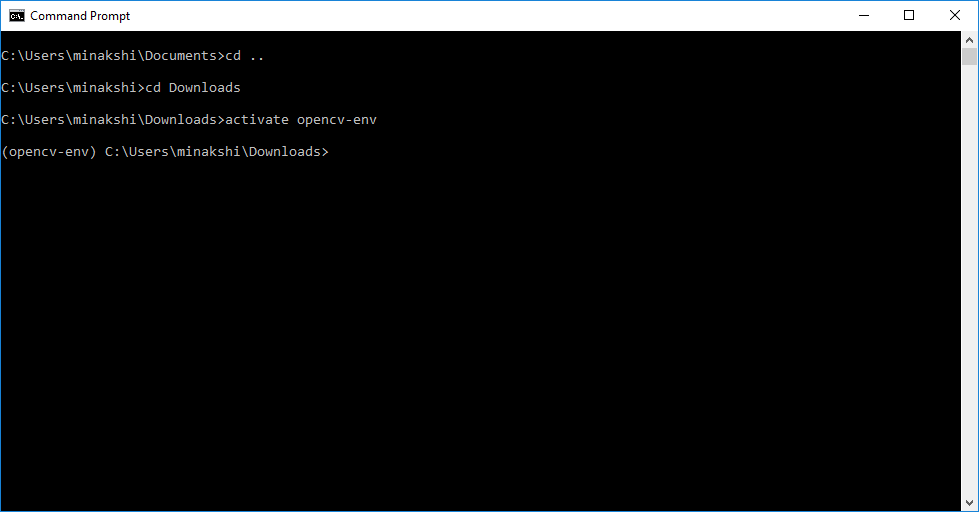
3.1. Activate the environment
# See how the (opencv-env) appears before the prompt after this command.
activate opencv-env
3.2. Install OpenCV and other important packages
Continuing from the above prompt, execute the following commands
pip install numpy scipy matplotlib scikit-learn jupyter
pip install opencv-contrib-python
pip install dlib
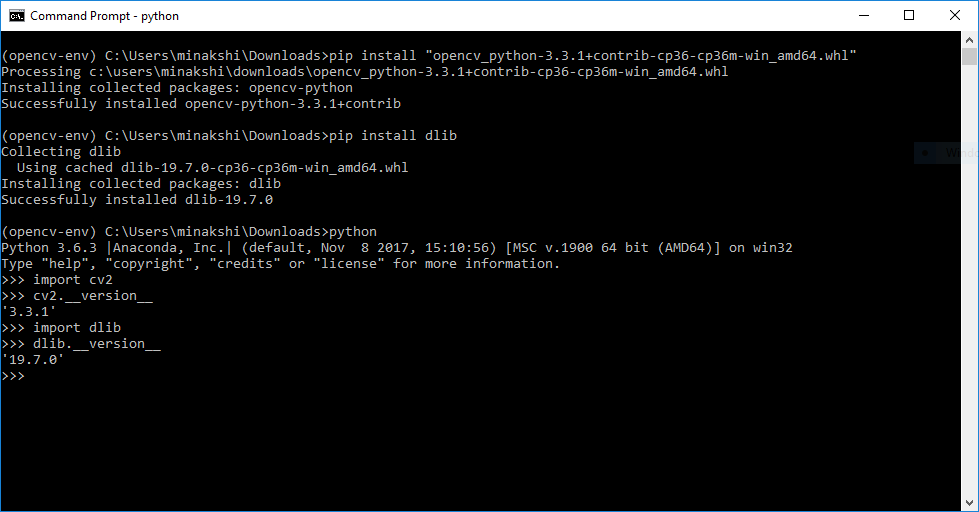
3.3. Test your installation
Open the python prompt on the command line by typing python on the command prompt
import cv2
cv2.__version__
import dlib
dlib.__version__
You should get the following output






100K+ Learners
Join Free OpenCV Bootcamp3 Hours of Learning