In today’s
Imagine finding an old family photograph. You scan it and it looks great except for a few scratches.
Of
You are a super cool engineer! You have a reputation to live up to. You open your favorite editor and write 10 lines of code to solve the problem using an inpainting algorithm in OpenCV. If your friends do not look sufficiently impressed, you can tell them the method is based on the Navier Stokes equation they might have encountered in fluid dynamics!
But to be that cool, you need to read this post first.
What is Image Inpainting?
Image inpainting is a class of algorithms in computer vision where the objective is to fill regions inside an image or a video.
The region is identified using a binary mask, and the filling is usually done by propagating information from the boundary of the region that needs to be filled.
The most common application of image inpainting is restoration of old scanned photos. It is also used for removing small unwanted objects in an image.


Inpainting Algorithms
In this section, we will briefly discuss two inpainting algorithms implemented in OpenCV.
INPAINT_NS : Navier-Stokes based Inpainting
This method was published in 2001 in a paper titled “Navier-Stokes, Fluid Dynamics, and Image and Video Inpainting”
Sometimes I feel like the field of Computer Vision is a field of immigrants from other fields like electrical engineering, computer science, physics, and mathematics.
They bring their ideas to the field and solve the same problem in very interesting and unique ways. An electrical engineer may see an image as a 2D signal and apply the theories of signal processing to solve computer vision problems. On the other hand, a mathematician may see an image as a connected graph and solve computer vision problems using graph theory.
So it isn’t surprising that theories developed for fluid dynamics also make their way into computer vision.
In the image below, our objective is to fill the dark region and obtain an image that looks like the one on the right.
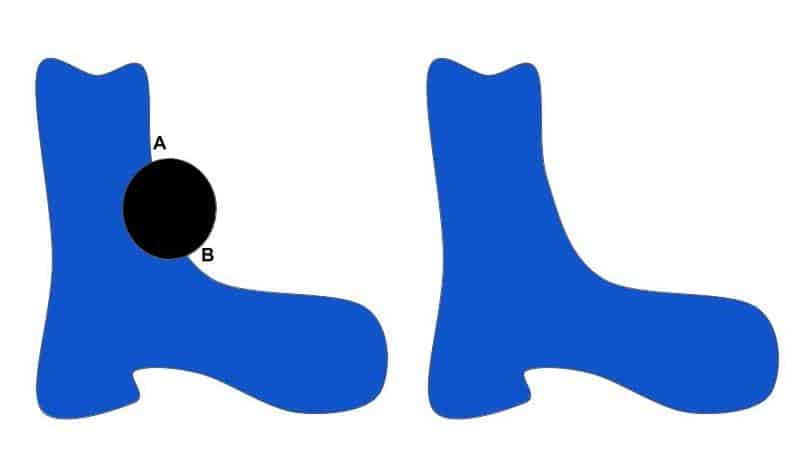
How do we fill this black region? One constraint we would like is the edge entering point A should continue to the edge leaving point B. The other constraint we may want is that the region on the right of the curve joining A and B should be white, and the region on the left should be blue.
The above two constraints essentially state
- Preserve gradients (i.e. edge like features)
- Continue to propagate color information in smooth regions
The authors set up a partial differential equation (PDE) to update image intensities inside the region with the above constraints.
The image smoothness information is estimated by the image Laplacian and it is propagated along the isophotes (contours of equal intensities). The isophotes are estimated by the image gradient rotated by 90 degrees.
The authors show that these equations are closely related in form to the
The benefit of reducing the problem to one of fluid dynamics is that we benefit from well developed theoretical analysis and numerical tools.
INPAINT_TELEA : Fast Marching Method based
This implementation is based on a paper titled “An Image Inpainting Technique Based on the Fast Marching Method” by Alexandru Telea.
This implementation solves the same constraints using a different technique. Instead of using the image Laplacian as the estimator of smoothness, the author uses a weighted average over a known image neighborhood of the pixel to
Once a pixel is inpainted, the boundary needs to updated. The author treats the missing region of the image as level sets and uses the fast marching method to update the boundary.
Pros and Cons
As per the theory and the papers, Navier-Stokes based inpainting is supposed to be slower and has a tendency to produce results that are blurrier than the Fast Marching based method.
In practice, we did not find that to be the case. INPAINT_NS produced better results in our tests and the speed was also marginally better than INPAINT_TELEA.
Inpainting Code in Python and C++

In OpenCV inpainting is implemented using the function inpaint.
void inpaint(
    Mat src,
    Mat inpaintMask,
    Mat dst,
    double inpaintRadius,
    int flags
    )
dst = cv2.inpaint(src, inpaintMask, inpaintRadius, flags)
Where,
- src = Source image
- inpaintMask = A binary mask indicating pixels to be inpainted.
dst = Destination image- inpaintRadius = Neighborhood around a pixel to
inpaint . Typically, if the regions to be inpainted are thin, smaller values produce better results (less blurry). flags : INPAINT_NS (Navier-Stokes based method) or INPAINT_TELEA (Fast marching based method)
Inpainting Results
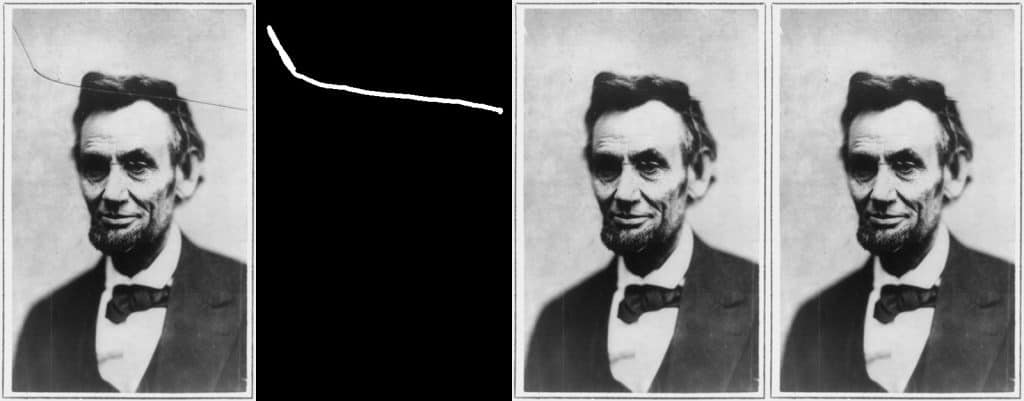
Let’s look at the result of applying inpainting to a historic image of President Lincoln. There is a fascinating history behind this photo which I have borrowed from Wikipedia
On Sunday, February 5, 1865, at Gardner’s Gallery in Washington DC, Alexander Gardner took several multiple-lens pictures of the President. Before this session ended, Gardner asked the president for one last pose. He moved his camera closer and took a photograph of Lincoln’s head, shoulders, and chest. Mysteriously the glass plate negative cracked. Gardner carefully took it to his dark room and was able to make one print, with an ominous crack across Lincoln’s face, before it broke completely and was discarded. This print, known as O-118, still exists to this day. Over the years many people have associated this crack with a symbolic foretelling of the assassin’s bullet that awaited Lincoln 10 weeks later.
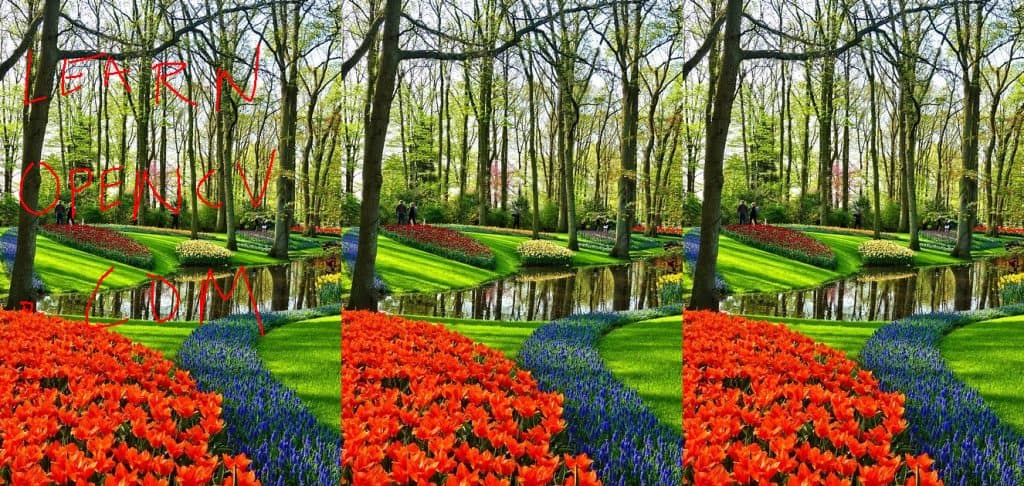
Let’s look at a more complicated example. We have scribbled quite extensively over the image of a flower garden, but the results are still very compelling.