

The release of Gemma 3n, Google’s latest family of open nano models, made LLM edge deployment more accessible. Its unique architecture is engineered to address the persistent challenges of deploying high-performance models within sensitive, resource-constrained environments. But how can we leverage it for the medical domain? One-word answer: finetuning Gemma 3n!
Consider a common scenario in radiology: a clinician analyzing a CT scan encounters a subtle anomaly that presents diagnostic ambiguity. In the absence of an immediate second opinion from a specialist, they face a critical decision-making bottleneck. This is precisely where a Gemma 3n can serve as a powerful decision-support tool. A clinician could simply ask, “Is there evidence of ground-glass opacity in the lower lobes?” and receive an immediate, context-aware answer from a model that understands both the question and the medical image.
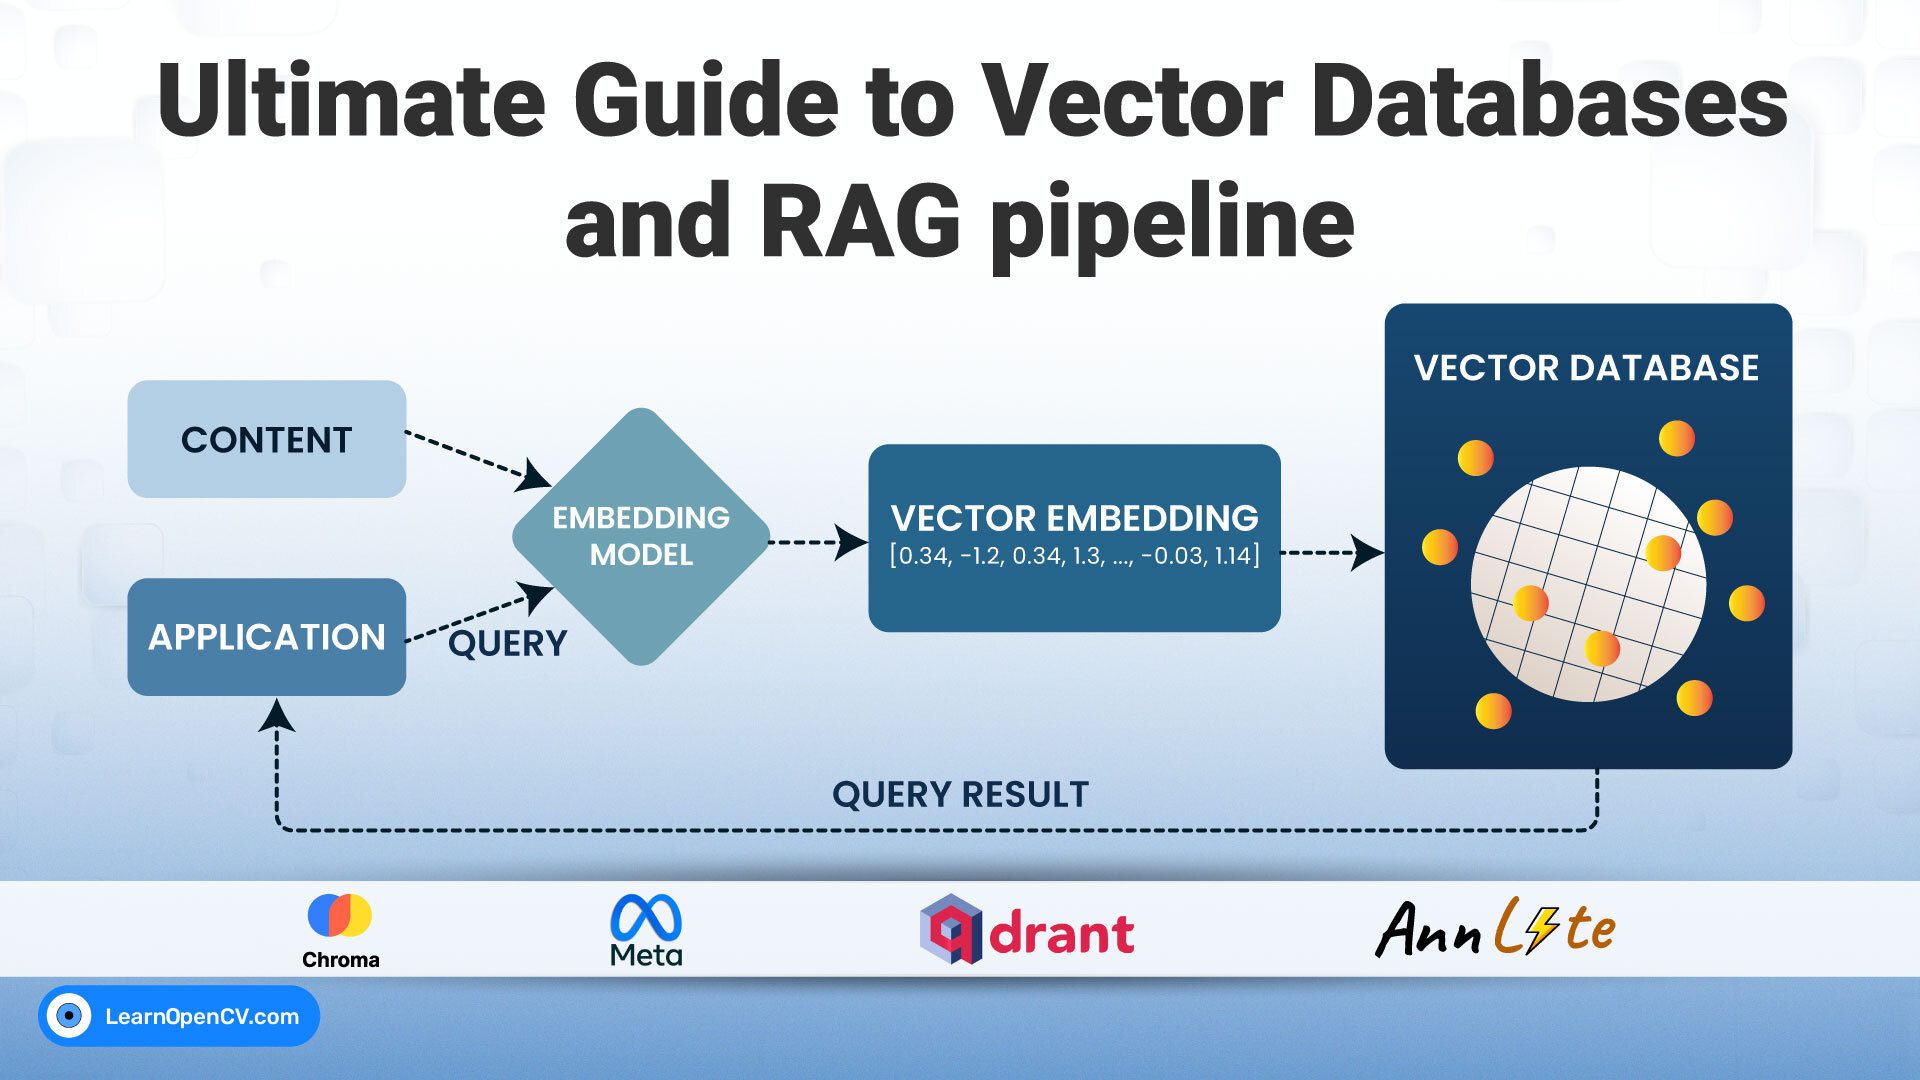
This article details the process of fine-tuning the Gemma 3N model on a radiology dataset. We will transform this powerful, generalist Vision-Language Model (VLM) into a focused expert for medical imaging analysis.
In this guide, we will provide a technical walkthrough of:
- The core capabilities and design philosophy of Gemma 3n, and why it is uniquely suited for on-device Medical AI.
- The novel architecture of Gemma 3n, highlighting the key advancements over the classic Gemma3 series that enable its efficiency.
- The methodology for Fine-Tuning Gemma 3n, adapting the base model for the specific domain of medical VQA.
- An evaluation of the specialized VLM, demonstrating its ability to answer complex, clinically relevant questions.
- A Download Code button, to get the code files with One Click!
This article provides a comprehensive guide to this process, from model architecture to practical implementation. Let’s begin.
Note: The primary goal of this blog post is to demonstrate the technical process of fine-tuning a large language model. The radiological examples serve strictly as a use case to illustrate this process on a challenging dataset, utilizing open-source models and data for research purposes. There is absolutely no intention to build or propose a functional AI radiologist, clinical expert, or medical assistant. Any use of terms like ‘AI assistant’ is purely metaphorical, employed only to create a relatable analogy and provide an intuitive understanding of the model’s evolving behavior, not to suggest any real-world clinical capability.
Introduction to Gemma 3n

Gemma 3n represents a strategic evolution in Google’s family of open models. Building on the powerful foundation of the Gemma3 series, Gemma 3n is engineered with a specific and critical purpose in mind: to bring state-of-the-art multimodal AI to resource-constrained environments. The ‘n’ in its name signifies “Nano,” reflecting a mobile-first design philosophy that prioritizes efficiency and on-device execution. This is not simply a smaller model; it is a re-architected system designed to deliver high-caliber performance on the hardware we use daily, such as laptops, smartphones, and various edge devices, without relying heavily on cloud infrastructure. This approach makes it an ideal candidate for a new generation of intelligent, private, and responsive applications.
Key Capabilities of Gemma 3n

Gemma 3n’s design combines several innovations to achieve its balance of power and efficiency.
- Native Multimodality: Gemma 3n is inherently a Vision-Language Model (VLM), co-trained from the ground up to understand a rich blend of inputs, including text, image, audio, and video. This integrated understanding is fundamental for complex tasks like Visual Question Answering.
- Optimized On-Device Efficiency: While the models have raw parameter counts of 5B (E2B) and 8B (E4B), architectural innovations allow them to operate with memory footprints comparable to much smaller models, as low as 2GB and 3GB, respectively. This breakthrough in efficiency is what enables local deployment on consumer-grade hardware.
- Novel and Flexible Architecture: The model introduces a unique Matryoshka-like structure called MatFormer. This design allows the larger E4B model to contain a complete, smaller E2B sub-model. Developers can deploy a single artifact and dynamically select the optimal balance between performance and quality based on the task and hardware constraints.
- High-Quality Performance: Despite its focus on efficiency, Gemma 3n achieves impressive benchmark scores in reasoning, mathematics, and coding. With a knowledge cutoff of June 2024 and support for over 140 languages, its capabilities are both current and globally relevant.
- Privacy-Centric and Offline-Ready: By enabling local execution, Gemma 3n inherently enhances data privacy, a critical requirement for sensitive applications. Its ability to function without an internet connection ensures reliability and availability in diverse operational environments.
Application Areas
The unique characteristics of Gemma 3n unlock a range of applications that were previously impractical for high-performance AI.
- Medical and Clinical AI: This is our primary focus. The model’s privacy-centric design and offline capabilities make it exceptionally well-suited for deployment within secure hospital networks. It can power diagnostic aids on local workstations, run on portable medical imaging devices, and enable the kind of low-latency Medical VQA we aim to build, where patient data remains confidential.
- Interactive Consumer Technology: On smartphones and personal devices, Gemma 3n can drive a new wave of intelligent applications. This includes real-time, multilingual transcription and translation apps that process both voice and visual context, or sophisticated assistive tools for the visually impaired.
- Industrial and Automotive Sectors: In manufacturing, the model can be deployed on the factory floor for real-time video analysis and quality control. In automotive, it can power advanced in-vehicle assistants that process commands and sensor data locally, enhancing both safety and user experience without depending on cloud connectivity.
Gemma 3n Architecture – What’s New in the Nano
The remarkable efficiency of Gemma 3n is not the result of simple model compression or quantization alone; it stems from a fundamental rethinking of the transformer architecture itself. While it shares a lineage with the Gemma3 family, its internal structure has been specifically redesigned for on-device performance. This section delves into the core architectural innovations that enable Gemma 3n to deliver its impressive capabilities within such a constrained memory footprint.
MatFormer: The Heart of Elastic Inference

At the core of Gemma 3n lies the MatFormer (Matryoshka Transformer) architecture, a novel approach to building elastic models. The concept is elegantly simple and powerful, much like the Russian Matryoshka dolls from which it gets its name. A larger, more capable model contains smaller, fully functional versions of itself nested within its parameters. This extends beyond just embeddings; it applies to all components of the transformer.
During the training of the 8-billion-parameter E4B model, a 5-billion-parameter E2B sub-model is simultaneously optimized within it. This co-training process yields two significant advantages for developers:
- Pre-Extracted Models: Google provides both the main E4B model for maximum capability and a pre-extracted, standalone E2B model. The E2B variant offers a direct path to faster inference (up to 2x) and lower resource usage, without requiring any complex extraction process on the developer’s end.
- Custom Sizes with “Mix-n-Match”: For granular control over the performance-to-resource ratio, developers can use a “Mix-n-Match” technique. This allows for the creation of a spectrum of custom-sized models between the E2B and E4B checkpoints by selectively adjusting components, such as the feed-forward network’s hidden dimensions, or even skipping certain layers. This empowers developers to precisely tailor a model to specific hardware constraints.

Beyond these immediate benefits, the MatFormer architecture lays the groundwork for elastic execution, a future capability where a single deployed E4B model could dynamically switch between its larger and smaller inference paths in real-time, optimizing performance based on the immediate demands of the task.
Per-Layer Embeddings (PLE): Intelligent Memory Management
Another critical innovation for on-device deployment is Per-Layer Embeddings (PLE). This technique cleverly addresses the primary bottleneck for large models on edge devices: limited high-speed accelerator memory (VRAM).

In a traditional transformer, all model parameters, including massive embedding tables, must be loaded into the GPU/TPU’s VRAM. Gemma 3n’s architecture, powered by PLE, changes this. It allows a significant portion of the parameters, specifically, the embeddings associated with each layer, to be offloaded and computed efficiently on the system’s more abundant CPU and standard RAM. Only the core transformer weights (the most computationally intensive part) need to reside in the accelerator’s VRAM.
This is why the 5B and 8B “raw parameter” models can operate with an “effective” memory footprint of just 2B and 4B parameters. It’s an intelligent division of labor: the accelerator focuses on the heavy lifting of matrix operations, while the CPU handles the less demanding embedding lookups. This design dramatically improves model quality and capability without increasing the VRAM requirement, making larger, more powerful models practical for on-device use.
KV Cache Sharing: Accelerating Long-Context Processing
For a VLM to be truly useful, especially in a medical context where it might process sequences of images or long clinical notes, it must handle long inputs efficiently. Gemma 3n introduces KV Cache Sharing to significantly accelerate this process.
During inference, the initial processing of the input prompt (the “prefill” phase) can be a major source of latency. KV Cache Sharing optimizes this by allowing the key and value states from a middle attention layer to be directly shared with all subsequent top layers. This architectural shortcut delivers a notable 2x improvement in prefill performance compared to its predecessors. For the end-user, this translates to a much faster “time-to-first-token,” meaning the model begins generating its response more quickly after receiving a long or complex input.
Upgraded Sensory System: Advanced Vision and Audio Encoders
A VLM is only as good as its ability to perceive the world. Gemma 3n features a completely new set of encoders, representing a significant leap over the SigLIP vision system used in the earlier Gemma3 models.
- MobileNet-V5 Vision Encoder: The new vision backbone is a highly efficient and powerful MobileNet-V5-300M encoder. Designed for high performance on constrained hardware, it offers several advantages:
- Flexibility: It natively supports multiple input resolutions (256×256, 512×512, 768×768), allowing developers to balance detail and performance.
- High Throughput: It can process up to 60 frames per second on a Google Pixel device, enabling real-time video analysis.
- Efficiency: Compared to the baseline vision system in Gemma 3, MobileNet-V5 provides a staggering 13x speedup with quantization, uses 46% fewer parameters, and has a 4x smaller memory footprint, all while delivering higher accuracy on vision-language tasks.
- Universal Speech Model (USM) Audio Encoder: Gemma 3n introduces audio understanding through an encoder based on Google’s Universal Speech Model. It processes audio in 160ms chunks, unlocking on-device Automatic Speech Recognition (ASR) and Automatic Speech Translation (AST). While the initial implementation is optimized for clips up to 30 seconds, the underlying streaming architecture is capable of processing arbitrarily long audio streams, paving the way for future real-time voice applications.
PS: We have a detailed article on Fine-Tuning Gemma3 on LaTeX-OCR. If you are interested in the fine-tuning part, you can give it a read.
Now let’s move on to the fine-tuning task. First, let’s look at the dataset we will use for this article.
Before we move: Our courses cover Vision Language Models(VLMs), Fundamentals of Computer Vision, and Deep Learning in depth. To get started, just click below on any of our free Bootcamps!


Dataset Overview: ROCOv2-Radiology
A Vision-Language Model, no matter how sophisticated its architecture, is fundamentally shaped by the data it learns from. For our objective of creating a specialized medical VQA assistant, the selection of an appropriate dataset is as critical as the choice of the model itself. The data must be high-quality, relevant, and structured in a way that facilitates the learning of complex relationships between visual radiological evidence and textual medical descriptions.

Our methodology leverages two key datasets from the Hugging Face Hub, which serve distinct but complementary roles in our fine-tuning strategy. We will use Radiology_mini for our fine-tuning process, as it’s a small and distilled version of the ROCOv2-radiology dataset.
The Foundation: eltorio/ROCOv2-radiology
The primary dataset for our project is ROCOv2 (Radiology Object in COntext version 2). This is a large-scale, multimodal dataset created specifically for medical image analysis.
- Origin and Scale: Sourced from the openly available PMC Open Access Subset, ROCOv2 contains approximately 80,000 radiological images, with nearly 60,000 designated for the training set. This scale provides the breadth and diversity needed to train a robust model.
- Data Structure: Each image in the dataset is paired with two critical pieces of information:
- A caption: The original, human-written description of the image from the source publication. These captions are rich with clinical terminology and observations.
- cui: A list of Unified Medical Language System (UMLS) Concept Unique Identifiers. These are standardized codes that map the textual descriptions to a formal medical ontology, providing structured, machine-readable labels for the concepts present in the image and caption.
The Mini Version: unsloth/Radiology_mini
While the full ROCOv2 dataset is powerful, its size can make the initial development and debugging phases of a project time-consuming. To accelerate the process, we will utilize unsloth/Radiology_mini by UnSloth.
- Content and Size: This dataset is a smaller, curated subset of ROCOv2, containing approximately 2,000 image-caption pairs. It maintains the exact same data structure (image, caption, cui), making it a perfect, lightweight proxy for its larger counterpart.
- Role in Fine-Tuning: The purpose of Radiology_mini is to enable rapid iteration. During the development of our fine-tuning pipeline, we can use this smaller dataset to quickly test our code, validate our training parameters, and debug any issues in a matter of minutes rather than hours. It allows us to confirm that our entire workflow is functioning correctly before committing the significant computational resources required to train on the full dataset.
PS: We will do the FineTuning Gemma 3n process using the radiology_mini dataset for this article.
The Code Pipeline: FineTuning Gemma3n
Theory is valuable, but the real learning happens when we translate it into code. In this section, we will walk through the practical steps of fine-tuning Gemma 3n, converting our general-purpose VLM into a specialized medical assistant. Our toolkit will be centered around the high-performance Unsloth library, which dramatically accelerates training, combined with the powerful and flexible SFTTrainer from Hugging Face TRL.
The following steps are a narrative walkthrough of the provided Jupyter Notebook. For the complete, executable scripts and to follow along, you can download the Notebook below.

Step 1: Setting Up the Environment
Before we can begin, we must ensure our environment is equipped with the necessary libraries. This involves installing Unsloth for optimized training, a specific version of transformers compatible with Gemma 3n, and other essential packages like datasets and timm.
# Install Unsloth and its dependencies
!pip install "unsloth[colab-new] @ git+https://github.com/unslothai/unsloth.git"
!pip install --no-deps "xformers<0.0.26" "trl<0.9.0" "peft<0.11.0" "accelerate<0.31.0" "bitsandbytes<0.44.0"

# Install latest transformers for Gemma 3N
!pip install --no-deps transformers==4.53.1
!pip install --no-deps --upgrade timm
- Unsloth: This is the core optimization library we’re using. It patches parts of the PyTorch and transformers ecosystem to enable up to 2x faster fine-tuning with significantly less memory, which is crucial for working with models of this scale. Read our detailed guide to get started with Unsloth.
- Specific Versions: The notebook correctly highlights the need for a specific
transformersversion (4.53.1) and an upgradedtimmlibrary to ensure full compatibility with the Gemma 3n architecture.
Step 2: Loading the Model with 4-bit Quantization
With our environment ready, the next step is to load the model. We will use unsloth/gemma-3n-E2B-it model. To make this process manageable on a single consumer GPU (we are using a free-tier Google Colab T4), we employ 4-bit quantization, a technique that drastically reduces the model’s memory footprint.
from unsloth import FastVisionModel
import torch

model, processor = FastVisionModel.from_pretrained(
    "unsloth/gemma-3n-E2B-it",
    load_in_4bit = True,
    use_gradient_checkpointing = "unsloth",
)
FastVisionModel: This is Unsloth’s specialized class for handling Vision-Language Models. It automatically applies performance patches upon loading.load_in_4bit = True: This is the key to our efficiency. It loads the model weights in a 4-bit precision format, significantly cutting down on VRAM usage with a minimal impact on performance.use_gradient_checkpointing = "unsloth": This is another memory-saving technique. Instead of storing all intermediate activations during the forward pass, it recomputes them during the backward pass. This trades some computational time for a substantial reduction in memory, allowing us to use larger batch sizes or longer sequence lengths.
Step 3: Preparing for PEFT with LoRA
Fine-tuning all 5 billion parameters of Gemma 3n would be computationally prohibitive. Instead, we use Parameter-Efficient Fine-Tuning (PEFT), specifically LoRA (Low-Rank Adaptation). This technique freezes the vast majority of the pre-trained model’s weights and injects a small number of new, trainable parameters (the “adapters”). We are essentially adding a few precise “tuning knobs” to the model rather than re-engineering the entire system.
model = FastVisionModel.get_peft_model(
    model,
    finetune_vision_layers     = True,
    finetune_language_layers   = True,
    finetune_attention_modules = True,
    finetune_mlp_modules       = True,

    r = 16,
    lora_alpha = 16,
    lora_dropout = 0,
    bias = "none",
    random_state = 3407,
    target_modules = "all-linear",
    modules_to_save = [
        "lm_head",
        "embed_tokens",
    ],
)
- Finetuning Control: Unsloth provides remarkable granularity. We’ve set
finetune_vision_layersandfinetune_language_layerstoTrue, indicating our desire to adapt both the model’s ability to “see” and its ability to “reason” about the visual input. - LoRA Hyperparameters:
r = 16sets the rank (or dimensionality) of our adapter matrices, andlora_alpha = 16is a scaling factor. A common rule of thumb is to set alpha equal to r. modules_to_save: This is a critical parameter. We are explicitly telling the training process not to apply LoRA to the language model head (lm_head) and token embeddings (embed_tokens), but to train them fully. This allows the model to better adapt to the new, specialized vocabulary of radiology.
Step 4: Structuring the Data
Before training, we must format our dataset into a conversational structure that the model expects. Each sample will consist of a “user” turn (containing our instruction and the image) and an “assistant” turn (containing the expected descriptive caption).
instruction = "You are an expert radiologist. Describe accurately what you see in this image."

def convert_to_conversation(sample):
    conversation = [
        {
            "role": "user",
            "content": [
                {"type": "text", "text": instruction},
                {"type": "image", "image": sample["image"]},
            ],
        },
        {"role": "assistant", "content": [{"type": "text", "text": sample["caption"]}]},
    ]
    return {"messages": conversation}

# Apply the conversion to the entire dataset
converted_dataset = [convert_to_conversation(sample) for sample in dataset]
Step 5: The Training Loop
This is the final and most crucial step before training. We configure the SFTTrainer from the TRL library, which orchestrates the entire fine-tuning process. We’ll pass our training arguments through the SFTConfig class, and we’ll break down each parameter below for clarity.
Finally, we configure and launch the training job using the SFTTrainer.
from unsloth.trainer import UnslothVisionDataCollator
from trl import SFTTrainer, SFTConfig

trainer = SFTTrainer(
    model=model,
    train_dataset=converted_dataset,
    processing_class=processor.tokenizer,
    data_collator=UnslothVisionDataCollator(model, processor, resize=512),
    args = SFTConfig(
        per_device_train_batch_size = 1,
        gradient_accumulation_steps = 4,
        gradient_checkpointing = True,
        gradient_checkpointing_kwargs = {"use_reentrant": False},
        max_grad_norm = 0.3,
        warmup_steps = 5,
        max_steps = 60,
        learning_rate = 2e-4,
        logging_steps = 1,
        save_strategy="steps",
        optim = "adamw_torch_fused",
        weight_decay = 0.01,
        lr_scheduler_type = "cosine",
        seed = 3407,
        output_dir = "outputs",
        report_to = "none",

        # MUST for vision finetuning:
        remove_unused_columns = False,
        dataset_text_field = "",
        dataset_kwargs = {"skip_prepare_dataset": True},
        max_seq_length = 2048,
    )
)

trainer_stats = trainer.train()
Now, the vital part, let’s understand all the training configs that we are using to fine-tune the Gemma3n.
Batching & Memory Management:
per_device_train_batch_size = 1: This determines how many samples are processed by the GPU at once. We set it to 1 to keep memory usage as low as possible.gradient_accumulation_steps = 4: This is a clever trick to simulate a larger batch size. The trainer will process 1 sample, calculate the gradients (the direction for learning), and hold them. It repeats this 4 times, adding the new gradients to the old ones. Only after 4 steps does it update the model’s weights. This gives us the stability of a larger batch size (effective batch size of 1 * 4 = 4) without the high memory cost.gradient_checkpointing= True: A key memory-saving feature. It avoids storing all intermediate values during the forward pass, instead recalculating them when needed for the backward pass. This significantly reduces VRAM usage at the cost of slightly longer training time.
Optimizer & Learning Dynamics:
max_grad_norm = 0.3: This acts as a safety mechanism. It “clips” the gradients if they become too large, preventing unstable training updates that could harm the model’s learning. The value of 0.3 is a common recommendation from the QLoRA paper.warmup_steps = 5: The learning rate won’t start at its maximum value. Instead, it will gradually increase from a very low value to its target over the first 5 training steps. This “warm-up” period helps stabilize the model at the beginning of training.max_steps = 60: For this demonstration, we are telling the trainer to stop after exactly 60 update steps. For a full project, you would typically disable this and usenum_train_epochs = 1or more to train on the entire dataset.learning_rate = 2e-4: This is the speed at which the model learns. It determines the size of the steps the optimizer takes.2e-4is a well-established and effective learning rate for LoRA fine-tuning.optim = "adamw_torch_fused": We select the “fused” AdamW optimizer, which is a highly efficient, faster version provided by PyTorch.lr_scheduler_type = "cosine": This dictates how the learning rate changes over the course of training. A “cosine” schedule starts at the full learning rate (after warmup), then smoothly decreases in a curve resembling a cosine wave. This often helps the model settle into a better final state.
Utilities & Housekeeping:
logging_steps = 1: The trainer will print the training loss and other metrics to the console after every single step.output_dir = "outputs": This is the directory where the final trained model adapters and checkpoints will be saved.seed = 3407: Setting a random seed ensures that anyone running this code gets the exact same results, making the process reproducible.
Mandatory Arguments for Vision Fine-Tuning:
remove_unused_columns= False: By default, the trainer removes any columns from the dataset that aren’t expected by the model. We must set this to False to prevent it from deleting our crucial image column.dataset_text_field = "": Since our data is in a complex conversational format (a list of dictionaries) and not a single text field, we leave this blank.dataset_kwargs = {"skip_prepare_dataset": True}: This tells the trainer to trust that we’ve already formatted the dataset correctly and to skip its internal preparation steps.
Finally, the trainer.train() command initiates the entire fine-tuning process, putting all these configurations into action to create our specialized model.
Step 6: Analyzing the Training Process
After executing trainer.train(), the system provides a detailed log of the fine-tuning process. This output is not just a progress bar; it’s a rich source of information that tells us how effectively our model is learning. If you see the training log:
==((====))==  Unsloth - 2x faster free finetuning | Num GPUs used = 1
   \\   /|    Num examples = 1,978 | Num Epochs = 1 | Total steps = 60
O^O/ \_/ \    Batch size per device = 1 | Gradient accumulation steps = 4
\        /    Data Parallel GPUs = 1 | Total batch size (1 x 4 x 1) = 4
 "-____-"     Trainable parameters = 21,135,360 of 5,460,573,632 (0.39% trained)
`use_cache=True` is incompatible with gradient checkpointing. Setting `use_cache=False`.
 [60/60 06:56, Epoch 0/1]
Step	Training Loss
1	11.555500
2	10.761400
...
17	4.852000
18	3.785700
...
30	2.410200
31	1.963100
...
48	0.963500
49	1.699900
...
60	1.677400
Parameter Efficiency in Action: The Unsloth header immediately confirms the power of our PEFT approach. We are only training 21.1 million parameters, which is a mere 0.39% of the model’s total 5.46 billion parameters. This is LoRA in action, allowing us to achieve significant specialization without the immense computational overhead of training the full model.
Training Loss Dynamics: The core of the log is the training loss (Cross-Entropy) table.
- Initial High Loss: The training begins with a very high loss (e.g., 11.5555 at Step 1). This is completely normal. The model, pre-trained on general data, is now seeing a highly specialized, conversational format for the first time and is essentially making wild guesses.
- The “Aha!” Moment: We observe a dramatic drop in loss around Step 17, where it plummets from 10.7388 to 4.8520. This is a classic indicator that the model has started to understand the underlying pattern of the data, and the optimizer has found a strong direction for learning.
- Steady Decrease: From Step 17 onwards, despite some minor fluctuations, the overall trend is consistently downward. The model continues to refine its understanding, with the loss eventually settling into a much lower range (around 1.6 to 2.2 in the final steps).
- We got the best model at Step 48 with the minimum loss of 0.9.
Now let’s move on to the inference section and evaluate the performance.
Inference: Putting Our FineTuned Gemma 3n to Test
The true measure of our fine-tuning effort is not the training loss, but how the model performs on a new, unseen example. Inference is where we evaluate whether our specialized VLM has truly learned to “think” like a radiologist. We will use the same sample image from our initial test to conduct a direct before-and-after comparison.
To run the inference, we load the model in inference mode using the FastVisionModel.for_inference(...). Then we pass the input image along with the instruction prompt to the model. Then it’s a straightforward model.generate(...).
FastVisionModel.for_inference(model)

image = dataset[2]["image"]
instruction = "You are an expert radiologist. Describe accurately what you see in this image."

# Prepare messages in the conversational format
messages = [
    {
        "role": "user",
        "content": [{"type": "image"}, {"type": "text", "text": instruction}],
    }
]

# Process inputs with the processor
input_text = processor.apply_chat_template(messages, add_generation_prompt=True)
inputs = processor(
    image,
    input_text,
    add_special_tokens=False,
    return_tensors="pt",
).to("cuda")

# Generate the response
result = model.generate(**inputs, max_new_tokens=256)
Performance Evaluation – Gastrointestinal Radiography

Prompt: “You are an expert radiologist. Describe accurately what you see in this image.“
Base Model’s Output (Pre-Finetuning):
## Radiologic Findings:

This is an upper gastrointestinal series demonstrating a **stricture** in the distal duodenum, likely representing a **dynamic stricture**. ...The findings are consistent with a dynamic duodenal stricture...
This description is confident but incorrect. It hallucinates a “duodenal stricture,” which is not the primary finding in the image. This demonstrates the critical need for domain-specific fine-tuning. It’s not following any instructions at all.
Fine-Tuned Model’s Output:
The image shows a gastrografin swallow demonstrating a dilated jejunum with a prominent loop extending into the abdominal cavity. The arrow points to the dilated jejunum.
This case provides an instructive example for analyzing model behavior. The model’s response was: “The image shows a gastrografin swallow demonstrating a dilated jejunum with a prominent loop… The arrow points to the dilated jejunum.” For context, the ground truth describes this as a post-operative study where “The inner diameter of the anastomosis was measured the length of the white arrow.”
This divergence highlights a key challenge that instruction tuning aims to address. The model’s output makes an interpretive leap to a clinical finding (“dilated jejunum”) and assigns a purpose to the arrow that differs from the ground truth. The objective of further instruction tuning is to bridge this gap, guiding the model to avoid such interpretations and instead produce a factual description more aligned with the ground truth, identifying the type of study and the elements present without assigning a clinical diagnosis. This process is fundamental to developing AI tools that can reliably serve as descriptive assistants.
Performance Evaluation – Cerebral Angiogram

Prompt: “You are an expert radiologist. Describe accurately what you see in this image.”
Base Model’s Output (Pre-Finetuning):
## Radiologic Findings:
This grayscale angiogram demonstrates a posterior cerebral artery (PCA) territory infarct.
...
Interpretation:
The image shows a confirmed ischemic stroke within the posterior cerebral artery territory.
At first glance, this output seems plausible. It correctly identifies the modality (angiogram) and uses appropriate terminology that matches our ground truth data. However, it confidently and incorrectly makes a high-stakes diagnosis of a “PCA territory infarct” and a “confirmed ischemic stroke.” This is a classic example of a knowledgeable but non-specialized model over-reaching. It pattern-matches to similar images but lacks the nuanced clinical understanding to differentiate complex pathologies. For a human expert, this confident but wrong diagnosis is more hazardous than helpful.
Fine-Tuned Model’s Output:
The image shows a vascular angiogram of the brain with multiple small, irregular vessels.
After fine-tuning, the model’s output is demonstrably better because it now correctly follows its core instruction to describe visual content, not interpret it. Instead of attempting a speculative clinical diagnosis, it generates a direct, factual observation: “a vascular angiogram of the brain with multiple small, irregular vessels.” This shift shows the model has successfully learned to operate within its intended boundaries, producing a more predictable and constrained output that aligns precisely with its designated function as a descriptive tool.
This descriptive output is valuable because it aligns with the observational aspects of our ground truth without overstepping its capabilities. This exemplifies a key principle for developing responsible AI tools for clinical support: the primary goal is to augment, not automate, clinical expertise.
The contrast between the model’s performance before and after fine-tuning is stark and demonstrates a fundamental shift in its behavior. Before tuning, the model consistently overstepped its role by attempting to act as a diagnostician. It confidently, and incorrectly, diagnosed a “confirmed ischemic stroke” on an image showing a successful medical treatment and hallucinated a “dynamic stricture” where none existed. In stark contrast, the post-fine-tuning model adheres strictly to its instruction to describe what is visually present. It now produces objective, factual statements, such as identifying “multiple small, irregular vessels” or pointing out a “measurement site at the anastomosis.” This transformation is critical: the model has learned to stop making unsafe, speculative interpretations and has instead become a reliable tool that provides objective visual evidence, leaving the crucial task of diagnosis to the human expert.
Now, let’s do a quick recap of what we’ve learned so far.
Medical Disclaimer
This article is for educational and research purposes only. It should not be used as a substitute for professional medical diagnosis or treatment. Always consult qualified healthcare professionals for medical advice.
Quick Recap
We’ve covered a significant amount of ground, from the underlying theory to practical code. Our journey has taken a powerful, general-purpose Vision-Language Model and transformed it into a specialized tool for Medical AI. Let’s briefly summarize the essential takeaways from this process.
- Gemma 3n is Built for the Edge: The ‘n‘ in Gemma 3n signifies “Nano,” reflecting a design philosophy centered on efficiency. Its novel architecture, featuring innovations like MatFormer and Per-Layer Embeddings, allows it to deliver powerful performance within a small memory footprint, making it ideal for on-device applications where data privacy and offline capability are critical.
- Specialization is Achieved Through Fine-Tuning: The base gemma 3n model, while broadly capable, requires domain-specific fine-tuning to become an expert. By training it on the radiology dataset, we taught it the specific vocabulary and visual patterns of medical imaging, dramatically improving its accuracy and relevance for Clinical AI tasks.
- Parameter-Efficient Fine-Tuning (PEFT) is Key: Fine-tuning a multi-billion parameter model is made feasible through techniques like LoRA (Low-Rank Adaptation). By freezing the core model and training only a small set of adapter layers, we can achieve significant specialization with a fraction of the computational cost, making the process accessible even on consumer-grade hardware.
- Unsloth Accelerates the Process: Leveraging the Unsloth library provides a significant performance boost, enabling up to 2x faster training and 60% less memory usage. This optimization is crucial for iterating quickly and making the fine-tuning of large models like Gemma 3n a practical endeavor for developers and researchers.
- The Results Demonstrate a Clear Transformation: Our before-and-after inference comparison shows a stark difference. The fine-tuned model moved from generating generic, inaccurate descriptions to providing a precise, clinically relevant analysis of a radiological image, validating the effectiveness of our fine-tuning pipeline.
Conclusion
The Gemma 3n model, the nano series of Gemmaverse, represents a pivotal step forward in making advanced AI practical for specialized, real-world applications. Its efficient, mobile-first architecture, combined with powerful fine-tuning libraries like Unsloth and TRL, breaks down the computational barriers that have often limited such projects. Our journey to transform a general-purpose VLM into a focused Medical AI assistant demonstrates that creating highly specialized, private, and secure tools is now more accessible than ever for developers and researchers.
Download the Notebook, play with the model, fine-tune on your dataset, and solve a practical problem. Do let us know about your experiments and fun in the comments.
See you in the next one! Bye 😀
References
Gemma 3n: How to Run & Fine-tune by UnSloth Team
Introducing Gemma 3n: The developer guide by Google
Code Reference Notebook By UnSloth Team
Gemma 3n Model Card


100K+ Learners
Join Free OpenCV Bootcamp3 Hours of Learning