

In middle school, we learned about various shapes in geometry. It was relatively easy to find the centers of standard shapes like the circle, square, triangle, ellipse, etc.
But when it came to finding the centroid of an arbitrary shape, the methods were not straightforward. Some nerdy friends said it would require calculus. Other practical friends suggested intersecting plumblines.
The same problem of finding centroid is relevant when you work in Computer Vision — except, you are dealing with pixels instead of atoms! In this post, we will first discuss how to find the center of an arbitrarily shaped blob and then we will move to the case of multiple blobs.
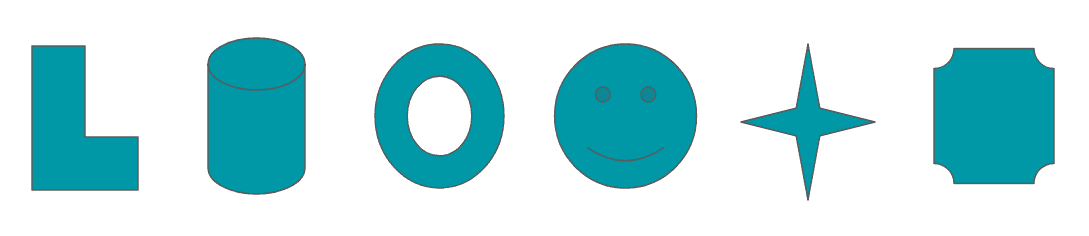
What is a blob?
A blob is a group of connected pixels in an image that shares some common property ( e.g grayscale value ). In this post, our goal is to find the center of a binary blob using OpenCV in Python and C++. If the shape we are interested in is not binary, we have to binarize it first.


What is the centroid of a shape?
The centroid of a shape is the arithmetic mean (i.e. the average) of all the points in a shape. Suppose a shape consists of  distinct points
  , then the centroid is given by
![\[\mathbf{c} = \frac{1}{n} \sum^n_{i=1} \mathbf{x}_i\]](https://learnopencv.com/wp-content/ql-cache/quicklatex.com-d8977626fad8ea01c88c5424f9b0e281_l3.png)
In the context of image processing and computer vision, each shape is made of pixels, and the centroid is simply the weighted average of all the pixels constituting the shape.
Image Moments
We can find the center of the blob using moments in OpenCV. But first of all, we should know what exactly Image moment is all about. Image Moment is a particular weighted average of image pixel intensities, with the help of which we can find some specific properties of an image, like radius, area, centroid etc. To find the centroid of the image, we generally convert it to binary format and then find its center.
The centroid is given by the formula:-
![\[C_x = \cfrac{M_{10}}{M_{00}}\]](https://learnopencv.com/wp-content/ql-cache/quicklatex.com-1aa636507f6ba5fbf430e08b13ecf07e_l3.png)
![\[C_y = \cfrac{M_{01}}{M_{00}}\]](https://learnopencv.com/wp-content/ql-cache/quicklatex.com-d993fc1b3e18f913051c0a476dc132fd_l3.png)
 is the x coordinate and
  is the y coordinate of the centroid and
  denotes the Moment.
Steps for finding Centroid of a Blob in OpenCV
To find the center of the blob, we will perform the following steps:-
1. Convert the Image to grayscale.
2. Perform Binarization on the Image.
3. Find the center of the image after calculating the moments.
Center of a single blob in an image :
To easily follow along with this tutorial, please download code by clicking on the button below. It’s FREE!
C++ Code
// declare Mat variables, thr, gray and src
Mat thr, gray, src;

// convert image to grayscale
cvtColor( src, gray, COLOR_BGR2GRAY );

// convert grayscale to binary image
threshold( gray, thr, 100,255,THRESH_BINARY );

// find moments of the image
Moments m = moments(thr,true);
Point p(m.m10/m.m00, m.m01/m.m00);

// coordinates of centroid
cout<< Mat(p)<< endl;

// show the image with a point mark at the centroid
circle(src, p, 5, Scalar(128,0,0), -1);
imshow("Image with center",src);
waitKey(0);
Python Code
# convert image to grayscale image
gray_image = cv2.cvtColor(img, cv2.COLOR_BGR2GRAY)

# convert the grayscale image to binary image
ret,thresh = cv2.threshold(gray_image,127,255,0)

# calculate moments of binary image
M = cv2.moments(thresh)

# calculate x,y coordinate of center
cX = int(M["m10"] / M["m00"])
cY = int(M["m01"] / M["m00"])

# put text and highlight the center
cv2.circle(img, (cX, cY), 5, (255, 255, 255), -1)
cv2.putText(img, "centroid", (cX - 25, cY - 25),cv2.FONT_HERSHEY_SIMPLEX, 0.5, (255, 255, 255), 2)

# display the image
cv2.imshow("Image", img)
cv2.waitKey(0)
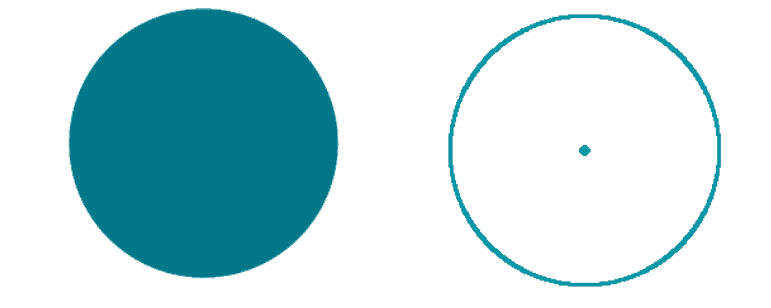
The figure below shows the center of a single blob in an Image.
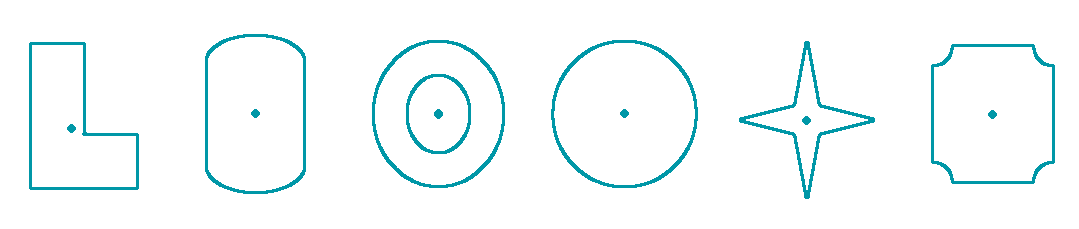
Center of multiple blobs in an Image
Finding the center of only one blob is quite easy, but what if there are multiple blobs in the Image? Well then, we will have to use findContours to find the number of contours in the Image and find the center of each of them. Let us see how it works!
C++ Code
Mat canny_output;
vector<vector<Point> > contours;
vector<Vec4i> hierarchy;

// detect edges using canny
Canny( gray, canny_output, 50, 150, 3 );

// find contours
findContours( canny_output, contours, hierarchy, RETR_TREE, CHAIN_APPROX_SIMPLE, Point(0, 0) );

// get the moments
vector<Moments> mu(contours.size());
for( int i = 0; i<contours.size(); i++ )
{ mu[i] = moments( contours[i], false ); }

// get the centroid of figures.
vector<Point2f> mc(contours.size());
for( int i = 0; i<contours.size(); i++)
{ mc[i] = Point2f( mu[i].m10/mu[i].m00 , mu[i].m01/mu[i].m00 ); }

// draw contours
Mat drawing(canny_output.size(), CV_8UC3, Scalar(255,255,255));
for( int i = 0; i<contours.size(); i++ )
{
Scalar color = Scalar(167,151,0); // B G R values
drawContours(drawing, contours, i, color, 2, 8, hierarchy, 0, Point());
circle( drawing, mc[i], 4, color, -1, 8, 0 );
}

// show the resultant image
namedWindow( "Contours", WINDOW_AUTOSIZE );
imshow( "Contours", drawing );
waitKey(0);
Python Code
# read image through command line
img = cv2.imread(args["ipimage"])

# convert the image to grayscale
gray_image = cv2.cvtColor(img, cv2.COLOR_BGR2GRAY)

# convert the grayscale image to binary image
ret,thresh = cv2.threshold(gray_image,127,255,0)

# find contours in the binary image
im2, contours, hierarchy = cv2.findContours(thresh,cv2.RETR_TREE,cv2.CHAIN_APPROX_SIMPLE)
for c in contours:
   # calculate moments for each contour
   M = cv2.moments(c)

   # calculate x,y coordinate of center
   cX = int(M["m10"] / M["m00"])
   cY = int(M["m01"] / M["m00"])
   cv2.circle(img, (cX, cY), 5, (255, 255, 255), -1)
   cv2.putText(img, "centroid", (cX - 25, cY - 25),cv2.FONT_HERSHEY_SIMPLEX, 0.5, (255, 255, 255), 2)

   # display the image
   cv2.imshow("Image", img)
   cv2.waitKey(0)
Observe that, while finding the center in case of multiple blobs, we use the function findContours, which outputs contours and hierarchy, where the contour is the list of all the contours present in the image.
After running python code for multiple blobs in an Image, you may get cX = int(M[“m10”] / M[“m00”])
ZeroDivisionError: float division by zero
The above error occurs in case If M[“m00”] is zero, i.e when segmentation did not happen perfectly.
Solution:-
You can include, the below code snippet to prevent getting errors, this simply neglects the contours which are not segmented properly.
if M["m00"] != 0:
 cX = int(M["m10"] / M["m00"])
 cY = int(M["m01"] / M["m00"])
else:
 cX, cY = 0, 0
References:-
Official OpenCV documentation on Features and Functions related to contours.