
Last updated on 4th Nov 2022
Document Scanning is the process of converting physical documents into their digital form. It can be done by taking images either via a scanner or just your phone camera. We will discuss how to achieve this efficiently using Computer Vision and Image Processing techniques in this tutorial.
In the present day and age of computers, there is hardly any need for physical paperwork. Still, in the rare cases where physical documents are still required, it is necessary that we have a medium to convert them to digital documents. Thankfully for that, we don’t need the traditional hardware scanners anymore that take up a lot of space and are slow at processing documents.
There are numerous software solutions and apps available to do just that. With the power of computer vision, the process of going from a physical to a scanned document is not very different from pointing a camera at the document and clicking a pic. The speed and ease of use are the main advantages of such solutions, and they are available for computers and mobile devices.
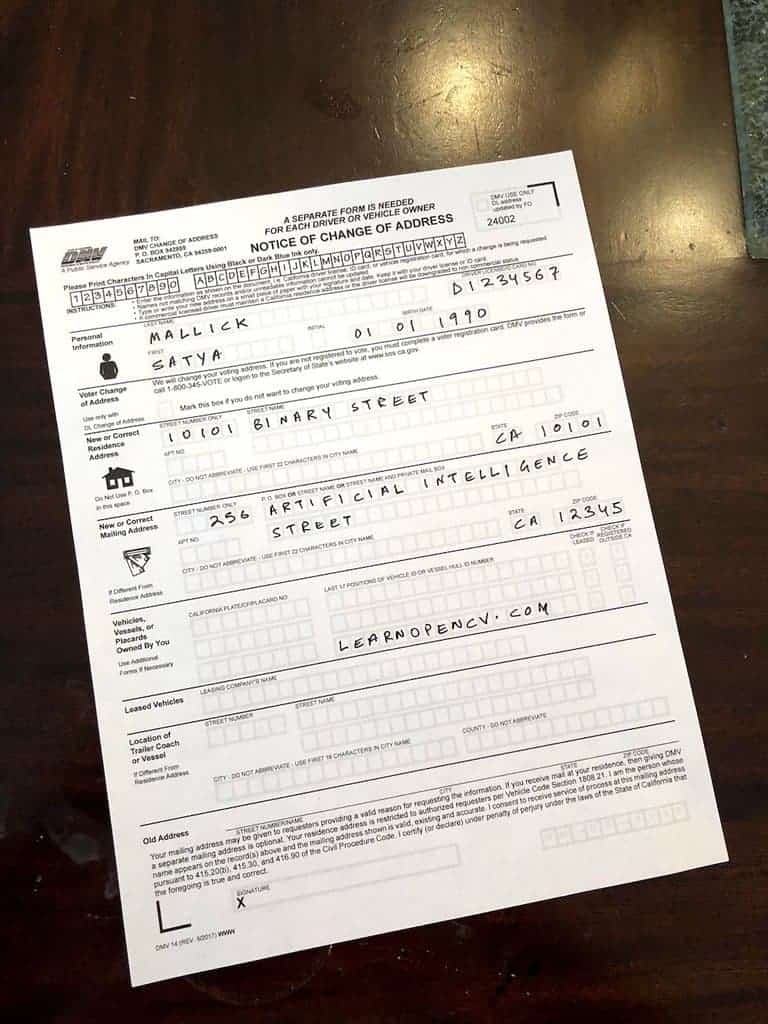
Let us see how a simple OpenCV Document Scanner can be created using classical computer vision techniques, where the input will be an image of the document that we want to scan, and the expected output will be a properly aligned scanned image of the document.
Learning Objective
You will learn building OpenCV Document Scanner using the following classical computer vision techniques.
- Morphological Operation
- Edge Detection
- Contour Detection
- Homography
- GrabCut
- Perspective Transform
- Getting Started with OpenCV Document Scanner
- Morphological operation involved in OpenCV Document Scanner
- The magic of GrabCut in OpenCV Document Scanner
- Edge Detection and Contour Detection
- Detecting the Corner Points
- Perspective Transform
- Streamlit Web Application of OpenCV Document Scanner
- Testing & Result
- Limitations of OpenCV Document Scanner
- References
1. Getting Started with OpenCV Document Scanner
To build OpenCV Document Scanner, we will be using some simple yet powerful tools from OpenCV. The document scanner pipeline is as follows.
- Start with morphological operations to get a blank page.
- Then GrabCut to get rid of the background.
- Detect the edges of the document and its contour using Canny Edge Detection.
- Find the four corners of the document as well as the destination coordinates for these corner points.
- Perform perspective transform to get an aligned document.
- Finally, crop out the document.
NOTE: In OpenCV Document Scanner, we assume that the camera is pointed normally to the document surface. It would mostly be the case when you are trying to scan a document. It also allows us to not worry about the perspective transformation for getting the scanned document.
Original Document
2. Morphological operation involved in OpenCV Document Scanner
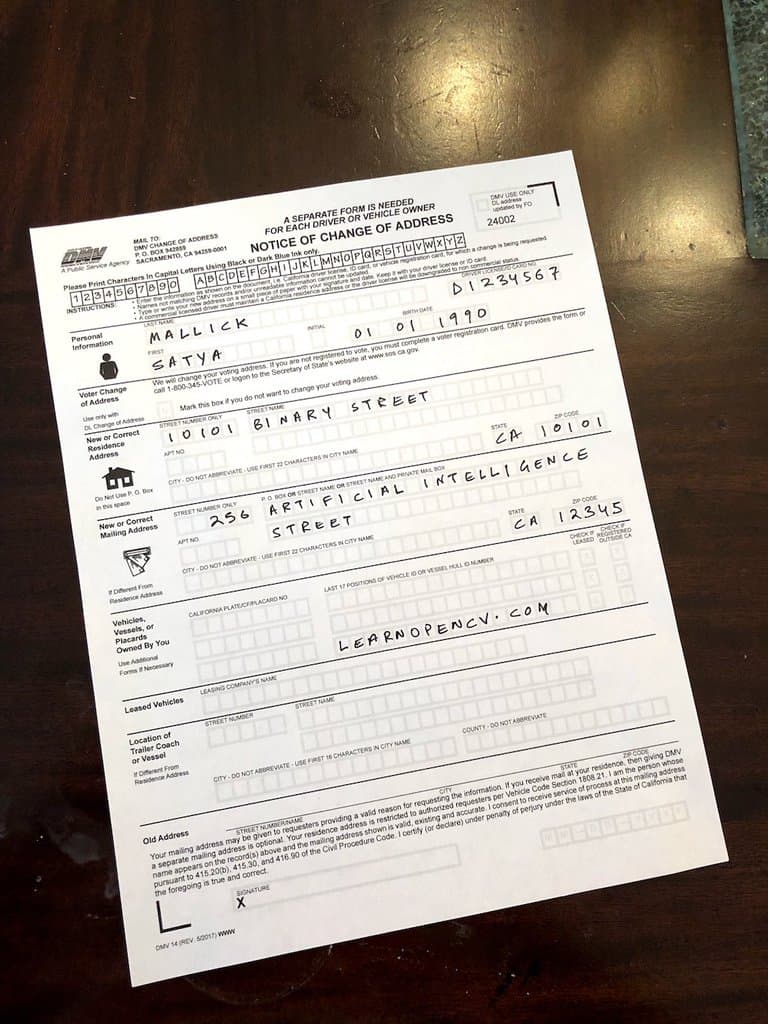
With cv2.morphologyEx(), using basic operations like erosion and dilation, you can perform advanced morphological transformations. Here, we will perform a close operation.
![]()
In morphology, a close operation is nothing but dilation, followed by erosion. Keep repeating these close operations until you get a blank page.
# Repeated Closing operation to remove text from the document.
kernel = np.ones((5,5),np.uint8)
img = cv2.morphologyEx(img, cv2.MORPH_CLOSE, kernel, iterations= 3)
But why do we want a blank document? Well, you will soon be doing edge detection, and you definitely don’t want the contents of the page to interfere with that process.

3. The Magic of GrabCut in OpenCV Document Scanner
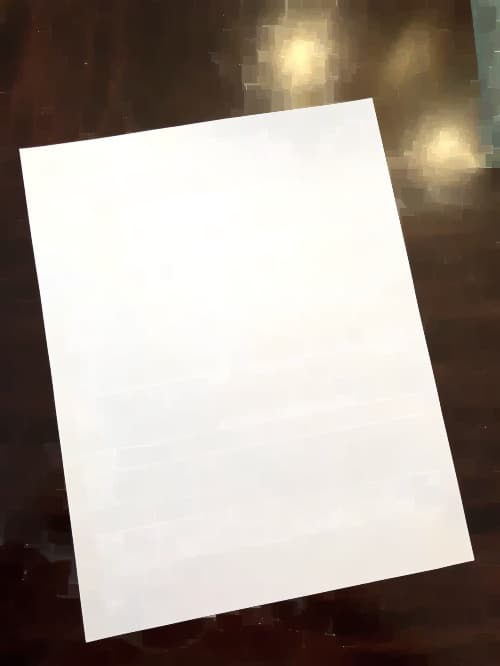
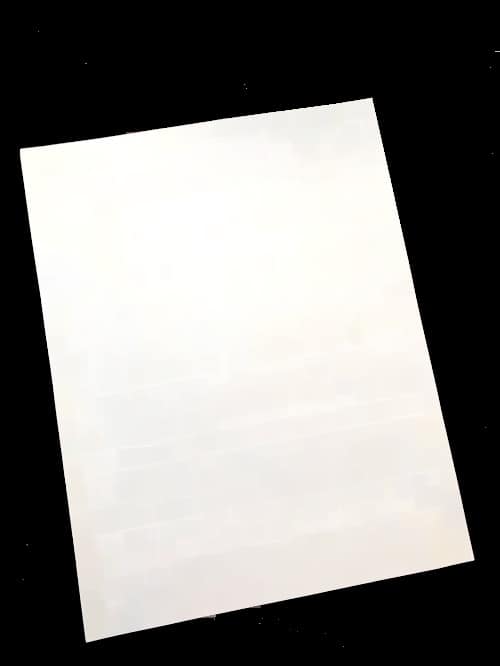
Once you have a blank document, the next step is to get rid of the background. We will use GrabCut to extract the foreground.
- It simply requires a bounding box around the object that is in the foreground, everything outside the bounding box is considered the background.
- GrabCut automatically rids you of all the background, even inside the bounding box. All you’re left with now is the foreground object.
Having users manually draw these bounding boxes won’t really be very ‘automatic’. So, we take the corner 20 pixels as the background, and GrabCut automatically determines the foreground and background, leaving us only with the document.
mask = np.zeros(img.shape[:2],np.uint8)
bgdModel = np.zeros((1,65),np.float64)
fgdModel = np.zeros((1,65),np.float64)
rect = (20,20,img.shape[1]-20,img.shape[0]-20)
cv2.grabCut(img,mask,rect,bgdModel,fgdModel,5,cv2.GC_INIT_WITH_RECT)
mask2 = np.where((mask==2)|(mask==0),0,1).astype('uint8')
img = img*mask2[:,:,np.newaxis]
Assume this ‘rect’ is the bounding box around the document. In many images, however, the document might be a lot smaller than the bounding box, so a lot of background would be inside the bounding box. However, the way GrabCut works, what’s important is that no part of the object should be outside the bounding box, and as long as the background is even remotely uniform, it would give exceptional results.
4. Edge Detection and Contour Detection
Edge Detection
Now that you have a blank page with no background, you’re ready to perform edge detection. Use canny-edge detection to detect the edges of the document. The canny-edge detector can give the precise outline of the document.
gray = cv2.cvtColor(img, cv2.COLOR_BGR2GRAY)
gray = cv2.GaussianBlur(gray, (11, 11), 0)
# Edge Detection.
canny = cv2.Canny(gray, 0, 200)
canny = cv2.dilate(canny, cv2.getStructuringElement(cv2.MORPH_ELLIPSE, (5, 5)))
- First convert the image of the blank page to grayscale, as canny works only on grayscale images.
- Then perform Gaussian Blur to remove noise from the image.
- Finally, do canny-edge detection on the image.
- Also, dilate the image to get a thin outline of the document.
Contour Detection
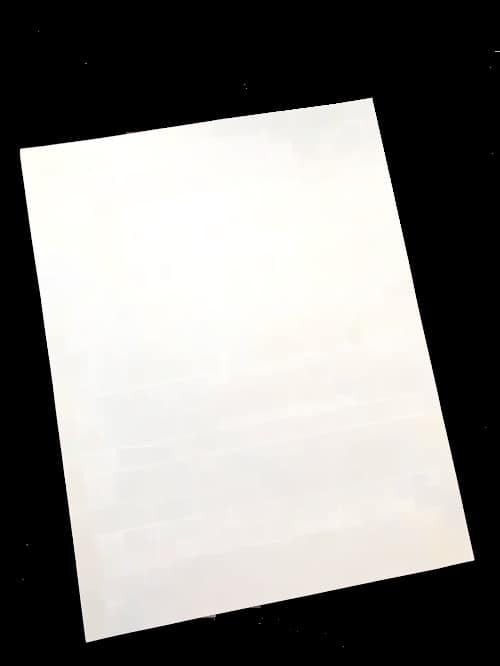
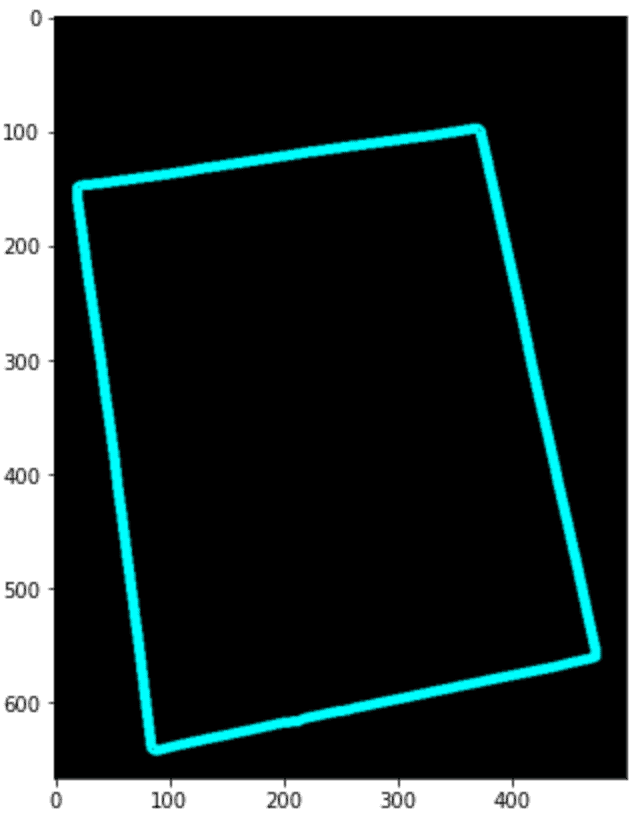
After getting the edges of the document, perform contour detection to get the contours of these edges.
Why not skip edge detection and straightaway detect contours, one might argue. It’s not recommended as GrabCut sometimes inadvertently retains parts of the background.
Once you’re done with contour detection:
- Sort the detected contours according to their size
- Keep only the largest-detected contour
- Then draw this largest-detected contour on a blank canvas
# Blank canvas.
con = np.zeros_like(img)
# Finding contours for the detected edges.
contours, hierarchy = cv2.findContours(canny, cv2.RETR_LIST, cv2.CHAIN_APPROX_NONE)
# Keeping only the largest detected contour.
page = sorted(contours, key=cv2.contourArea, reverse=True)[:5]
con = cv2.drawContours(con, page, -1, (0, 255, 255), 3)
5. Detecting the Corner Points
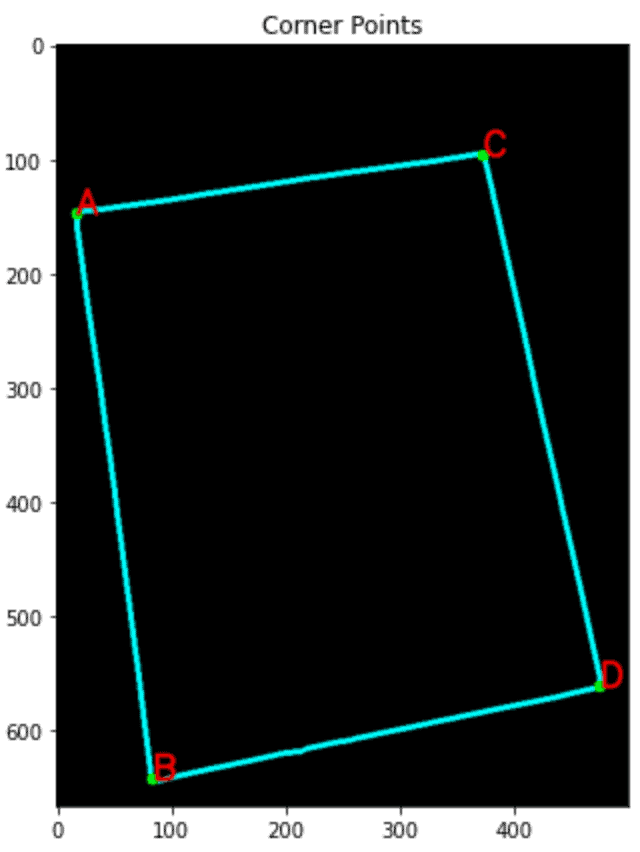
Our end goal is to align the document, and for that, we need its four corners. Now that you have the contour for the edge, use ‘cv2.approxPolyDP’ to get the corner points. Using the Douglas-Peucker algorithm, this function approximates a curve or a polygon with another curve/polygon, with fewer vertices.
# Blank canvas.
con = np.zeros_like(img)
# Loop over the contours.
for c in page:
  # Approximate the contour.
  epsilon = 0.02 * cv2.arcLength(c, True)
  corners = cv2.approxPolyDP(c, epsilon, True)
  # If our approximated contour has four points
  if len(corners) == 4:
      break
cv2.drawContours(con, c, -1, (0, 255, 255), 3)
cv2.drawContours(con, corners, -1, (0, 255, 0), 10)
# Sorting the corners and converting them to desired shape.
corners = sorted(np.concatenate(corners).tolist())

# Displaying the corners.
for index, c in enumerate(corners):
  character = chr(65 + index)
  cv2.putText(con, character, tuple(c), cv2.FONT_HERSHEY_SIMPLEX, 1, (255, 0, 0), 1, cv2.LINE_AA)

Rearranging the Detected Corners
Note that the order of the detected corners is not conventional. Therefore we need a function that rearranges the four points in standard order.
def order_points(pts):
    '''Rearrange coordinates to order:
      top-left, top-right, bottom-right, bottom-left'''
    rect = np.zeros((4, 2), dtype='float32')
    pts = np.array(pts)
    s = pts.sum(axis=1)
    # Top-left point will have the smallest sum.
    rect[0] = pts[np.argmin(s)]
    # Bottom-right point will have the largest sum.
    rect[2] = pts[np.argmax(s)]

    diff = np.diff(pts, axis=1)
    # Top-right point will have the smallest difference.
    rect[1] = pts[np.argmin(diff)]
    # Bottom-left will have the largest difference.
    rect[3] = pts[np.argmax(diff)]
    # Return the ordered coordinates.
    return rect.astype('int').tolist()
Finding the Destination Coordinates
Once you get the corner points for the documents, you only need the destination coordinates to perform perspective transform and align the documents.
(tl, tr, br, bl) = pts
# Finding the maximum width.
widthA = np.sqrt(((br[0] - bl[0]) ** 2) + ((br[1] - bl[1]) ** 2))
widthB = np.sqrt(((tr[0] - tl[0]) ** 2) + ((tr[1] - tl[1]) ** 2))
maxWidth = max(int(widthA), int(widthB))
# Finding the maximum height.
heightA = np.sqrt(((tr[0] - br[0]) ** 2) + ((tr[1] - br[1]) ** 2))
heightB = np.sqrt(((tl[0] - bl[0]) ** 2) + ((tl[1] - bl[1]) ** 2))
maxHeight = max(int(heightA), int(heightB))
# Final destination co-ordinates.
destination_corners = [[0, 0], [maxWidth, 0], [maxWidth, maxHeight], [0, maxHeight]]
Use the width and height of the document to align it with the original image and get the final destination of the document.
6. Perspective Transform to Align the Document
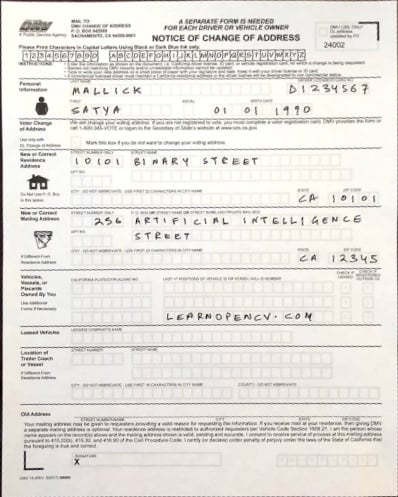
Next, use the detected corner points and the calculated destination points to do perspective transform and align the document.
# Getting the homography.
M = cv2.getPerspectiveTransform(np.float32(corners), np.float32(destination_corners))
# Perspective transform using homography.
final = cv2.warpPerspective(orig_img, M, (destination_corners[2][0], destination_corners[2][1]), flags=cv2.INTER_LINEAR)
7. Streamlit Web Application of OpenCV Document Scanner
Now that our document scanner is ready, take a look at this simple streamlit web application. Along with automatic scanning and alignment, we have also added the functionality of manually setting the document edges. Check out the app using the link below.
To see how the app works, first, lets check out some of the convenience functions used in the streamlit app.
Function to rearrange corner points:
def order_points(pts):
    '''Rearrange coordinates to order:
      top-left, top-right, bottom-right, bottom-left'''
    rect = np.zeros((4, 2), dtype='float32')
    pts = np.array(pts)
    s = pts.sum(axis=1)
    # Top-left point will have the smallest sum.
    rect[0] = pts[np.argmin(s)]
    # Bottom-right point will have the largest sum.
    rect[2] = pts[np.argmax(s)]

    diff = np.diff(pts, axis=1)
    # Top-right point will have the smallest difference.
    rect[1] = pts[np.argmin(diff)]
    # Bottom-left will have the largest difference.
    rect[3] = pts[np.argmax(diff)]
    # return the ordered coordinates
    return rect.astype('int').tolist()
Function to find destination points:
def find_dest(pts):
    (tl, tr, br, bl) = pts
    # Finding the maximum width.
    widthA = np.sqrt(((br[0] - bl[0]) ** 2) + ((br[1] - bl[1]) ** 2))
    widthB = np.sqrt(((tr[0] - tl[0]) ** 2) + ((tr[1] - tl[1]) ** 2))
    maxWidth = max(int(widthA), int(widthB))

    # Finding the maximum height.
    heightA = np.sqrt(((tr[0] - br[0]) ** 2) + ((tr[1] - br[1]) ** 2))
    heightB = np.sqrt(((tl[0] - bl[0]) ** 2) + ((tl[1] - bl[1]) ** 2))
    maxHeight = max(int(heightA), int(heightB))
    # Final destination co-ordinates.
    destination_corners = [[0, 0], [maxWidth, 0], [maxWidth, maxHeight], [0, maxHeight]]

    return order_points(destination_corners)
The main function to scan the documents:
def scan(img):
    # Resize image to workable size
    dim_limit = 1080
    max_dim = max(img.shape)
    if max_dim > dim_limit:
        resize_scale = dim_limit / max_dim
        img = cv2.resize(img, None, fx=resize_scale, fy=resize_scale)
    # Create a copy of resized original image for later use
    orig_img = img.copy()
    # Repeated Closing operation to remove text from the document.
    kernel = np.ones((5, 5), np.uint8)
    img = cv2.morphologyEx(img, cv2.MORPH_CLOSE, kernel, iterations=3)
    # GrabCut
    mask = np.zeros(img.shape[:2], np.uint8)
    bgdModel = np.zeros((1, 65), np.float64)
    fgdModel = np.zeros((1, 65), np.float64)
    rect = (20, 20, img.shape[1] - 20, img.shape[0] - 20)
    cv2.grabCut(img, mask, rect, bgdModel, fgdModel, 5, cv2.GC_INIT_WITH_RECT)
    mask2 = np.where((mask == 2) | (mask == 0), 0, 1).astype('uint8')
    img = img * mask2[:, :, np.newaxis]

    gray = cv2.cvtColor(img, cv2.COLOR_BGR2GRAY)
    gray = cv2.GaussianBlur(gray, (11, 11), 0)
    # Edge Detection.
    canny = cv2.Canny(gray, 0, 200)
    canny = cv2.dilate(canny, cv2.getStructuringElement(cv2.MORPH_ELLIPSE, (5, 5)))

    # Finding contours for the detected edges.
    contours, hierarchy = cv2.findContours(canny, cv2.RETR_LIST, cv2.CHAIN_APPROX_NONE)
    # Keeping only the largest detected contour.
    page = sorted(contours, key=cv2.contourArea, reverse=True)[:5]

    # Detecting Edges through Contour approximation.
    # Loop over the contours.
    if len(page) == 0:
        return orig_img
    for c in page:
        # Approximate the contour.
        epsilon = 0.02 * cv2.arcLength(c, True)
        corners = cv2.approxPolyDP(c, epsilon, True)
        # If our approximated contour has four points.
        if len(corners) == 4:
            break
    # Sorting the corners and converting them to desired shape.
    corners = sorted(np.concatenate(corners).tolist())
    # For 4 corner points being detected.
    corners = order_points(corners)

    destination_corners = find_dest(corners)

    h, w = orig_img.shape[:2]
    # Getting the homography.
    M = cv2.getPerspectiveTransform(np.float32(corners), np.float32(destination_corners))
    # Perspective transform using homography.
    final = cv2.warpPerspective(orig_img, M, (destination_corners[2][0], destination_corners[2][1]),
                                flags=cv2.INTER_LINEAR)
    return final
Function to generate a link to download a particular image file:
def get_image_download_link(img, filename, text):
    buffered = io.BytesIO()
    img.save(buffered, format='JPEG')
    img_str = base64.b64encode(buffered.getvalue()).decode()
    href = f'<a href="data:file/txt;base64,{img_str}" download="{filename}">{text}</a>'
    return href
Now, let’s discuss the body of the streamlit app.
- We set the title in the sidebar using
st.sidebar.title('Document Scanner')
- Next, provide the option to upload an image in the sidebar. On mobile devices, you can directly take an image using its camera.
uploaded_file = st.sidebar.file_uploader("Upload Image of Document:", type=["png", "jpg"])
image = None
final = None
- Create two columns to display the input image and the scanned document side-by-side for the automatic-scanning mode.
col1, col2 = st.columns(2)
- Also, set some variables as None for later use.
- Now, if a document is uploaded, we convert the image into a cv2 image and provide a toggle for manual mode in the sidebar.
if uploaded_file is not None:

    # Convert the file to an opencv image.
    file_bytes = np.asarray(bytearray(uploaded_file.read()), dtype=np.uint8)
    image = cv2.imdecode(file_bytes, 1)

    manual = st.sidebar.checkbox('Adjust Manually', False)
    h, w = image.shape[:2]
    h_, w_ = int(h * 400 / w), 400
To provide the functionality of manually selecting document edges, use the streamlit_drawable_canvas. If manual mode is toggled, you need not perform corner detection. Users can trace the edges of the document simply by clicking the corners and then perform perspective transform to get the aligned document.
    if manual:

        st.subheader('Select the 4 corners')
        st.markdown('### Double-Click to reset last point, Right-Click to select')

        # Create a canvas component
        canvas_result = st_canvas(
            fill_color="rgba(255, 165, 0, 0.3)",  # Fixed fill color with some opacity
            stroke_width=3,
            background_image=Image.open(uploaded_file).resize((h_, w_)),
            update_streamlit=True,
            height=h_,
            width=w_,
            drawing_mode='polygon',
            key="canvas",
        )
        st.sidebar.caption('Happy with the manual selection?')
        if st.sidebar.button('Get Scanned'):
            # Do something interesting with the image data and paths
            points = order_points([i[1:3] for i in canvas_result.json_data['objects'][0]['path'][:4]])
            points = np.multiply(points, w / 400)

            dest = find_dest(points)

            # Getting the homography.
            M = cv2.getPerspectiveTransform(np.float32(points), np.float32(dest))
            # Perspective transform using homography.
            final = cv2.warpPerspective(image, M, (dest[2][0], dest[2][1]), flags=cv2.INTER_LINEAR)
            st.image(final, channels='BGR', use_column_width=True)
If manual mode is not selected, use the scan function which performs all the steps discussed earlier and provides the scanned document. These are displayed side-by-side on the streamlit app.
    else:
        with col1:
            st.title('Input')
            st.image(image, channels='BGR', use_column_width=True)
        with col2:
            st.title('Scanned')
            final = scan(image)
            st.image(final, channels='BGR', use_column_width=True)
- Once you have the scanned document in the final variable, display the option to download the result.
    if final is not None:
        # Display link.
        result = Image.fromarray(final[:, :, ::-1])
        st.sidebar.markdown(get_image_download_link(result, 'output.png', 'Download ' + 'Output'),
                            unsafe_allow_html=True)
And our Document Scanner Web Application is ready.
8. Testing and Results

We tested on 23 different backgrounds and various orientations, and the automatic document scanner worked well in almost all the cases.
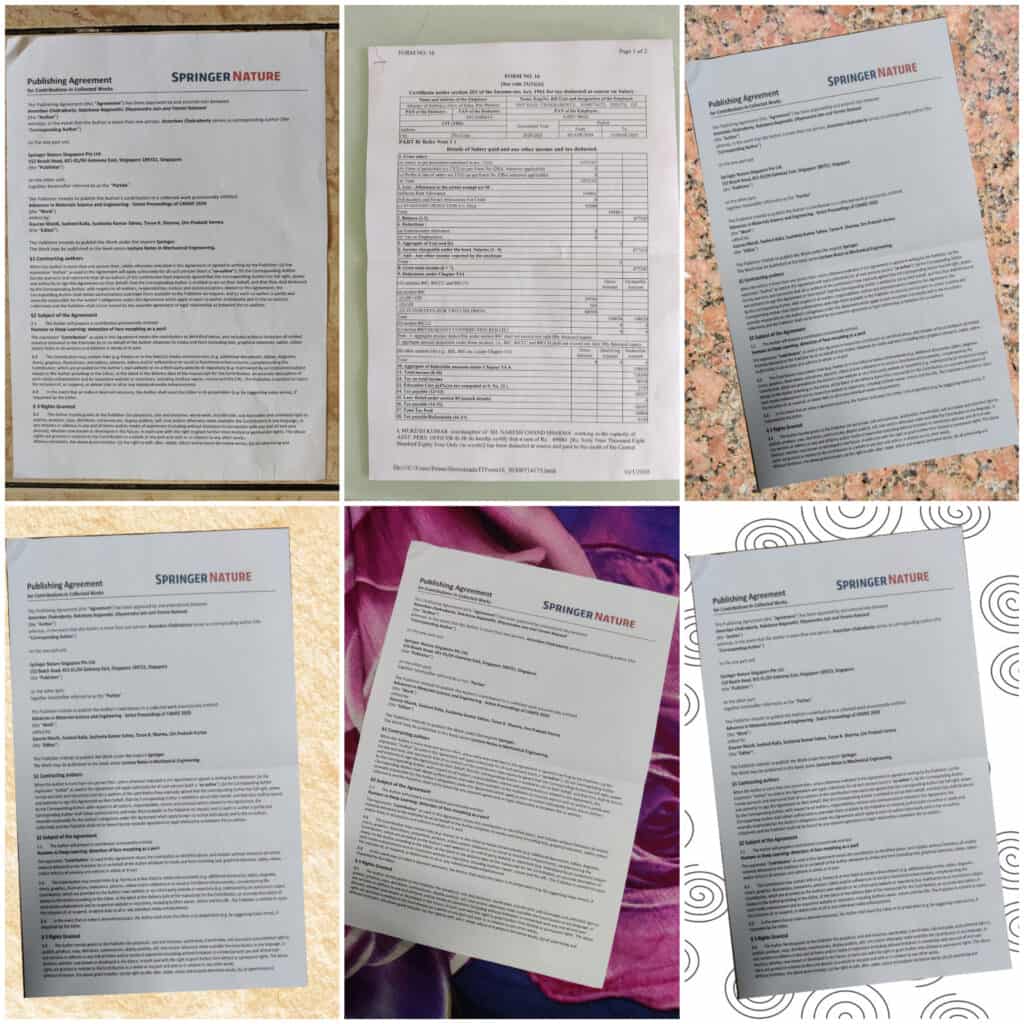
As you can see above, we have tested for a range of backgrounds and orientations, and it worked with all of these.
- Even images where the background has white and is similar to that of the document, GrabCut allows us to scan them. Had we opted for other methods to get the document, for example, thresholding, we would have faced issues.
- Also, GrabCut is quite fast. Though its speed depends on the size of the image and can be slow for very high-resolution images. It only takes a couple of seconds to scan a medium-sized image.
9. Limitations
Below are some example documents where this approach fails.
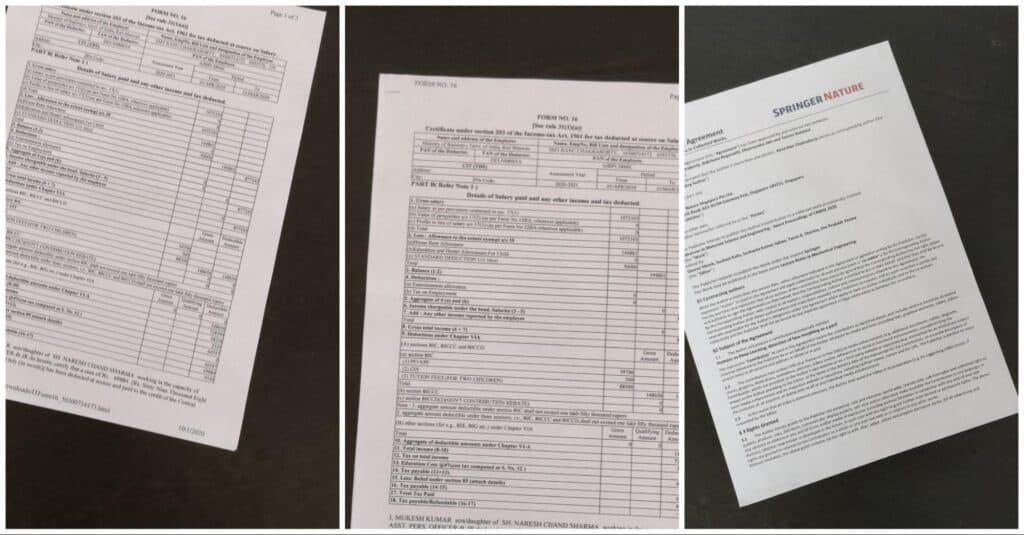
When a part of the document is outside the image, a corner perhaps going missing, GrabCut cannot scan. This is the only limitation of using GrabCut. In most of the other cases, our document scanner works well.
Another limitation of this approach is edge and contour detection. If there is a lot of noise in the background, a number of unwanted edges will be detected, and in some cases, the contour detection step can mistake those edges for the document. Also, if the document edges are not distinguishable from the background, contour detection might not work entirely.
But GrabCut and contour detection is not the only proven approach for document scanning. For consumer-grade Document scanning solutions, deep learning techniques such as corner point detection and segmentation are preferred as they are more robust.
With that thought, a newer version of Document Scanner using Deep Learning has been created. It utilizes the DeepLabV3 semantic segmentation model to separate the document from the background and performs well compared to the traditional method by eliminating some of its limitations discussed above.
SUMMARY
We looked at the different classical computer vision techniques that can be used to create a simple yet effective OpenCV Document Scanner. You also learned how the application could be packaged and deployed on Streamlit. Finally, we discussed where this particular document scanner might fail and what alternatives are used in the industry.
Go for the OPENCV FOR BEGINNERS course to learn about feature-matching and other techniques that can get similar results. And why stop at just a document scanner? This course will tell you all you need to know about face detection, object tracking, human pose estimation, and many more things in computer vision that can help you build your dream app.
References
- https://learnopencv.com/homography-examples-using-opencv-python-c/
- https://dontrepeatyourself.org/post/learn-opencv-by-building-a-document-scanner/
- https://docs.opencv.org/4.x/d9/dab/tutorial_homography.html
- https://docs.opencv.org/3.4/d8/d83/tutorial_py_grabcut.html
- https://learnopencv.com/image-alignment-feature-based-using-opencv-c-python/


100K+ Learners
Join Free OpenCV Bootcamp3 Hours of Learning