Since the advent of diffusion models, Computer Vision has seen tremendous growth in image generation capabilities. This spans image generation models, techniques, datasets, pipelines, and libraries. Amid all the innovations, the Hugging Face Diffusers library remains at the forefront. In this article, we will explore the Hugging Face Diffusers library for different image generation techniques. By the end of this article, you will be well-equipped to use the Hugging Face Diffusers library for generating images with different techniques. In addition to that, you will also get access to a notebook with all the experiments that we will discuss in this article.
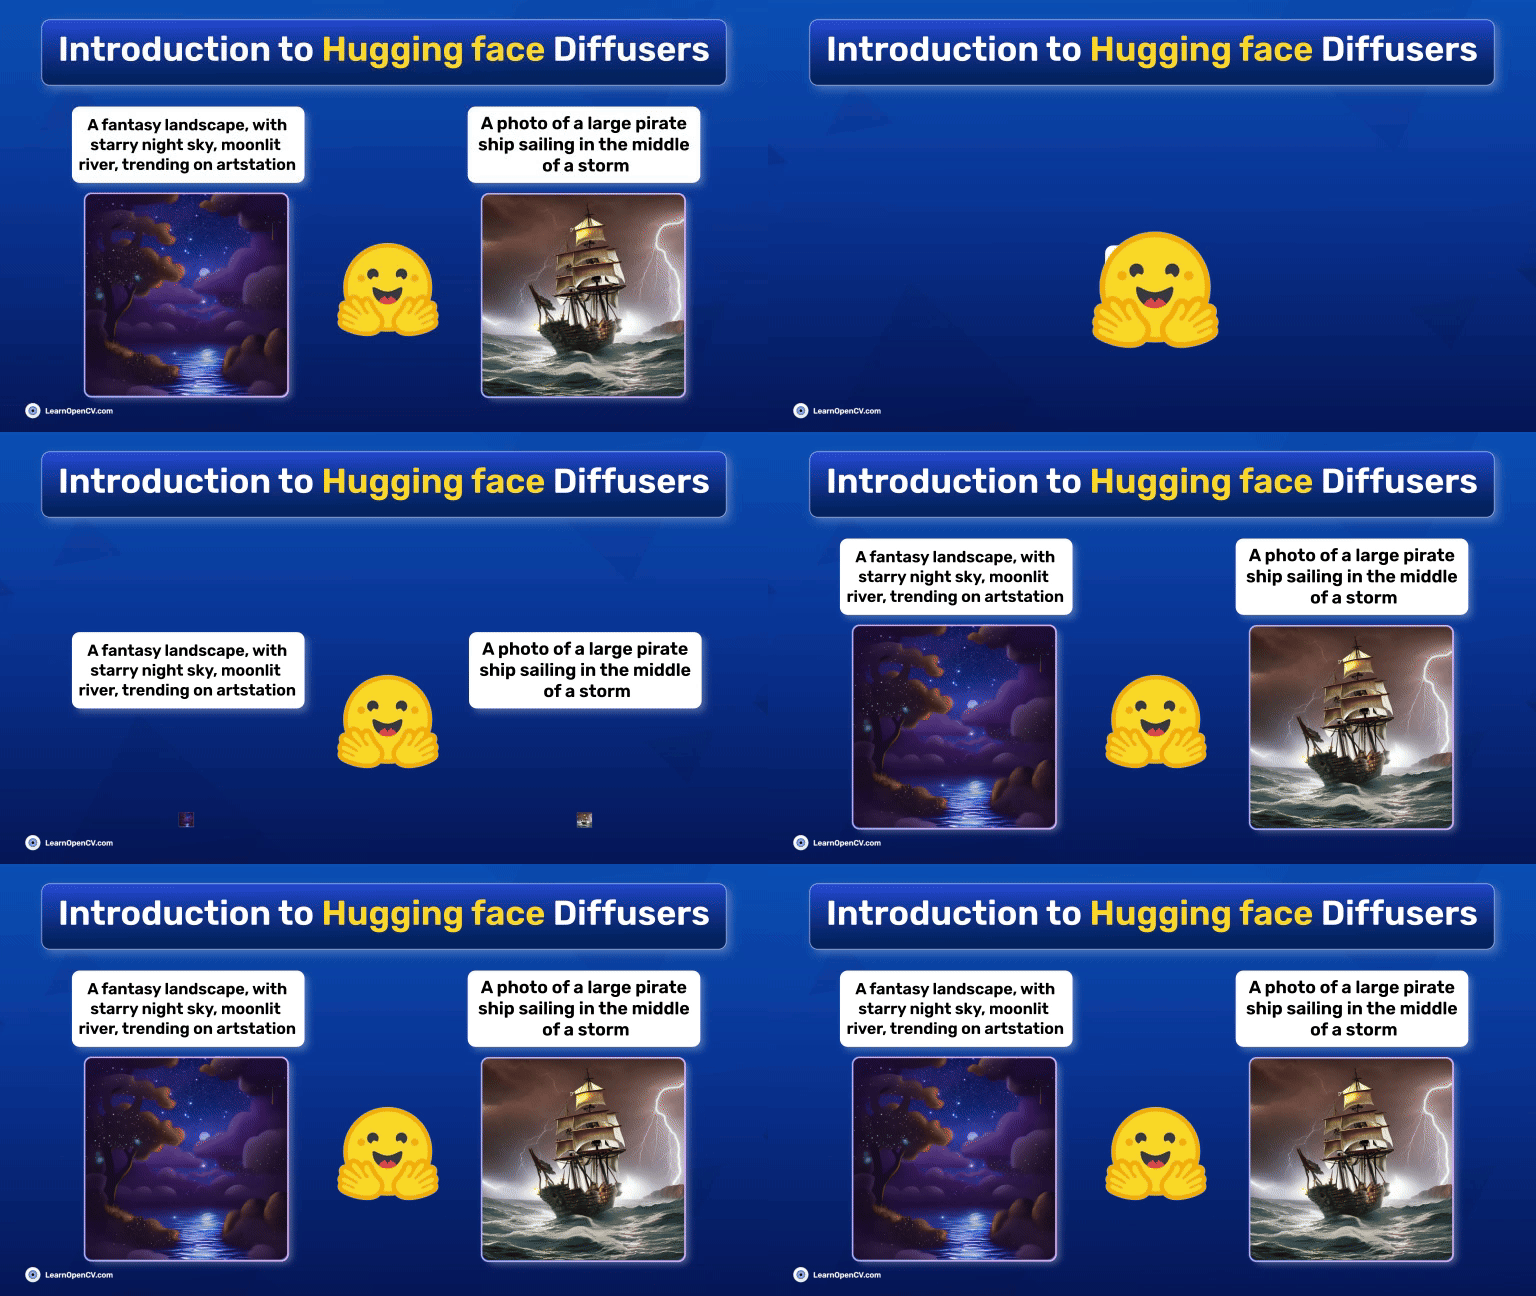
Figure 1. Generate images gif or featured image here…
- What is Hugging Face Diffusers?
- Setting Up Hugging Face Diffusers
- Text-to-Image with Stable Diffusion Pipeline
- Stable Diffusion Image-to-Image Pipeline
- Hugging Face Diffusers AutoPipeline
- AutoPipeline for Image-to-Image
- AutoPipeline for Image InPainting
- Dynamic Masking for Inpainting
- Key Takeaways
- Summary and Conclusion
Here, we will take a comprehensive look at the capabilities of Diffusers and several of its pipelines.
What is Hugging Face Diffusers?
The Diffusers library by Hugging Face is one of the best libraries for pretrained diffusion models, image, video, and audio generation pipelines. It’s easy to use, and customizable, with a myriad of options to choose from. We can start generating or modifying images with Stable Diffusion models with just a few lines of code.

The following are some of the highlights of the libraries:
- Availability of all the official Stable Diffusion models along with hundreds of fine-tuned models for task and image specific generation.
- Option to swap noise schedulers with the same pipeline with just a single line of code change.
- Easy integration with Gradio to create seamless UI and shareable applications.
The above are only some of the benefits of the Diffusers library. e will cover a lot more about image generation and dive deep into the primary components of the library.
Setting Up Hugging Face Diffusers
Before we jump into its image generation capabilities, we need to install the library along with some additional dependencies.
Install the Hugging Face Diffusers library using the pip command.
pip install diffusers
Along with that, we also need the Transformers and Accelerate libraries.
pip install transformers
pip install accelerate
That’s all that is needed as part of setting up Diffusers for image generation. Let’s move into the code for generating images using Diffusers.
Text-to-Image with Stable Diffusion Pipeline
The first step that needs to be done before generating images is setting the seed. This will ensure the generation of the same images for the same prompt and the number of steps. This makes it easier for us to compare images generated from different models, schedulers, and the number of steps.
seed = 42
Here, we will use a seed value of 42.
The diffusers library provides several pipelines for different tasks to use Stable Diffusion models. The most common use case is text-to-image generation for which the diffusers library provides the StableDiffusionPipeline.
Let’s start with creating an image using the pipeline along with the Stable Diffusion 1.5 model.
Stable Diffusion 1.5
First, import torch, StableDiffusionPipeline, and set the computation device.
import torch

from diffusers import StableDiffusionPipeline
It is advised to run diffusion models on the GPU, which makes the processing much faster compared to the CPU. We define the GPU device in the following code block.
# Set computation device.
device = torch.device('cuda:0' if torch.cuda.is_available() else 'cpu')
Before generating images, initialize the StableDiffusionPipeline using the from_pretrained method. This accepts the model name and a few other parameters, and then we load the pipeline to the GPU device.
pipe = StableDiffusionPipeline.from_pretrained(
    "runwayml/stable-diffusion-v1-5",
    use_safetensors=True,
    torch_dtype=torch.float16,
).to(device)
In the above code block, load the Stable Diffusion 1.5 model from the runwayml/stable-diffusion-v1-5 tag andalso use Safetensors and Float 16 data type.
safetensors is a new and secure file format for storing and loading tensors of saved models. This new format makes it difficult to store malicious code in saved models, which is becoming increasingly important with the evolution of Generative AI. In the code blocks shown, load safetensors by passing use_safetensors=True.
Typically, model weights are loaded in Float 32 (FP32) format. However, the Float 16 (FP16) format is being adopted widely now as more GPUs have started supporting it. The primary benefit of FP16 over FP32 is less usage of GPU memory, which may become vital when running Diffusion models on resource constrained devices.
Executing the above code block will download the model and configuration files for the first time if not already present.
The next code block defines a prompt and passes it through the pipeline to generate the image. We run the inference for 150 steps defined by the num_inference_steps parameter. Additionally, we pass the seed to the pipeline so that we always get the same image.
# Prompting to generate image.
prompt = "A photo of a large pirate ship sailing in the middle of a storm and lightning, highly detailed, unreal engine effect"
image = pipe(
    prompt, num_inference_steps=150, generator=torch.manual_seed(seed)
).images[0]

image
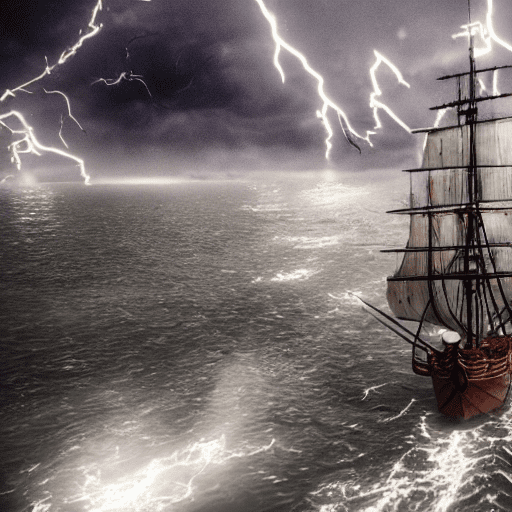
The following is the generated image.
Stable Diffusion 2.1
We can use any Stable Diffusion model using StableDiffusionPipeline. The following example shows the use of Stable Diffusion 2.1 to generate an image.
pipe = StableDiffusionPipeline.from_pretrained(
    "stabilityai/stable-diffusion-2-1",
    torch_dtype=torch.float16,
    variant="fp16"
)

pipe = pipe.to(device)
While generating the above pipeline, we only need to change the model tag while keeping the other parameters the same.
Then. use the same prompt to generate an image.
prompt = "A photo of a large pirate ship sailing in the middle of a storm and lightning, highly detailed, unreal engine effect"
image = pipe(
    prompt, num_inference_steps=150, generator=torch.manual_seed(seed)
).images[0]
image
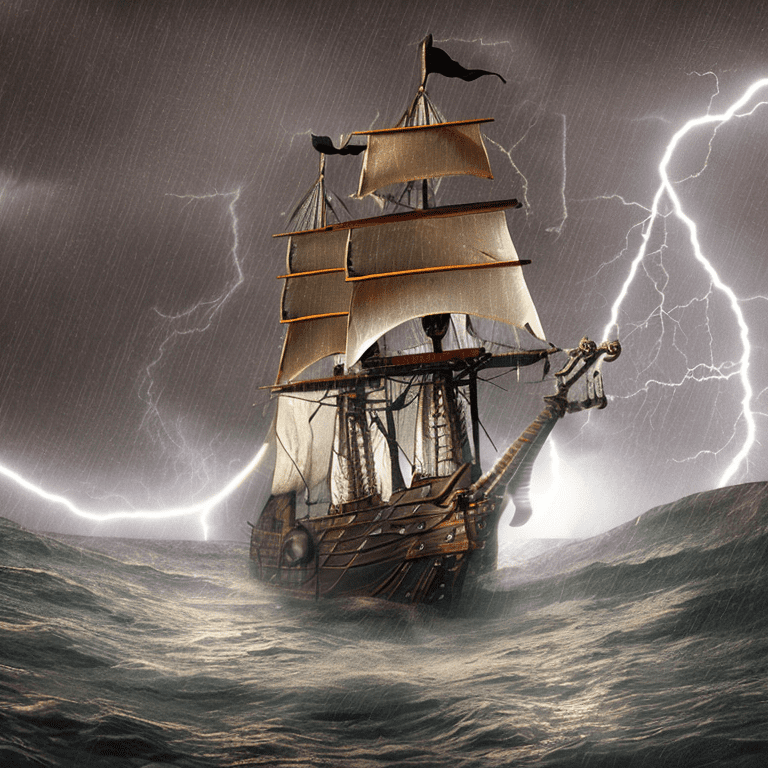
In most cases, Stable Diffusion 2.1 generates higher fidelity images compared to Stable Diffusion 1.5. It is apparent from the above image as well. Stable Diffusion 2.1 generates images at 768×768 resolution whereas Stable Diffusion 1.5 generates images at 512×512 resolution.
Using Negative Prompt with StableDiffusionPipeline
When generating images, we would want to minimize distorted, blurry, and unattractive images as much as possible. For this, Diffusers’s pipeline provides a negative_prompt argument which accepts a prompt string signifying the parts that we do not want in the image.
Let’s try that out with Stable Diffusion 2.1.
prompt = "A photo of a large pirate ship sailing in the middle of a storm and lightning, highly detailed, unreal engine effect"
image = pipe(
    prompt,
    num_inference_steps=150,
    generator=torch.manual_seed(seed),
    negative_prompt='low resolution, distorted, ugly, deformed, disfigured, poor details'
).images[0]
image
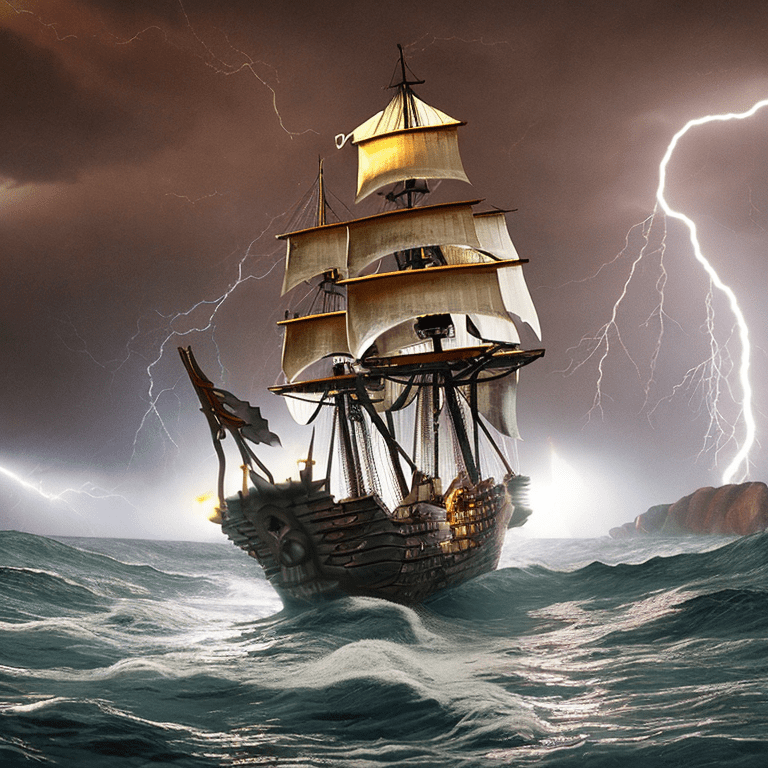
This time, the model generates a much sharper image with more intricate details on the ship and better reflections on the water as well. However, we can also observe loss of detail in the raindrops. This is one of the adverse effects of using negative prompts. Sometimes, they may cause the loss of certain details while enhancing others.
Swapping Schedulers
Stable Diffusion models use a scheduling technique at each time step to generate the images. You can learn more about schedulers in our Denoising Diffusion Probabilistic Models article.
We can also swap these schedulers to generate different images using the same prompt. In general, some schedulers work better than others. However, in most cases, we can safely leave it to the default setting which is DDIMScheduler.
from diffusers import EulerAncestralDiscreteScheduler
The pipe object has a scheduler attribute to assign a new scheduler.
pipe.scheduler = EulerAncestralDiscreteScheduler.from_config(pipe.scheduler.config)
image = pipe(
    prompt,
    num_inference_steps=150,
    generator=torch.manual_seed(seed),
    negative_prompt='low resolution, distorted, ugly, deformed, disfigured, poor details'
).images[0]

image
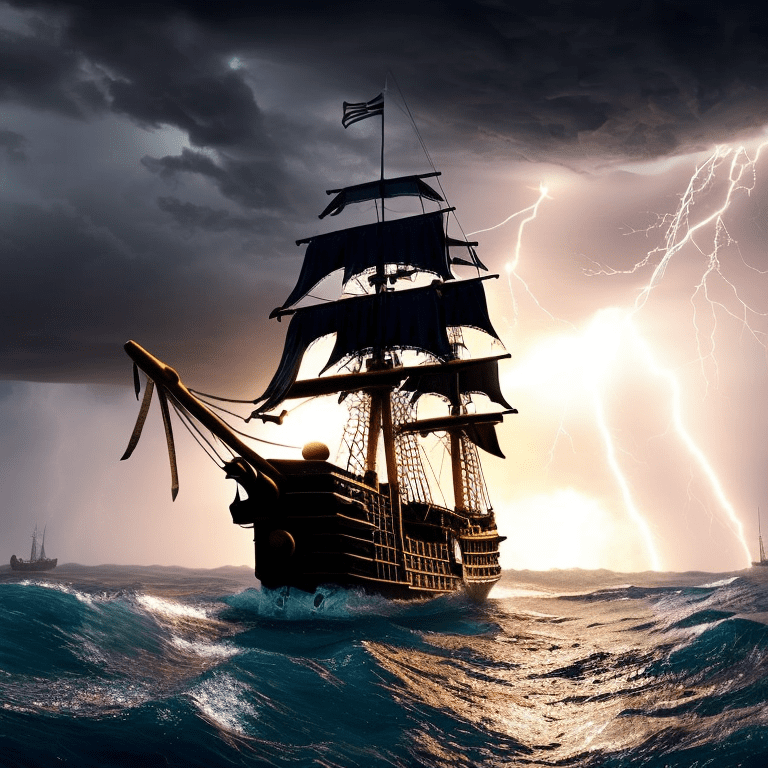
Although it is difficult to say that one scheduler will always be better than the other, EulerAncestralDiscreteScheduler generates very high quality images. This is obvious from the above image which shows quality details of the water and lightning.
Stable Diffusion Image-to-Image Pipeline
There are times when we want to transfer the style of one image to another generated image. This is more commonly known as style transfer. We can do so with the Hugging Face Diffusers library using the StableDiffusionImg2ImgPipeline.
First, let’s import the required additional modules.
from PIL import Image

from diffusers import StableDiffusionImg2ImgPipeline
Next, initialize a new pipeline and read a style image.
pipe = StableDiffusionImg2ImgPipeline.from_pretrained(
    'stabilityai/stable-diffusion-2-1',
    torch_dtype=torch.float16
).to(device)

image_path = 'images/abstract_art_1.jpg'

init_image = Image.open(image_path).convert("RGB")
init_image = init_image.resize((768, 768))

init_image
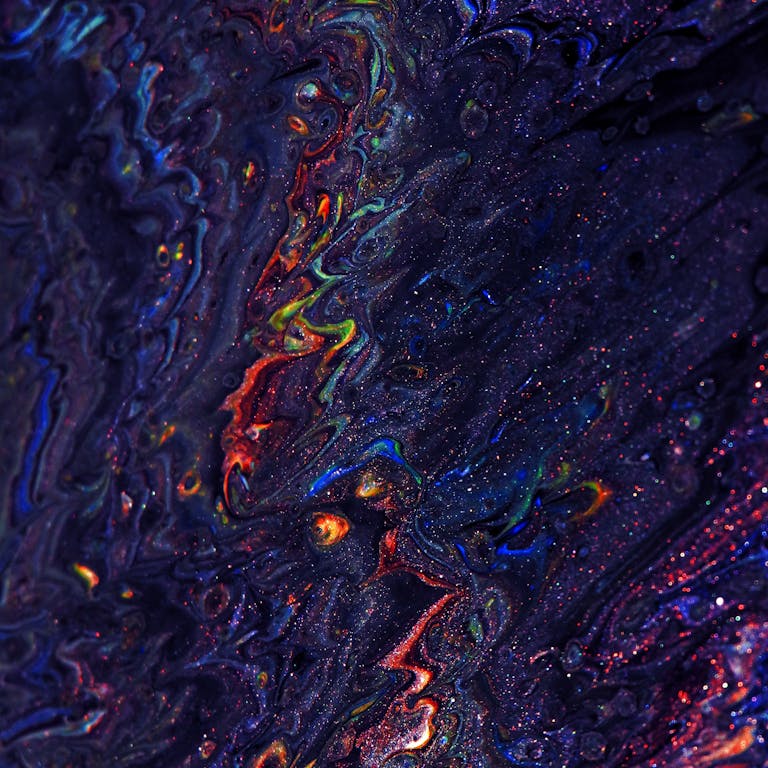
The above is an abstract art image. resize it to 768×768 resolution as the Stable Diffusion 2.1 model will be used for image generation.
While executing the pipeline, we need to pass the init_image and a prompt along with additional arguments needed for image generation.
prompt = "A fantasy landscape, with starry night sky, moonlit river, trending on artstation"

image = pipe(
    prompt=prompt,
    image=init_image,
    num_inference_steps=150,
    strength=1,
    generator=torch.manual_seed(seed)
).images[0]

image
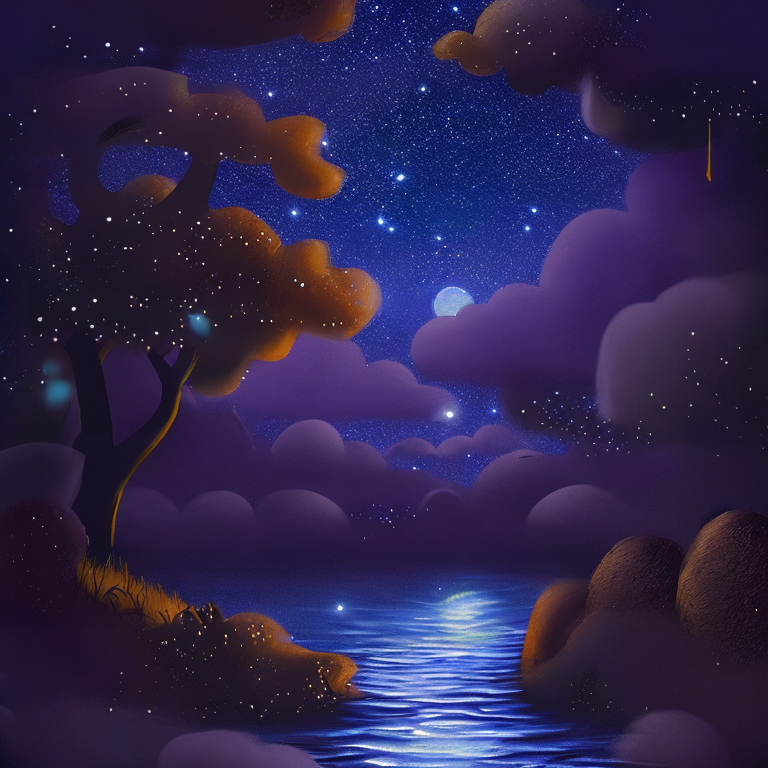
The model outputs a beautiful image preserving the color of the initialization image while following the prompt aptly.
Hugging Face Diffusers AutoPipeline
Remembering which pipeline to use can be confusing as individuals and even organizations can contribute models. To tackle this, diffusers provide the AutoPipeline which detects the task based on the models and the arguments provided.
We can pass any model path from the Hugging Face Hub depending on the task, no matter which organization has contributed to it or even if it is a stable diffusion variation or not.
Let’s start with a text-to-image example.
from diffusers import AutoPipelineForText2Image
pipe = AutoPipelineForText2Image.from_pretrained(
    'stabilityai/stable-diffusion-2-1',
    torch_dtype=torch.float16,
    use_safetensors=True
).to(device)
The rest of the code for generating images remains the same as in our previous approach.
prompt = "A white tiger, anime style, realism, detailed line art, fine details, solid lines"

image = pipe(
    prompt,
    num_inference_steps=150,
    generator=torch.manual_seed(seed)
).images[0]

image

AutoPipeline for Image-to-Image
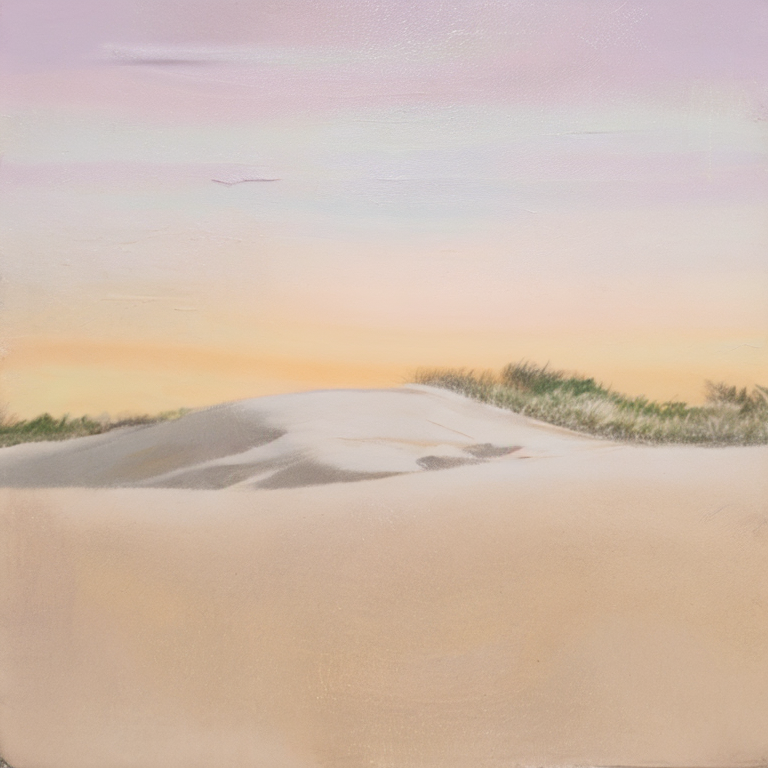
We can also use the AutoPipeline for image-to-image generation to transfer the style of one image to the generated image.
from diffusers import AutoPipelineForImage2Image

pipe = AutoPipelineForImage2Image.from_pretrained(
    'stabilityai/stable-diffusion-2-1',
    torch_dtype=torch.float16,
    use_safetensors=True,
).to(device)

image_path = 'images/abstract_art_2.jpg'

init_image = Image.open(image_path).convert("RGB")
init_image
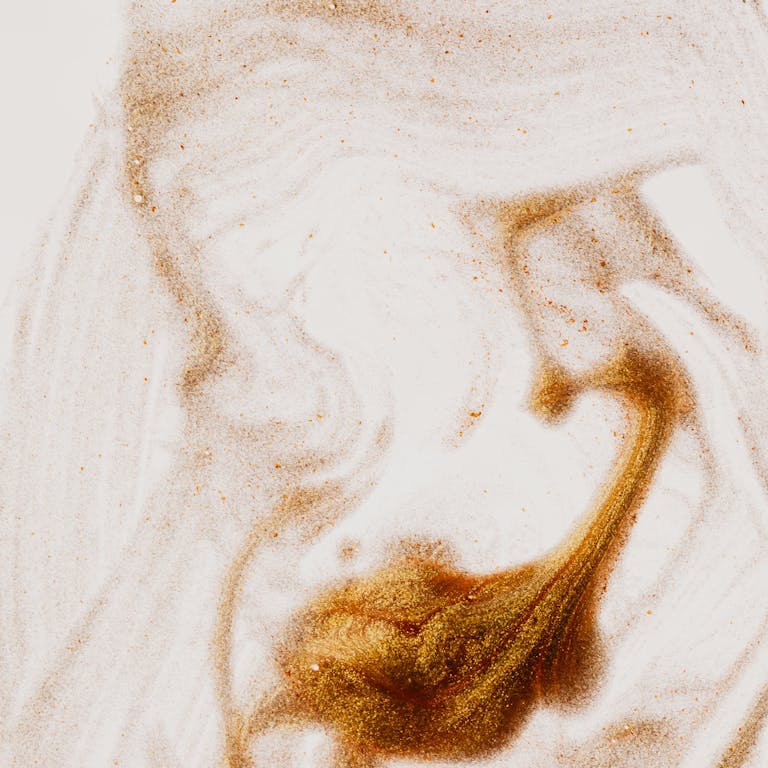
Following is our initialization image.
prompt = "a painting of sand dunes in a desert, with sun rising on the horizon, sand particle style, pastel drawing, on canvas"

image = pipe(
    prompt,
    init_image,
    num_inference_steps=150,
    strength=1.0,
    generator=torch.manual_seed(seed)
).images[0]

image
AutoPipeline for Image InPainting
One of the most interesting use cases of generative models is inpainting. Inpainting is the task of creating a mask on an image, providing a prompt, and expecting the generative AI model to create the object in place of the mask based on the prompt. This may sound simple, however, the training strategy varies compared to training the vanilla image generation model. It requires additional fine-tuning and data. We will delve deeper into the training techniques while fine-tuning our own Stable Diffusion inpainting model in later parts of the series.
For now, let’s focus on using AutoPipeline for image inpainting with Stable Diffusion and Hugging Face Diffusers.
from diffusers import AutoPipelineForInpainting
from diffusers.utils import load_image
For inpainting, we load the same Stable Diffusion 1.5.
pipeline = AutoPipelineForInpainting.from_pretrained(
    "runwayml/stable-diffusion-v1-5",
    torch_dtype=torch.float16,
    use_safetensors=True
).to(device)
It’s interesting to note that the same image generation model can be used for inpainting. The rest of the initializations for inpainting are done by the AutoPipelineForInpainting class.
For image inpainting, we need two components:
- An input image in RGB format.
- A binary mask.
The following code block downloads the image and mask from Dropbox URLs.
img_url = "https://www.dropbox.com/scl/fi/oymummr3q4i86fbx79qv4/car.jpg?rlkey=8aogj5fwb0lrzd5u36rb3ifih&dl=1"
mask_url = "https://www.dropbox.com/scl/fi/le25tqopqapligom78myp/car_mask.png?rlkey=8t556dfxi1mr543j5fdwcg5mc&dl=1"

init_image = load_image(img_url).convert("RGB")
mask_image = load_image(mask_url).convert("RGB")
Following are the input images and masks.


The mask contains white pixels (255, 255, 255) in the region where the car is present and the rest is black pixels (0, 0, 0). That’s how the Stable Diffusion model knows where to generate the image based on the prompt.
prompt = "A glass house in the middle of a ground"
image = pipeline(
    prompt,
    image=init_image,
    mask_image=mask_image,
    num_inference_steps=150,
    generator=torch.manual_seed(seed)
).images[0]

image
When executing the pipeline, we provide an additional mask_image argument that accepts the binary mask.
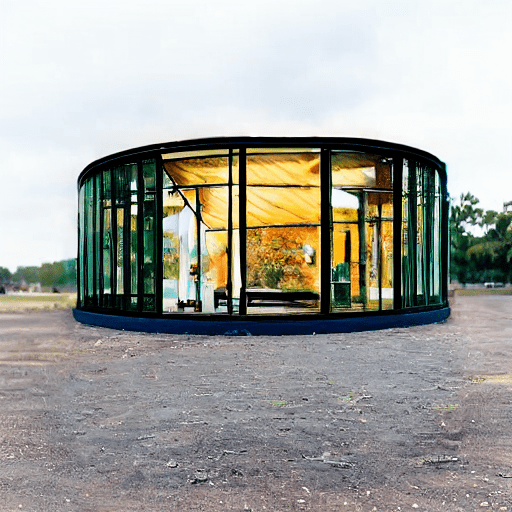
In the final image, the glass house is generated only in the masked region without additional texture to cover the remaining mask. Generally, the model will try to best fit the mask with the main subject and fill the remaining area with plausible content.
There is a big limitation to the above approach. We need to have the mask ready (generated separately) and feed it to the model. It can be cumbersome to generate masks separately for each image and load them. However, there is a better way where we can generate the mask directly in Gradio UI.
Dynamic Masking for Inpainting
For this approach, we need to install a specific version of Gradio.
pip install gradio==3.50.2
Next, import the required libraries, define a helper function to process images and masks, and initialize the Gradio interface.
import gradio as gr
import numpy as np
from PIL import Image

def process_and_save_image(uploaded_image):
    # Save the final mask image to disk
    final_mask = Image.fromarray(uploaded_image['mask'])
    final_image = Image.fromarray(uploaded_image['image'])

    save_path_mask = './final_mask_image.png'
    save_path_image = './final_image.png'

    final_mask.save(save_path_mask)
    final_image.save(save_path_image)

    # Return the original and the final mask image
    return final_image, final_mask

# Create the Gradio interface
iface = gr.Interface(
    fn=process_and_save_image,
    inputs=[
        gr.Image(
            tool="sketch",
            image_mode='RGBA',
            shape=(512, 512),
            brush_color="#ffffff",
            mask_opacity=1.0
        ),
    ],
    outputs=[
        gr.outputs.Image(label="Original Image", type='pil'),
        gr.outputs.Image(label="Final Mask Image", type='pil')
    ]
)

# Launch the interface
iface.launch(share=True)
For a better understanding, here is what the Gradio UI looks like.
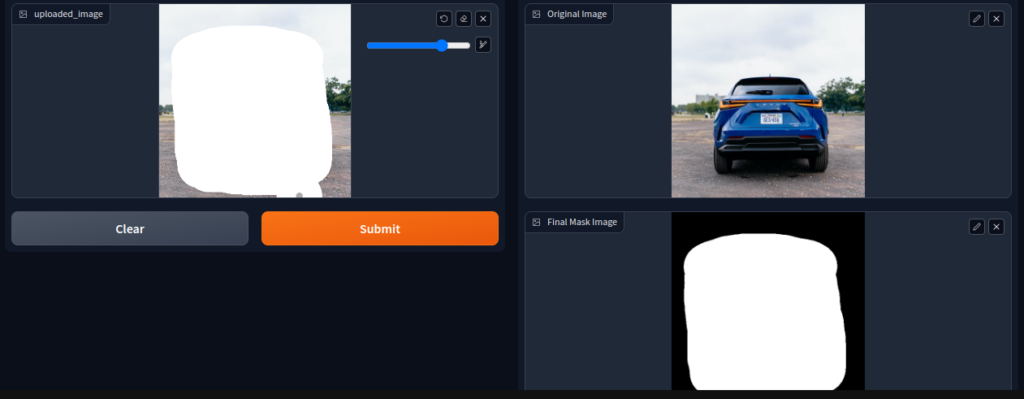
There is one input image component, where we upload the image and mask the region of choice. As our input image (inputs in the above code block) is in RGBA format, it contains an alpha mask. It contains a 'mask' and 'image' component that we extract in the first two lines in the process_and_save_image function. The function saves both the final image and the mask to the disk that we load in the next code block and passes them through the inpainting pipeline.
init_image = load_image('final_image.png').convert("RGB")
mask_image = load_image('final_mask_image.png').convert("RGB")

prompt = "A glass house in the middle of the ground, highly detailed, 4k, trending on artstation"
image = pipeline(
    prompt,
    image=init_image,
    mask_image=mask_image,
    num_inference_steps=150,
    generator=torch.manual_seed(seed)
).images[0]

image

The rest of the code remains the same. The benefit of the above approach is that the Gradio UI can launch directly in a Jupyter Notebook and we can create any mask of our choice as per requirements.
Of course, generating random objects or images of our choice with inpainting may not always work well. We may need to fine-tune a Stable Diffusion inpainting model to generate specific objects like furniture. Although not straightforward, it is certainly possible and we will explore exactly that in one of the future posts of the series.
Key Takeaways
- Setting Up Hugging Face Diffusers: Setting up the Diffusers library is easy and straightforward. It can simply be done with the pip command.
- Access to Diffusion Model: With Diffusers, users get access to hundreds of diffusion based models for image generation, image-to-image style transformer, image inpainting and more.
- Running models and Schedulers: With pipelines, it becomes extremely simple to run models and swap schedulers of different models as well. In fact, with the AutoPipeline, the overhead of the model path and initialization is handled by the library, leaving the user with creative task of generating amazing content.
Summary and Conclusion
In this article, we explored the Diffusers library for image generation tasks. Starting from the introduction of Diffusers to text-to-image, image-to-image, inpainting, and AutoPipeline. There are many more components available in the library, and the official Diffusers documentation is the best place to learn more.
What are you going to build with the knowledge of Generative AI? Let us know in the comments.


100K+ Learners
Join Free OpenCV Bootcamp3 Hours of Learning