This is the first post of a series on programming OpenCV AI Kit with Depth (OAK-D), and its little sister OpenCV AI Kit with Depth Lite (OAK-D-Lite). Both OAK-D and OAK-D Lite are spatial AI cameras.
Check out more articles from the OAK series.
- Stereo Vision and Depth Estimation using OpenCV AI Kit
- Object detection with depth measurement using pre-trained models with OAK-D
What is Spatial AI?
Spatial AI is the ability of a visual AI system to make decisions based on two things.
- Visual Perception: This is the ability of an AI to “see” and “interpret” its surrounding visually. For example, the system of a camera connected to a processor running a neural network for object detection can detect a cat, a person, or a car in the scene the camera is looking at.
- Depth Perception: This is the ability of the AI to understand how far objects are. In computer vision jargon, “depth” simply means “how far.”
The idea of Spatial AI is inspired by human vision. We use our eyes to interpret our surroundings. In addition, we use our two eyes (i.e. stereo vision) to perceive how far things are from us.
OAK-D and OAK-D-Lite are Spatial AI Cameras
At a high-level OAK-D and OAK-D-Lite consist of the following important components.
- A 4K RGB Camera : The RGB camera placed at the center can capture very high-resolution 4k footage. Typically, this camera is used for visual perception.
- A Stereo pair: This is a system of two cameras (the word “stereo” means two) used for depth perception.
- Intel® Myriad™ X Visual Processing Unit (VPU: This is the “brain” of the OAKs. It is a powerful processor capable of running modern neural networks for visual perception and simultaneously creating a depth map from the stereo pair of images in real-time.
Applications of OAK-D and OAK-D-Lite
OAK-D is being used to develop applications in a wide variety of areas. The OpenCV AI Competition 2021 showcases many of these applications.
You can see applications in education, neo-natal care, assistive technologies for the disabled, AR/VR, warehouse inspection using drones, robotics, agriculture, sports analytics, retail, and even advertising.
Check out the Indiegogo campaign page to see many more amazing applications built using OAK-D and OAK-D-Lite
Excited to learn how to program this device? Let’s get started.
OAK-D vs OAK-D Lite
In terms of features, both devices are nearly identical. With an OAK-D Lite, you can do almost everything that an OAK-D is capable of. As a beginner, you should not notice much difference. However, there are a few specs that separate the two devices. OAK-D Lite is sleek, lighter, cheaper, and uses less power. On the other hand, OAK-D is slightly more power-user-oriented.
| Features/Specs | OAK-D | OAK-D Lite |
|---|---|---|
| RGB camera | 12 Megapixel, 4k, up to 60 fps | 12 Megapixel, 4k, up to 60 fps |
| Mono cameras | 1280x800p, 120 fps, Global Shutter | 640x480p, 120 fps, Global Shutter |
| Inertial Measurement Unit | Yes | No |
| USB-C, Power Jack | Yes, Yes | Yes, No |
| VPU | Myriad-X, 4 trillion ops/s | Myriad-X, 4 trillion ops/s |
Installation
The best part of using an OAK-D or OAK-D Lite is that there are no external hardware or software dependencies. It has integrated hardware, firmware, and software resulting in a seamless experience. Depth-AI is the API (Application Programming Interface) through which we program the OAK-D. It’s cross-platform, so you don’t need to worry about what OS you have. So let’s go ahead and install the API by firing up a terminal or Powershell. It should only take about 30 seconds, given that you have a good internet connection.
git clone https://github.com/luxonis/depthai.git
cd depthai
python3 install_requirements.py
python3 depthai_demo.py
You can also check out the DepthAI documentation of Luxonis.
The Depth-AI Pipeline
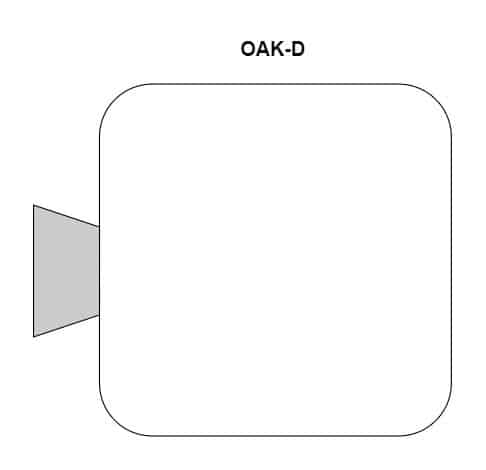
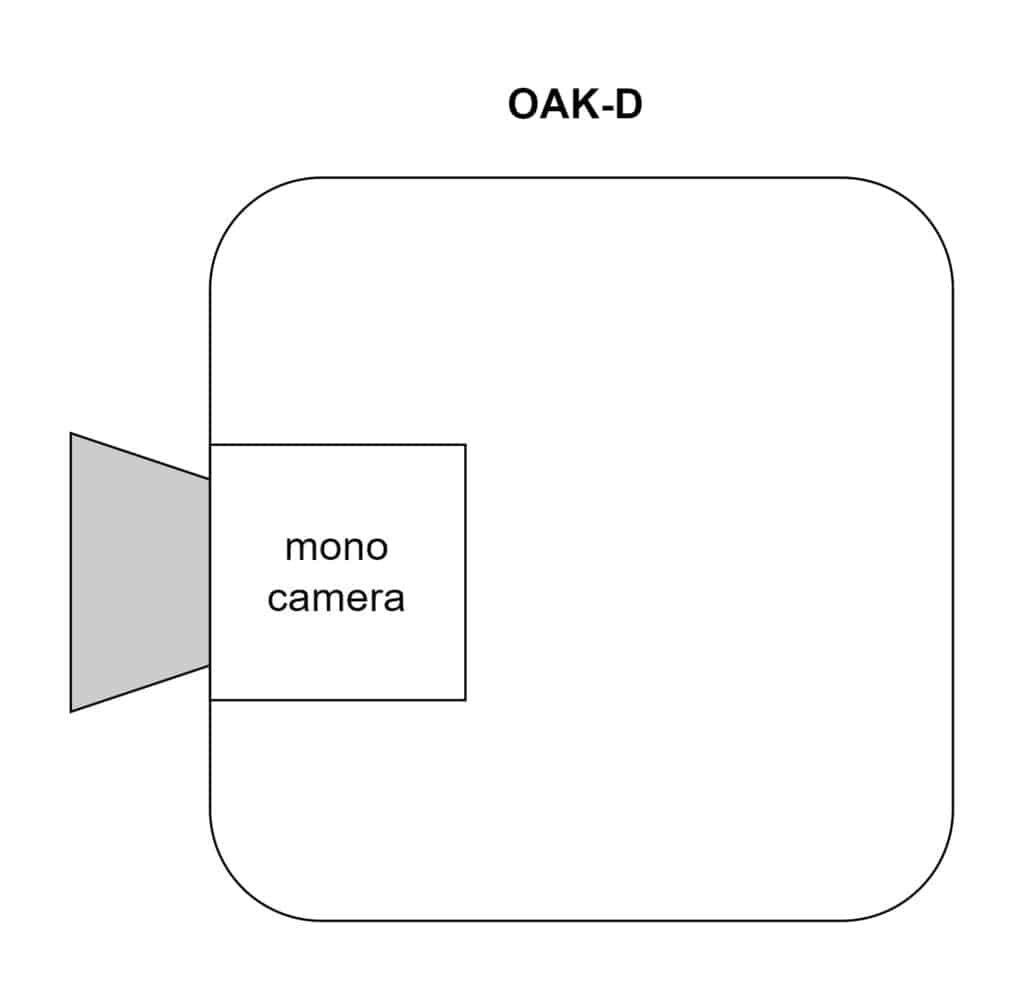
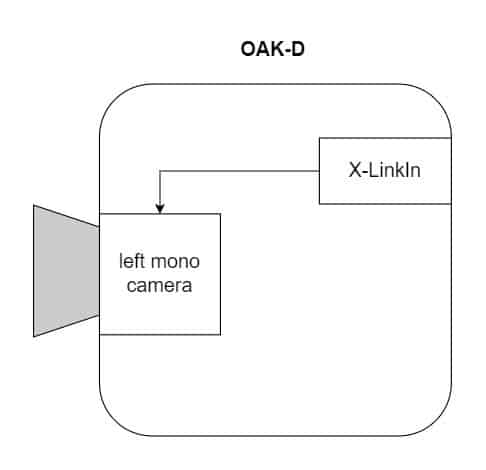
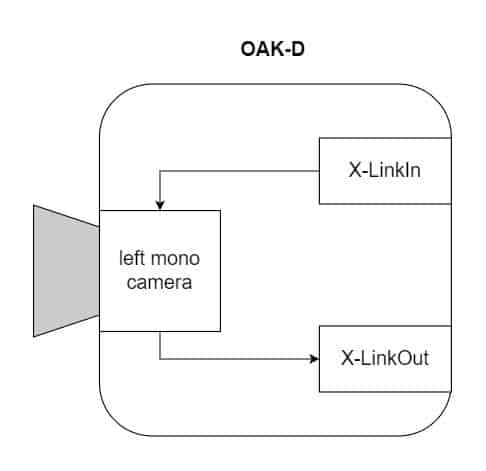
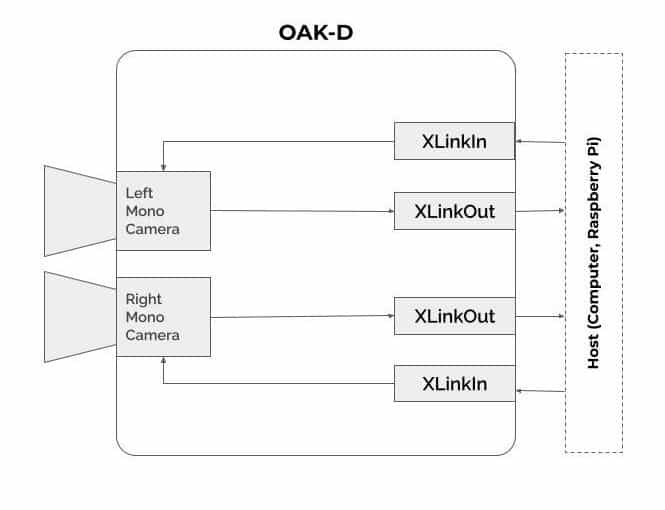
A pipeline is a collection of nodes, and a node is a unit with some inputs and outputs. To understand the Depth-AI pipeline, let us go through the following illustrations. In the figures, we are showing what is happening inside the camera when the given command is executed. It’s a very simple pipeline through which we capture the frames from the left mono camera.
- Create a pipeline
Here, we are instantiating the pipeline object.
import depthai as dai
pipeline = dai.Pipeline()
2. Create the camera node
With the instruction below, we create the mono camera node. It does not do anything visually. It just recognizes the mono cameras.
mono = pipeline.createMonoCamera()
3. Select the camera
To access a camera, we need to select it – in our case, the left camera. This is done by the setBoardSocket method. Internally it also creates an input node, X-LinkIn. X-Link is a mechanism using which the camera communicates with the host ( computer ).
mono.setBoardSocket(dai.CameraBoardSocket.LEFT)
4. Create XLinkOut node and acquire frames
To get the output, we need to create the X-Link output node. The camera can have several other outputs, say another stream from the right mono camera or from the RGB camera or some other output that we don’t need to worry about as of now. Hence, it has been named “left” so it does not conflict with others. Finally, we link the output of the mono camera by putting it as an input to the X-LinkOut node.
xout = pipeline.createXLinkOut()
xout.setStreamName("left")
mono.out.link(xout.input)
Although we showed that the previous instructions were readying the device, it was not processing anything. All the commands were running inside the host computer. You can think of it as a pre-processing step. We transfer the pipeline from the host computer to the camera with the following code snippet.
Now, we can acquire the output frame from the X-LinkOut node. Note that the output of the X-LinkOut node is not a single frame. In fact, it creates a queue that can store several frames. Which may be useful for certain applications requiring multiple frames. Video encoding is such an example. But in our case, we do not need multiple frames. So, let’s keep it as the default, single frame for now. As you can see, the queue is obtained using the getOutputQueue method, where we specify the stream.
Next, we query the queue to extract the frame. At this point, the frame is transferred from the device to the host computer. The frame is of the class depthai.ImgFrame, which can have several types. To make it OpenCV friendly, we use the function getCvFrame, which returns the image as a numpy array. This concludes our basic pipeline.
with dai.Device(pipeline) as device:
	queue = device.getOutputQueue(name="left")
	frame = queue.get()
	imOut = frame.getCvFrame()
Now let’s build a complete pipeline for both left and right cameras. We will use the outputs from the mono cameras to display the separate and merged views. Please download the complete code using the following link to get started.
A Complete Pipeline for Stereo Vision
Although the Depth-AI library supports both Python and C++ API, C++ API is not yet a stable release. Hence, in this blog post, we are focusing on Python code.
Import Libraries
import cv2
import depthai as dai
import numpy as np
Function to extract frame
It queries the frame from the queue, transfers it to the host, and converts it to a numpy array.
def getFrame(queue):
  # Get frame from queue
  frame = queue.get()
  # Convert frame to OpenCV format and return
  return frame.getCvFrame()
Function to select mono camera
Here, a camera node is created for the pipeline. Then we set the camera resolution using the setResolution method. The sensorResolution class has the following attributes to choose from.
- THE_700_P (1280x720p)
- THE_800_P (1280x800p)
- THE_400_P (640x400p)
- THE_480_P (640x480p)
In our case, we are setting the resolution to 640x400p. The board socket is set to the left or right mono camera using the isLeft boolean.
def getMonoCamera(pipeline, isLeft):
  # Configure mono camera
  mono = pipeline.createMonoCamera()

  # Set Camera Resolution
    mono.setResolution(dai.MonoCameraProperties.SensorResolution.THE_400_P)
  if isLeft:
      # Get left camera
      mono.setBoardSocket(dai.CameraBoardSocket.LEFT)
  else :
      # Get right camera
      mono.setBoardSocket(dai.CameraBoardSocket.RIGHT)
  return mono
Main Function
Pipeline and camera setup
We start by creating the pipeline and setting up the left and right mono cameras. The predefined function getMonoCamera creates the X-LinkIn node internally and returns mono camera output. The outputs from the cameras are then tied to the X-LinkOut nodes.
if __name__ == '__main__':
    pipeline = dai.Pipeline()

    # Set up left and right cameras
    monoLeft = getMonoCamera(pipeline, isLeft = True)
    monoRight = getMonoCamera(pipeline, isLeft = False)

    # Set output Xlink for left camera
    xoutLeft = pipeline.createXLinkOut()
    xoutLeft.setStreamName("left")

    # Set output Xlink for right camera
    xoutRight = pipeline.createXLinkOut()
    xoutRight.setStreamName("right")

    # Attach cameras to output Xlink
    monoLeft.out.link(xoutLeft.input)
    monoRight.out.link(xoutRight.input)
Transfer pipeline to the device
Once setup is ready, we transfer the pipeline into the device (camera). The queues for left and right camera outputs are defined with their respective names. The frame holding capacity is set with the maxSize argument, which is just a single frame in our case. A named window is also created later to display the output. The sideBySide variableis a boolean for toggling camera views (side by side or front view).
    with dai.Device(pipeline) as device:
        # Get output queues.
        leftQueue = device.getOutputQueue(name="left", maxSize=1)
        rightQueue = device.getOutputQueue(name="right", maxSize=1)

        # Set display window name
        cv2.namedWindow("Stereo Pair")
        # Variable used to toggle between side by side view and one
        frame view.
        sideBySide = True
Main loop
Until now, we have created a pipeline, linked camera outputs to X-LinkOut nodes and obtained the queues. Now, it’s time to query the frames and convert them to OpenCV-friendly numpy array format with the help of our predefined getFrame function. For side by side view, the frames are concatenated horizontally with the help of the numpy hstack (horizontal stack)function. For overlapping output, we simply add the frames by reducing the intensity by a factor of 2.
The keyboard input q breaks the loop, and t toggles the display (Side-by-side and front views).
        while True:
            # Get left frame
            leftFrame = getFrame(leftQueue)
            # Get right frame
            rightFrame = getFrame(rightQueue)

            if sideBySide:
                # Show side by side view
                imOut = np.hstack((leftFrame, rightFrame))
            else :
                # Show overlapping frames
                imOut = np.uint8(leftFrame/2 + rightFrame/2)

            # Display output image
            cv2.imshow("Stereo Pair", imOut)

            # Check for keyboard input
            key = cv2.waitKey(1)
            if key == ord('q'):
                # Quit when q is pressed
                break
            elif key == ord('t'):
                # Toggle display when t is pressed
                sideBySide = not sideBySide
Output

fig: Side by side view
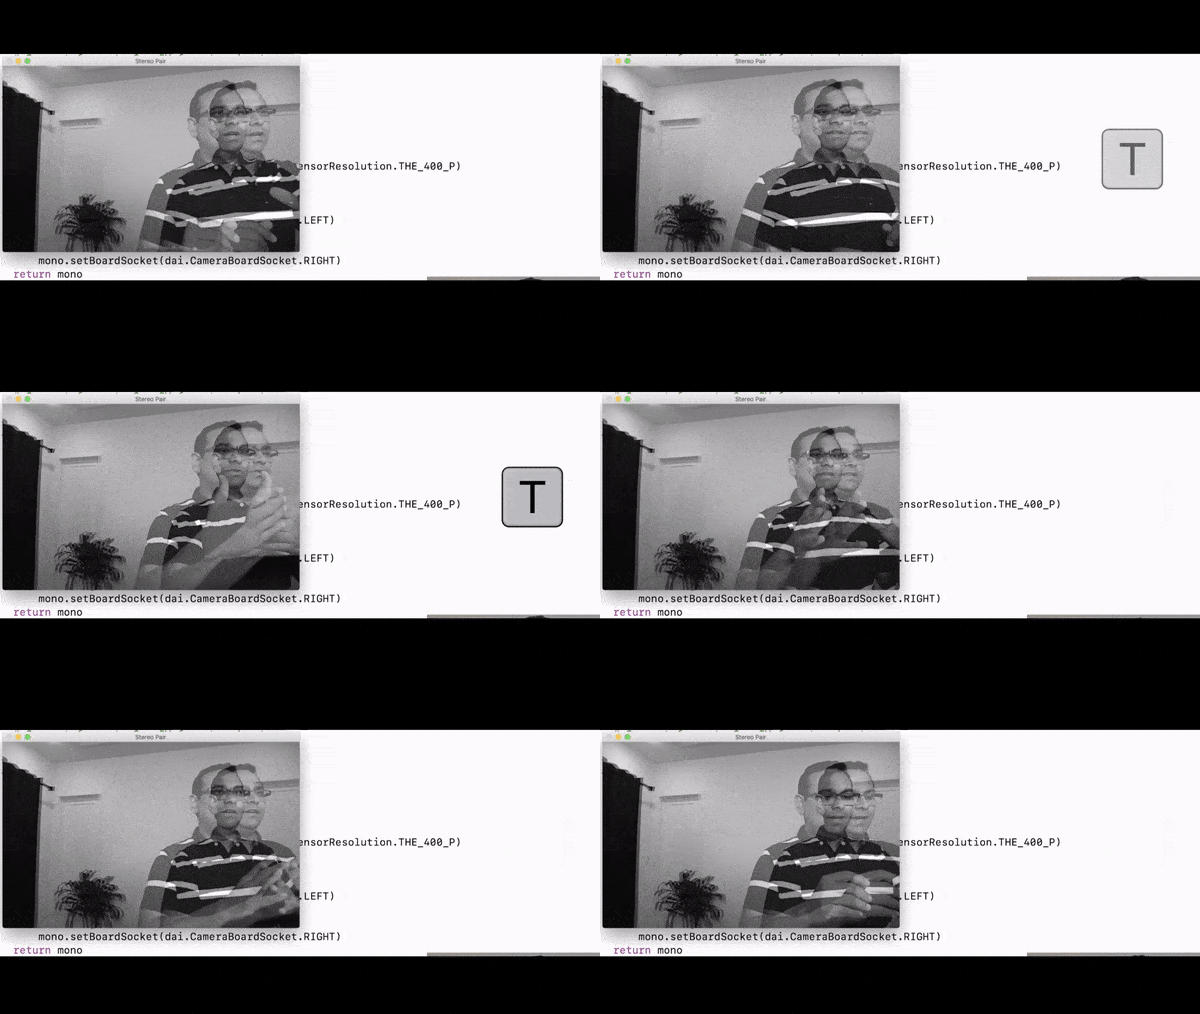
fig: Overlapped output
Conclusion
This concludes the introduction to OpenCV AI Kit with Depth. I hope you enjoyed the light read and got the idea of setting up an OAK-D. In our next blog post, we will the pipeline of getting the depth map out of an OAK-D.


100K+ Learners
Join Free OpenCV Bootcamp3 Hours of Learning