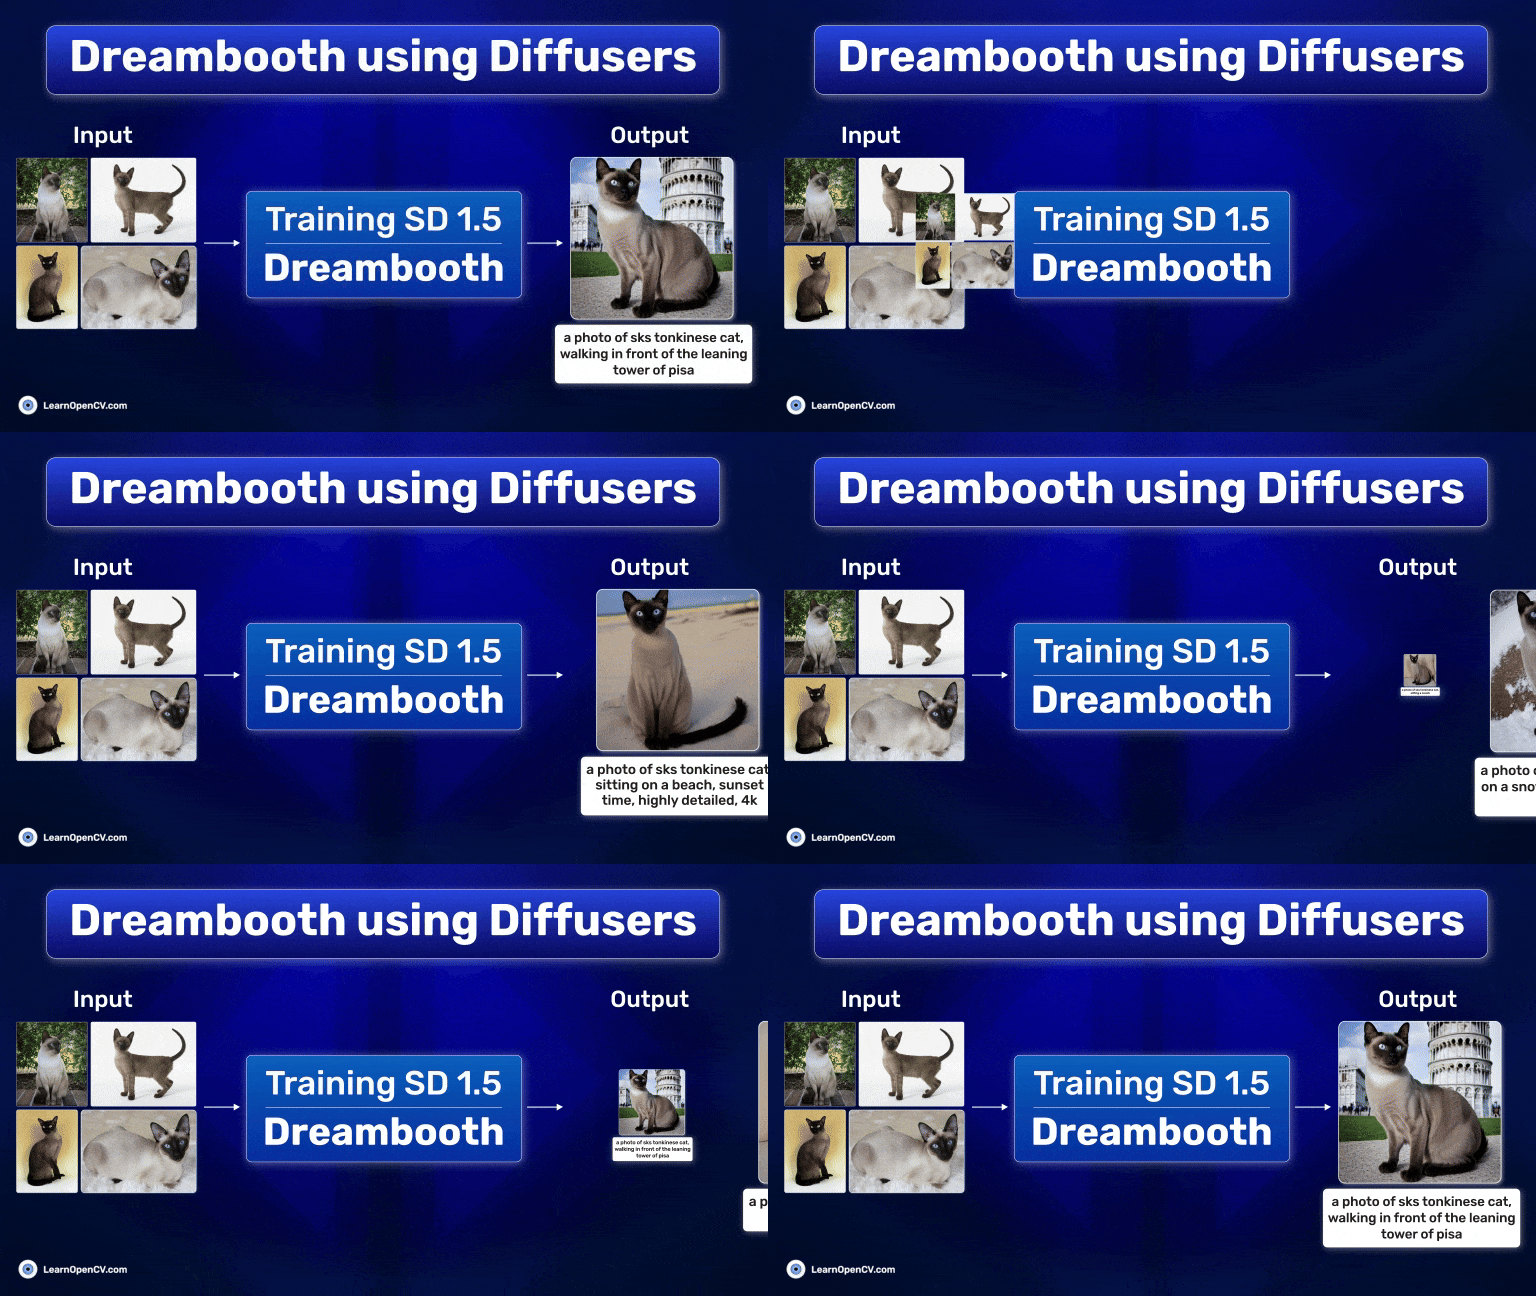
Ever wanted to generate different images of your pet but in different settings and locations? Dreambooth training using the Diffuser library can help you achieve this.
In the evolving landscape of Generative AI, the one-size-fits-all approach is quickly becoming outdated. Personalization is a necessity when using AI tools, particularly in image generation. Dreambooth training represents this shift, offering a method to tailor Diffusion models to our unique needs and preferences. By focusing on specific datasets, such as unique collections of images, Dreambooth allows for customization and relevance in generated content. This article delves into the world of Dreambooth training using Diffusers to generate personalized images based on a particular subject.

Topics We Will Cover:
- The Importance of Fine-Tuning on Specific Datasets: Why is it crucial to tailor your AI models to your specific needs?
- Setting Up Diffusers: Preparing your environment for Dreambooth training.
- Training the Stable Diffusion 1.5 Model: A step-by-step guide to fine-tuning a pre-trained model.
- Evaluating the Model: How to generate new images and assess the model’s performance.
What is Dreambooth?
Dreambooth is a specialized training technique designed to fine-tune pretrained Diffusion models.
It was introduced in the paper DreamBooth: Fine Tuning Text-to-Image Diffusion Models for Subject-Driven Generation by researchers from Google and Boston University.
There are two primary benefits of using Dreambooth to train Diffusion models:
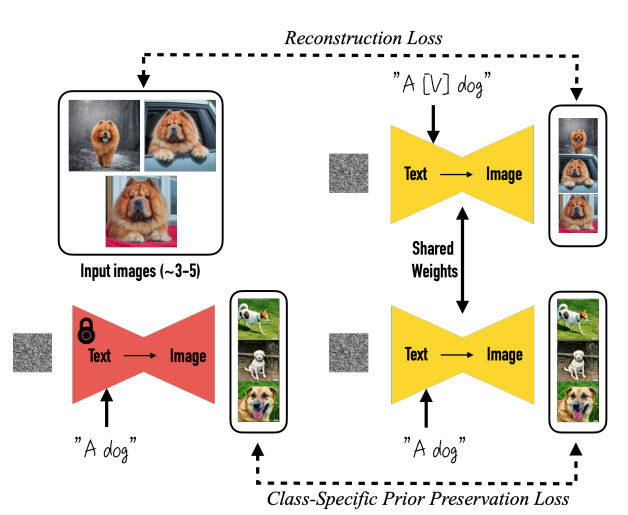
- We need 3-5 images of a particular image or concept. This is enough to steer the model to learn a new concept.
- After training, we can use the model to generate images across various scenarios and contexts. This means that the model does not forget the knowledge gathered from pertaining.

Unlike traditional training methods that aim for generalized capabilities, Dreambooth focuses on individual specificity. This method uses a small set of reference images to teach the model about particular subjects, objects, or styles, enabling it to produce highly personalized and relevant images. Essentially, Dreambooth empowers users to create bespoke AI models that understand and replicate unique attributes and nuances.
During training, we associate each image with a unique identifier. For example, if we teach the model to generate a particular species of dog, we can provide the prompt as an image of a [V] dog. Eventually, the model will learn to associate the token [V] with the image of the dog we are training with.

Then, during inference, we can use the same identifier with additional details in the prompt to generate new images.
The Tonkinese Cat Dataset for Dreambooth Training
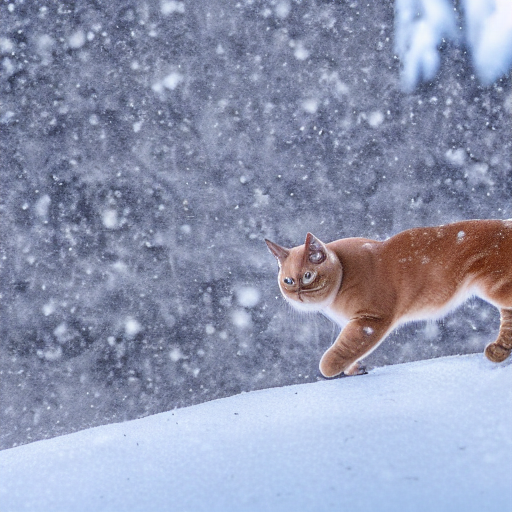
In this article, we will use the Diffusers library along with Dreambooth to teach Stable Diffusion 1.5 to generate images of Tonkinese cats. Tonkinese is a particularly rarer species of cats and the pretrained Stable Diffusion model does not do a good job of generating its images and variations. Here are some examples:


The above results are neither high quality nor represent the species too well.
Our dataset contains just five images.

However, as we will observe later, these are enough to train the model using Dreambooth and Diffusers.
If you wish to explore the entire pipeline of image generation, you should surely give the Stable Diffusion post a read.
Setting Up Diffusers
Before diving into the training process, setting up the correct environment is essential. This involves cloning the Hugging Face Diffusers repository and installing the necessary dependencies. Here’s how to prepare your system for Dreambooth training:
Clone the diffusers Repository
The Dreambooth training script is provided within the example directory of the diffusers library. So, the first step is cloning it.
import os

if not os.path.exists('diffusers'):
    !git clone https://github.com/huggingface/diffusers
Installing Dependencies
Next, install the transformers library along with the requirements for Dreambooth training.
!pip install transformers==4.30.2

%cd diffusers
!pip install -q .

%cd examples/dreambooth/
!pip install -q -r requirements.txt
These steps ensure your training environment is properly set up with all the tools and libraries needed for a smooth training experience.
Downloading the Dataset
Download the dataset from a direct Dropbox link and extract it.
import requests
import zipfile

# To download and unzip processed dataset.
def download_and_unzip(url, save_path):

    print("Downloading and extracting assets...", end="")
    file = requests.get(url)
    open(save_path, "wb").write(file.content)

    try:
        with zipfile.ZipFile(save_path) as z:
            z.extractall(os.path.split(save_path)[0]) # Unzip where downloaded.
            print("Done")
    except:
        print("Invalid file")

URL = r"https://www.dropbox.com/scl/fi/m8xvx5rm8xzoiw1uzutk6/tonkinese_cat.zip?rlkey=1r8zmgvnbuy41hl185ev6v7ji&dl=1"

dataset_name = "tonkinese_cat"
dataset_zip_path = os.path.join(os.getcwd(), f"{dataset_name}.zip")
dataset_path = os.path.join(os.getcwd(), dataset_name)

# Download if dataset does not exists.
if not os.path.exists(dataset_path):
    download_and_unzip(URL, dataset_zip_path)
The final dataset is extracted into the tonkinese_cat directory.
Fine Tuning Stable Diffusion 1.5 using Dreambooth
The fine-tuning process is at the heart of our journey. To start the training, we employ the accelerate launch train_dreambooth.py command.
The script is provided in the examples/dreambooth directory, and everything can be managed using the command line arguments. Execute the following command to start the training.
!accelerate launch train_dreambooth.py \
  --pretrained_model_name_or_path="runwayml/stable-diffusion-v1-5"  \
  --instance_data_dir="tonkinese_cat" \
  --output_dir="outputs" \
  --instance_prompt="a photo of sks tonkinese cat" \
  --resolution=512 \
  --train_batch_size=1 \
  --gradient_accumulation_steps=1 \
  --learning_rate=5e-6 \
  --lr_scheduler="constant" \
  --lr_warmup_steps=0 \
  --max_train_steps=500 \
  --mixed_precision="fp16" \
  --checkpointing_steps=50000
Here are the arguments that we use while training:
!accelerate launch train_dreambooth.py: This command starts the training process using the Accelerate library, which helps to easily run the script on any hardware configuration (CPU, single GPU, or multiple GPUs).--pretrained_model_name_or_path="runwayml/stable-diffusion-v1-5": Specifies the path or identifier of the pre-trained model to use as a starting point. In this case,"runwayml/stable-diffusion-v1-5"refers to a specific version of the Stable Diffusion model hosted on Hugging Face’s Model Hub).--instance_data_dir="tonkinese_cat": The directory where your specific instance images are stored. These are the images you want the model to learn from and adapt to. In this case, it’s set to a directory named"tonkinese_cat"containing images for the model to focus on.--output_dir="outputs": The directory where the trained model and any output files will be saved. This is where you’ll find the fine-tuned model after the training process is complete.--instance_prompt="a photo of sks tonkinese cat": This is a text prompt associated with your specific instance images. It helps the model to learn the context or attributes associated with the images in--instance_data_dir. The prompt is used to guide the model’s understanding and generation of new images similar to those in the dataset.--resolution=512: The resolution of the images that the model will generate. A resolution of 512×512 is specified here, balancing detail and computational efficiency. This also matches the resolution using which the model was pretrained.--train_batch_size=1: The number of images processed in one training step. A batch size of 1 means that each image is processed individually, which is suitable for lower-memory environments but can be slower.--gradient_accumulation_steps=1: The number of steps over which gradients are accumulated before performing a parameter update. Setting this to 1 means that gradients are not accumulated, and each step is updated immediately, which is typical for training with small batch sizes.--learning_rate=5e-6: The rate at which the model learns during training. A smaller learning rate like5e-6ensures slow, careful adjustments, reducing the risk of overfitting on the small dataset.--lr_scheduler="constant": This defines the learning rate scheduler. A"constant"scheduler means the learning rate does not change over time, maintaining a steady pace of learning throughout the training process.--lr_warmup_steps=0: The number of initial steps during which the learning rate linearly increases to its initial value. Setting this to 0 means there is no warm-up, and training starts directly with the specified learning rate.--max_train_steps=500: The total number of training steps to perform. A"step"processes one batch of data, so 500 steps means the model will see the data (depending on batch size and accumulation steps) 500 times.--mixed_precision="fp16": Specifies the use of mixed precision to speed up training while reducing memory usage."fp16"refers to 16-bit floating-point precision, as opposed to the standard 32-bit. This can significantly improve performance on compatible hardware.--checkpointing_steps=50000: This argument specifies how often to save model checkpoints. A value of 50000 means the model will be saved every 50,000 training steps.
Note: As we are training the model in FP16 format, it requires close to 18 GB of memory. It is recommended to have at least 24 GB of GPU memory for training. Although a drawback, full fine-tuning using Dreambooth creates superior images even with few images.
After the training is completed, the outputs directory will be populated in the following structure.
outputs
├── feature_extractor
│   └── preprocessor_config.json
├── logs
│   └── dreambooth
├── model_index.json
├── safety_checker
│   ├── config.json
│   └── model.safetensors
├── scheduler
│   └── scheduler_config.json
├── text_encoder
│   ├── config.json
│   └── model.safetensors
├── tokenizer
│   ├── merges.txt
│   ├── special_tokens_map.json
│   ├── tokenizer_config.json
│   └── vocab.json
├── unet
│   ├── config.json
│   └── diffusion_pytorch_model.safetensors
└── vae
    ├── config.json
    └── diffusion_pytorch_model.safetensors
There are numerous subdirectories containing configurations and the model (.safetensors) files. This is because using the default Dreambooth technique, the entire UNet is fine-tuned. The trained UNet is used for denoising. Along with that, the tokenizer, text encoder, and also the VAE (Variational Autoencoder) are stored.
Inference using the Dreambooth Trained Model
As we have the trained Stable Diffusion model now with us, we are all set for running inference.
Let’s import the necessary modules and set the seed first.
from diffusers import StableDiffusionPipeline

import torch

seed = 42
Next, we create a pipeline and provide the path to the outputs directory to load the model.
Note: Remember to load the pipeline on the CUDA device; otherwise, the generation will take several minutes.
pipe = StableDiffusionPipeline.from_pretrained(
    'outputs',
    torch_dtype=torch.float16,
).to('cuda')
Finally, we provide a prompt and generate the image.
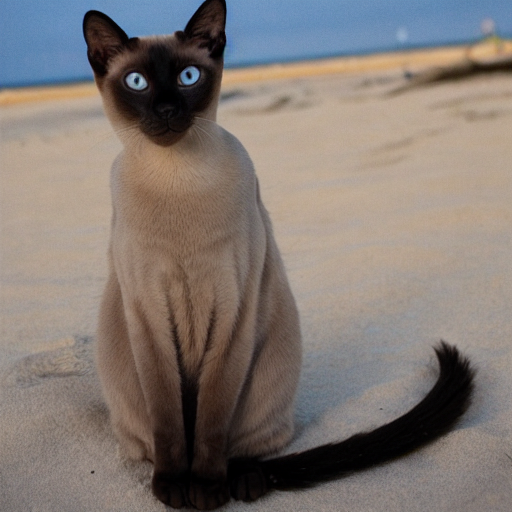
prompt = "a photo of sks tonkinese cat, sitting on a beach, sunset time, highly detailed, 4k"
image = pipe(prompt, num_inference_steps=150, generator=torch.manual_seed(seed)).images[0]
Here is the output from the model.

The image looks absolutely amazing. There is a stark difference between what the pretrained model produced and what our Dreambooth fine-tuned model produced. The model trained using Dreambooth generated an image of a cat that closely resembles the species. Furthermore, the fur and other physical features are extremely detailed. Check out the code for training Stable Diffusion using Dreambooth.
Let’s check a few more prompts and outputs.
prompt = "a photo of sks tonkinese cat, on a snowy mountain, highly detailed"
image = pipe(prompt, num_inference_steps=150, generator=torch.manual_seed(seed)).images[0

prompt = "a photo of sks tonkinese cat, sitting a couch"
image = pipe(prompt, num_inference_steps=150, generator=torch.manual_seed(seed)).images[0

prompt = "a photo of sks tonkinese cat, walking in front of the leaning tower of pisa"
image = pipe(prompt, num_inference_steps=150, generator=torch.manual_seed(seed)).images[0]

Takeaway
- Dreambooth marks a transformative step in personalized AI, allowing the customization of pre-existing models such as Stable Diffusion to align with specific user needs and preferences.
- This innovation democratizes AI model customization, making it accessible to a broader range of users, from artists and content creators to researchers and hobbyists.
- With the proper setup and dataset, many creative art and design industries will experience bigger changes. With this, it is also the responsibility of AI developers like us to focus on the ethical side of the technology and ensure that it is not used to spread fake or incorrect information
Conclusion
In this article, we focused on training the Stable Diffusion model using Dreambooth and Diffusers. We started with a short discussion about Dreambooth, moved on the dataset exploration, conducted the training experiments, and carried out inference at the end.
The entire process uncovered how a few images can be used to personalize a Diffusion model according to our needs. This also shed light on how GPU intensive the process can be. Nonetheless, the end results make the entire process worthwhile.
Let us know in the comments what you are going to use Dreambooth for.


100K+ Learners
Join Free OpenCV Bootcamp3 Hours of Learning