In this article, we will learn the pros and cons of using Face Recognition as an authentication method. We will also see how it can be spoofed and the methods that can be used to detect the spoofing attempt.

- Introduction
- Face Recognition in Authentication (Pros and Cons)
- Face Recognition
- How Facial Recognition Works
- Types of Spoofing Attempts
- Techniques to Prevent Spoofing
- Our Approach
- Implementation
- Demo
- Where it Fails
- Future Improvements
- Conclusions
1. Introduction
Imagine a scenario where you are carrying multiple bags in both your hands and even on your arms, you come to the door of your apartment building that has an access control system in which you have to put in a password or fingerprint to open it, so you put down your bags and put in your password or touch your fingerprint and then pick them up again and then walk through the door.

Now, consider an alternate situation. You are again carrying all those bags but now when you come to the door of your apartment building, you just have to look into the camera at the door, and Voila! the door unlocks, and you walk in.
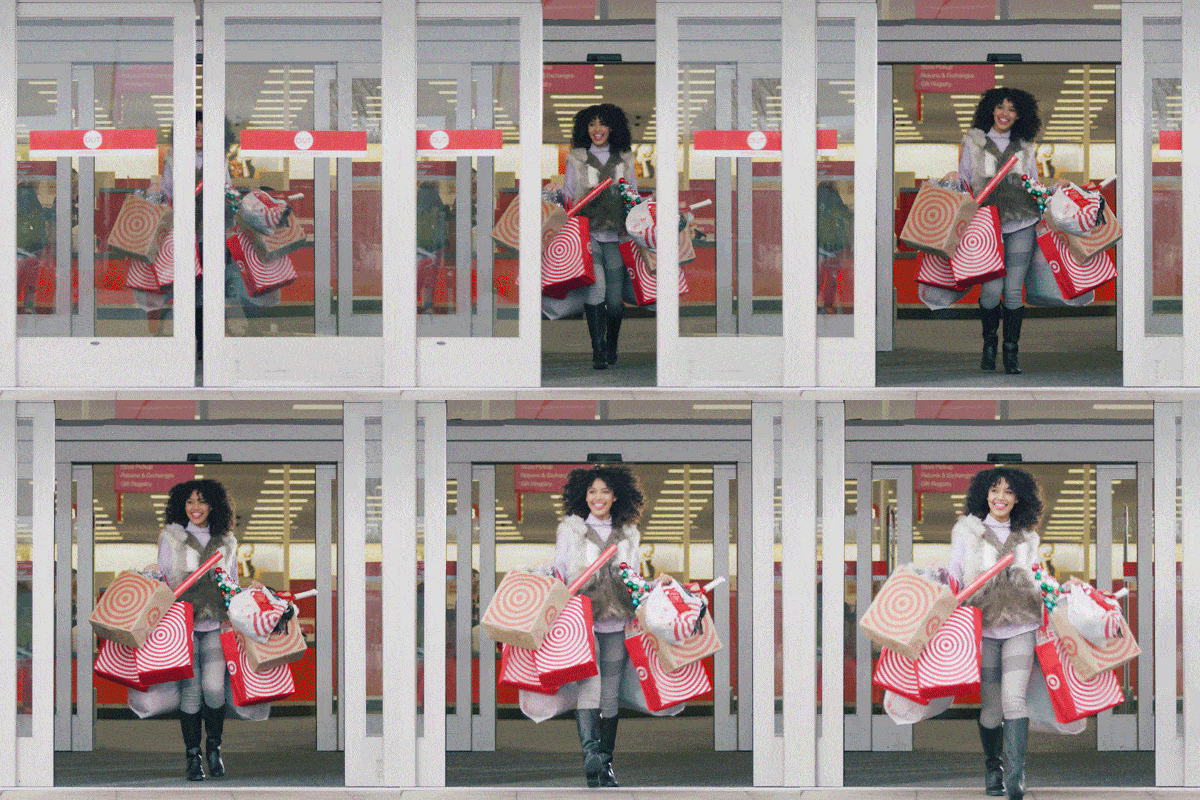
Doesn’t the second option sound quicker and hassle-free? That’s the beauty of using your face for authentication; it removes 1 to 2 steps from the authentication process but makes your life a little less frustrating and more convenient.
Also, in the present global pandemic, it helps you avoid touching surfaces such as authentication systems multiple people use.
2. Face Recognition in Authentication (Pros and Cons)
Now, the question is, if there are other authentication methods, such as passwords and fingerprints, why would we use face recognition?
If the above examples were not enough to convince you to try face authentication, let’s compare it with other popular authentication methods.
| Password | Fingerprint | Only Facial recognition | |
| Security | High | Moderate | Low |
| Memorability | Low | High | High |
| Ease of use | Low | moderate | High |
| Identify theft | High | Low | Low |
We can see that the main benefit of face recognition over other authentication methods is convenience. The major drawback is security.
So, how can we tackle that? Let’s first understand what Face Recognition is and how it works.
3. Face Recognition
Face recognition is a way to identify and recognize individuals with the help of their unique facial features.
It has many applications in numerous fields, such as medical services, law enforcement, customer experience, and biometric authentication.
4. How Facial Recognition Works
The main working principle in face recognition is that each face is unique. A person can be identified based on those unique features of the face
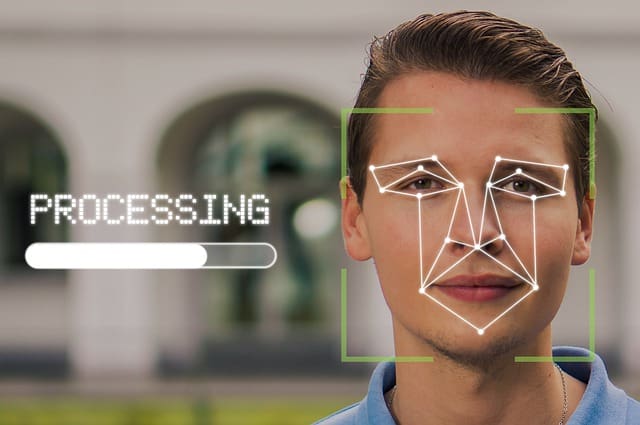
Biometric Man Facial Recognition Identify Face
On identifying the key features of a face, they can be represented as a feature embedding of that face; you can think of it as a faceprint of that person similar to a unique fingerprint.

Now, the faceprint can be matched against other faceprints to check how similar they are, and based on the similarity of the faceprints, we can say if it’s the same person or not.
These are the following steps involved in face recognition:
1. Face Detection
A face is first detected in the frame of the camera. This can be done with different face detection methods such as Viola-Jones, HOG, or CNN.
2. Calculate feature embedding (faceprint)
The next step is to identify the key features of the face and represent them as a feature embedding which will be the unique identifier of the face. This can be done using pre-trained Face recognition models like ArcFace
3. Match the feature embeddings
The final step is to match the feature embedding of the face with the feature embedding already saved in the system. If they are similar enough, we can confidently say that it belongs to the same person.
5. Types of Spoofing Attempts
There are multiple ways to fool face authentication systems. The popular approaches are
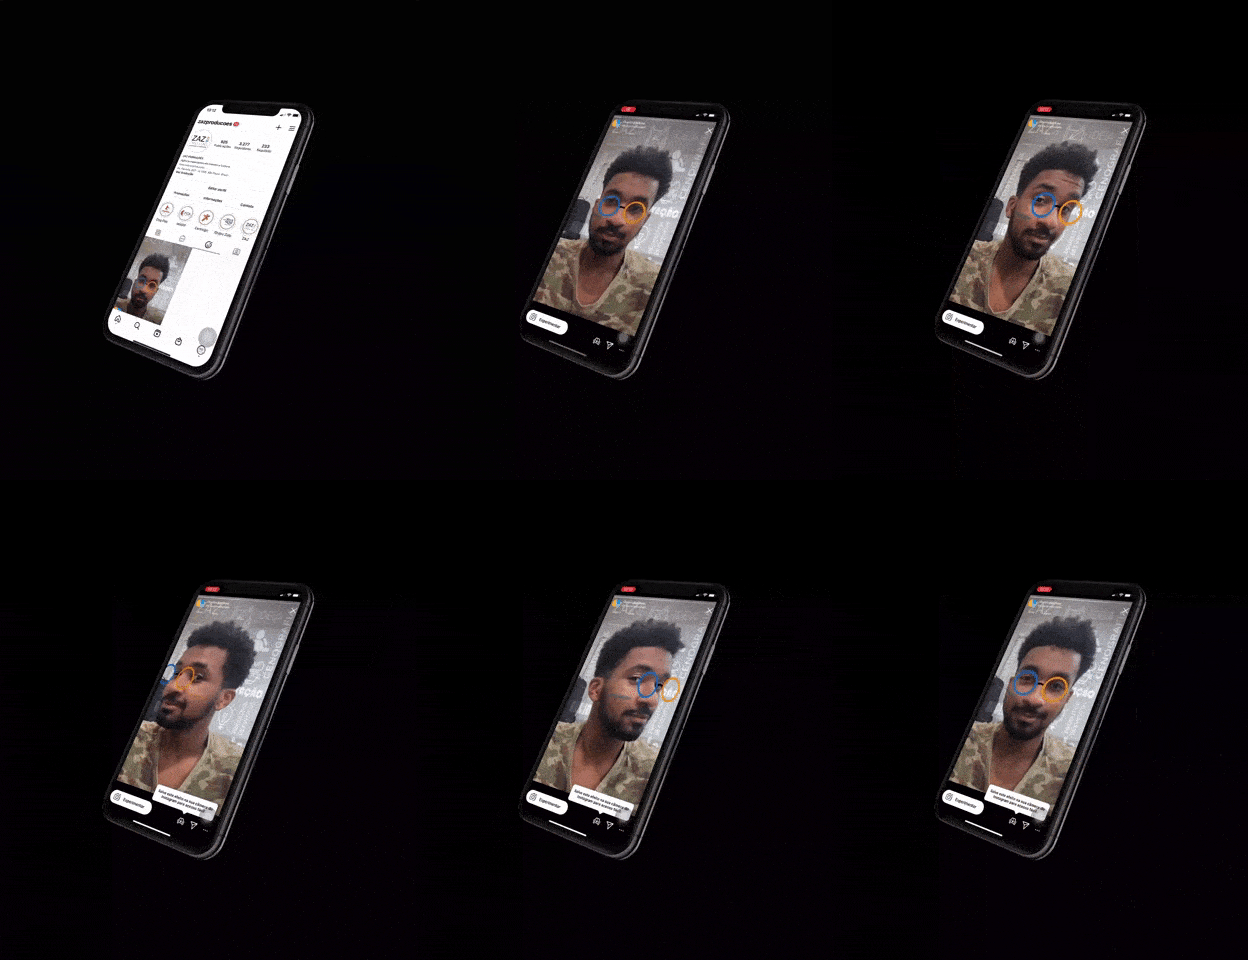
1. 2d Image attack
In this, the attacker tries to bypass the authentication by showing an image of the face of the authorized person. This is the most primitive attack, and any face authentication system with no spoof prevention measure can easily be bypassed by it.

2. 2d video attack
In this, the attacker tries to bypass the authentication by showing a video of the face of the authorized person to the authentication system. This differs from the image attack because it can bypass the liveliness detection anti-spoofing systems as the face appears to be moving and life-like.
3. 3d print/mask attack
This is a more advanced spoofing method in which the attacker attempts to recreate the 3d features of the real face using a facemask or, as the upcoming technology allows, a 3d print of the real face. This kind of attack is tough to detect and can bypass the anti-spoofing measures depending on the depth info of the face.

6. Techniques to Prevent Spoofing – Anti Spoofing Face Recognition
Different spoofing attempts require different prevention methods
1. Depth estimation:
Depth estimation can be used as a spoof detection method for image/Video attacks. It identifies the differences between the depth map of a 2-dimensional image or video and a real 3-dimensional face. We will implement this method in the latter part of the post.

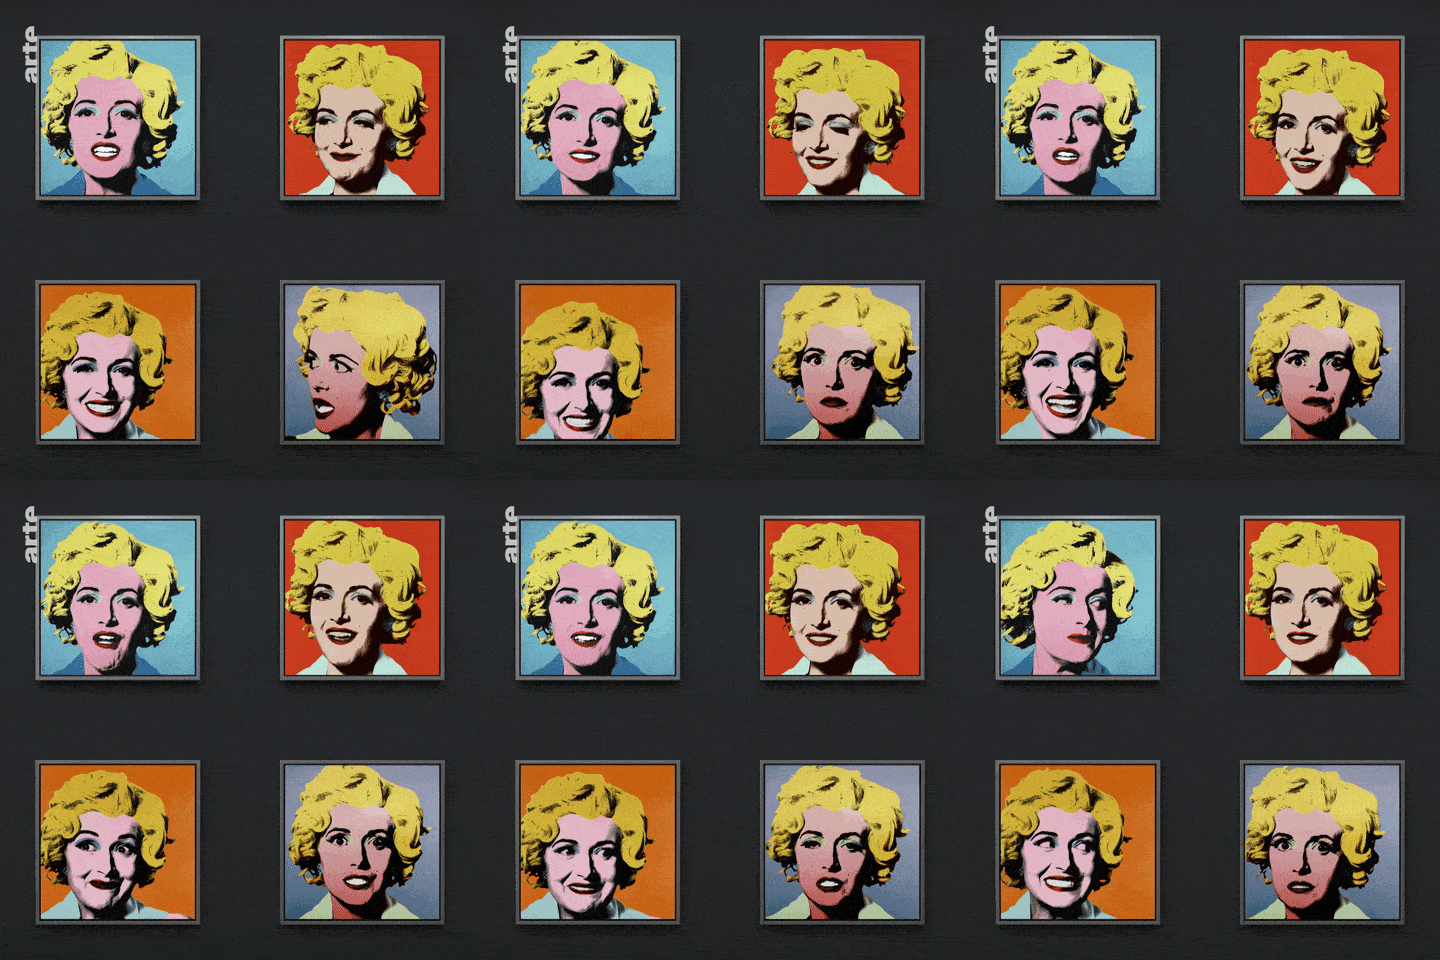
2. Liveness detection:
This method of detecting a spoof is effective against image attacks and face 3dPrint attacks. It attempts to identify a real face by detecting the natural movements of the facial features, such as blinking and smiling.
7. Our Approach
Let’s see what it takes to create our own Anti-spoofing authentication system.
In our implementation of Anti-spoofing Face Recognition, we will use the OAK-D device to capture the video frames and the depth map of the surrounding. We will create a DepthAI pipeline and deploy pre-trained models available on the OpenModelZoo to detect a face in an image frame and do facial recognition. We will also get the depth map of the face and run it through a trained custom model running on the OAK device to identify spoofs.
Let’s see what OAK and DepthAi are.
1. OAK-D
OAK-D (OpenCV AI Kit – Depth) is a spatial AI camera which means it can make decisions based on not just the visual perception of the surroundings but also the depth perception.
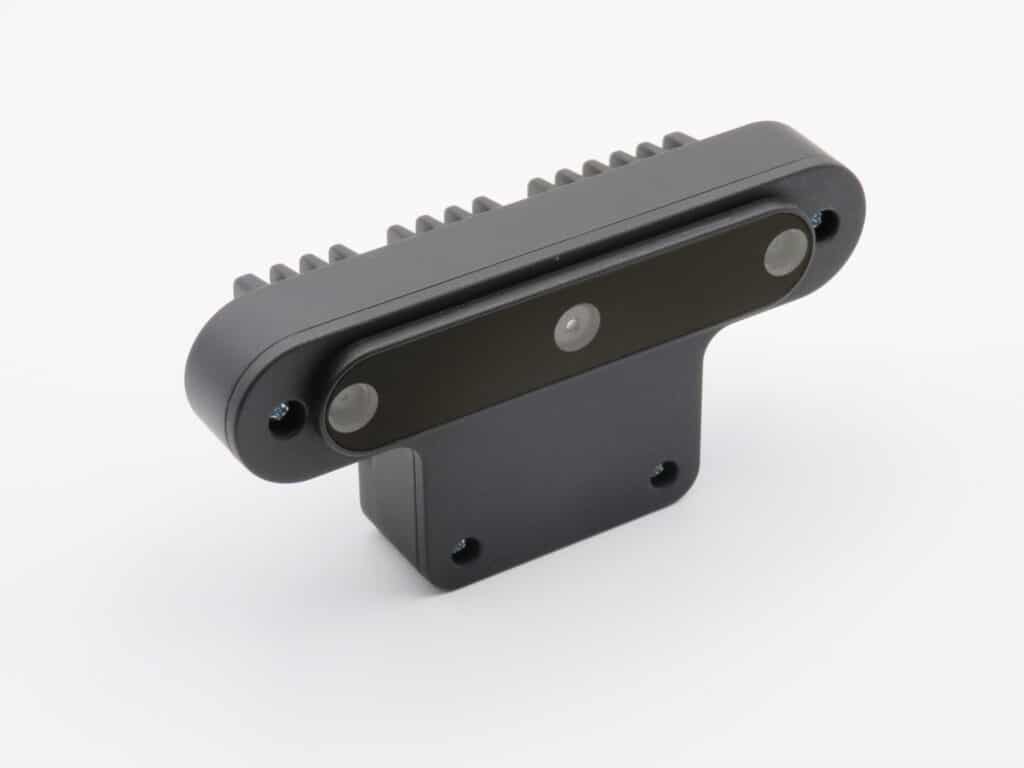
It achieves depth perception using a pair of stereoscopic cameras to estimate how far things are. The camera has an Intel Movidius VPU to power the vision and AI processing.
2. DepthAI
DepthAI is a cross-platform API used to interact with and program the OAK cameras to harness all its capabilities. Using it, we can create complex vision systems and even run custom model inferences on the device.
We have gone in depth about OAK-D and DepthAI in the series of posts, the link to which you can find below.
- Introduction to OAK-D and DepthAI
- Stereo Vision and Depth Estimation using OpenCV AI Kit
- Object detection with depth measurement using pre-trained models with OAK-D
- DepthAI Pipeline Overview: Creating a Complex Pipeline
8. Implementation
Let’s dive in and implement our system.
1. Prerequisites
- Python Environment
- OAK-D device
- Following Python modules
depthai == 2.10.0.0
opencv-contrib-python == 4.5.2.54
blobconverter == 1.2.9
scipy == 1.7.3
2. Code
Import Libraries
import cv2
import numpy as np
import depthai as dai
import os
import time
from face_auth import enroll_face, delist_face, authenticate_emb
import blobconverter
Create the DepthAI Pipeline
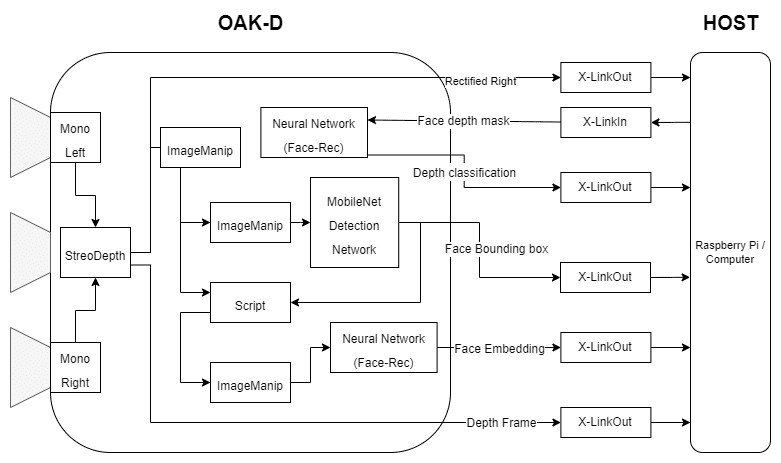
We create the DepthAI pipeline to get the depth map, and the right camera frame and to run all neural network models for face detection, face recognition, and depth classification.
We are using the “face-detection-retail-0004” model for face detection and the “Sphereface” model for face recognition. Both of the pre-trained models are available on the Open Model Zoo.
For spoof detection. We have trained a simple CNN binary classifier using Keras to classify between depth maps of real and spoofed faces.
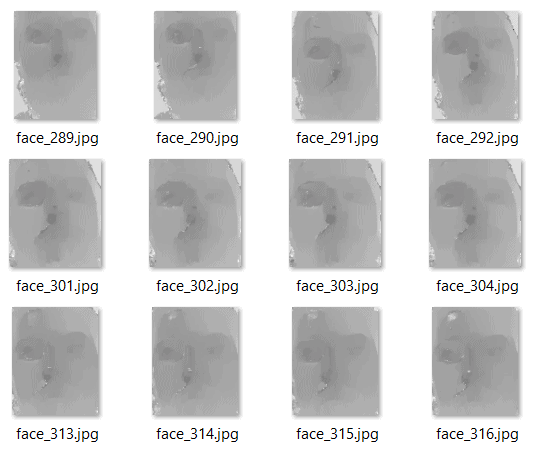
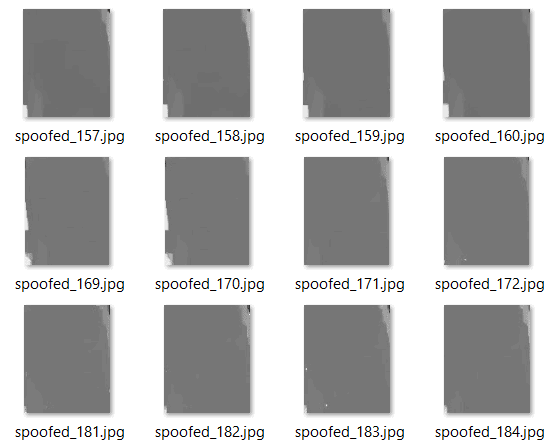
As DepthAI and OAK do not natively support the inference of Keras models, we use the blob converter to convert the trained model to the blob format supported by DepthAI so we can run it on the OAK device.
DepthAI Pipeline
# Define Depth Classification model input size
DEPTH_NN_INPUT_SIZE = (64, 64)

# Define Face Detection model name and input size
# If you define the blob make sure the DET_MODEL_NAME and DET_ZOO_TYPE are None
DET_INPUT_SIZE = (300, 300)
DET_MODEL_NAME = "face-detection-retail-0004"
DET_ZOO_TYPE = "depthai"
det_blob_path = None

# Define Face Recognition model name and input size
# If you define the blob make sure the REC_MODEL_NAME and REC_ZOO_TYPE are None
REC_MODEL_NAME = "Sphereface"
REC_ZOO_TYPE = "intel"
rec_blob_path = None


# Create DepthAi pipeline
def create_depthai_pipeline():
    # Start defining a pipeline
    pipeline = dai.Pipeline()

    # Define a source - two mono (grayscale) cameras
    left = pipeline.createMonoCamera()
    left.setResolution(dai.MonoCameraProperties.SensorResolution.THE_400_P)
    left.setBoardSocket(dai.CameraBoardSocket.LEFT)

    right = pipeline.createMonoCamera()
    right.setResolution(dai.MonoCameraProperties.SensorResolution.THE_400_P)
    right.setBoardSocket(dai.CameraBoardSocket.RIGHT)

    # Create a node that will produce the depth map
    depth = pipeline.createStereoDepth()
    depth.setConfidenceThreshold(200)
    depth.setOutputRectified(True)  # The rectified streams are horizontally mirrored by default
    depth.setRectifyEdgeFillColor(0)  # Black, to better see the cutout
    depth.setExtendedDisparity(True)  # For better close range depth perception

    median = dai.StereoDepthProperties.MedianFilter.KERNEL_7x7  # For depth filtering
    depth.setMedianFilter(median)

    # Linking mono cameras with depth node
    left.out.link(depth.left)
    right.out.link(depth.right)

    # Create left output
    xOutRight = pipeline.createXLinkOut()
    xOutRight.setStreamName("right")
    depth.rectifiedRight.link(xOutRight.input)

    # Create depth output
    xOutDisp = pipeline.createXLinkOut()
    xOutDisp.setStreamName("disparity")
    depth.disparity.link(xOutDisp.input)

    # Create input and output node for Depth Classification
    xDepthIn = pipeline.createXLinkIn()
    xDepthIn.setStreamName("depth_in")
    xOutDepthNn = pipeline.createXLinkOut()
    xOutDepthNn.setStreamName("depth_nn")

    # Define Depth Classification NN node
    depthNn = pipeline.createNeuralNetwork()
    depthNn.setBlobPath("data/depth-classification-models/depth_classification_ipscaled_model.blob")
    depthNn.input.setBlocking(False)

    # Linking
    xDepthIn.out.link(depthNn.input)
    depthNn.out.link(xOutDepthNn.input)

    # Convert detection model from OMZ to blob
    if DET_MODEL_NAME is not None:
        facedet_blob_path = blobconverter.from_zoo(
            name=DET_MODEL_NAME,
            shaves=6,
            zoo_type=DET_ZOO_TYPE
        )

    # Create Face Detection NN node
    faceDetNn = pipeline.createMobileNetDetectionNetwork()
    faceDetNn.setConfidenceThreshold(0.75)
    faceDetNn.setBlobPath(facedet_blob_path)

    # Create ImageManip to convert grayscale mono camera frame to RGB
    copyManip = pipeline.createImageManip()
    depth.rectifiedRight.link(copyManip.inputImage)
    # copyManip.initialConfig.setHorizontalFlip(True)
    copyManip.initialConfig.setFrameType(dai.RawImgFrame.Type.RGB888p)

    # Create ImageManip to preprocess input frame for detection NN
    detManip = pipeline.createImageManip()
    # detManip.initialConfig.setHorizontalFlip(True)
    detManip.initialConfig.setResize(DET_INPUT_SIZE[0], DET_INPUT_SIZE[1])
    detManip.initialConfig.setKeepAspectRatio(False)

    # Linking detection ImageManip to detection NN
    copyManip.out.link(detManip.inputImage)
    detManip.out.link(faceDetNn.input)

    # Create output steam for detection output
    xOutDet = pipeline.createXLinkOut()
    xOutDet.setStreamName('det_out')
    faceDetNn.out.link(xOutDet.input)

    # Script node will take the output from the face detection NN as an input and set ImageManipConfig
    # to crop the initial frame for recognition NN
    script = pipeline.create(dai.node.Script)
    script.setProcessor(dai.ProcessorType.LEON_CSS)
    script.setScriptPath("script.py")

    # Set inputs for script node
    copyManip.out.link(script.inputs['frame'])
    faceDetNn.out.link(script.inputs['face_det_in'])

    # Convert recognition model from OMZ to blob
    if REC_MODEL_NAME is not None:
        facerec_blob_path = blobconverter.from_zoo(
            name=REC_MODEL_NAME,
            shaves=6,
            zoo_type=REC_ZOO_TYPE
        )

    # Create Face Recognition NN node
    faceRecNn = pipeline.createNeuralNetwork()
    faceRecNn.setBlobPath(facerec_blob_path)

    # Create ImageManip to preprocess frame for recognition NN
    recManip = pipeline.createImageManip()

    # Set recognition ImageManipConfig from script node
    script.outputs['manip_cfg'].link(recManip.inputConfig)
    script.outputs['manip_img'].link(recManip.inputImage)

    # Create output stream for recognition output
    xOutRec = pipeline.createXLinkOut()
    xOutRec.setStreamName('rec_out')
    faceRecNn.out.link(xOutRec.input)

    recManip.out.link(faceRecNn.input)

    return pipeline
Script.py
In the above pipeline, we have used a Script node that will take the output from the face detection NN as an input and set ImageManipConfig for face recognition NN
import time


# Correct the bounding box
def correct_bb(bb):
    bb.xmin = max(0, bb.xmin)
    bb.ymin = max(0, bb.ymin)
    bb.xmax = min(bb.xmax, 1)
    bb.ymax = min(bb.ymax, 1)
    return bb


# Main loop
while True:
    time.sleep(0.001)

    # Get image frame
    img = node.io['frame'].get()

    # Get detection output
    face_dets = node.io['face_det_in'].tryGet()
    if face_dets and img is not None:

        # Loop over all detections
        for det in face_dets.detections:

            # Correct bounding box
            correct_bb(det)
            node.warn(f"New detection {det.xmin}, {det.ymin}, {det.xmax}, {det.ymax}")

            # Set config parameters
            cfg = ImageManipConfig()
            cfg.setCropRect(det.xmin, det.ymin, det.xmax, det.ymax)
            cfg.setResize(96, 112)  # Input size of Face Rec model
            cfg.setKeepAspectRatio(False)

            # Output image and config
            node.io['manip_cfg'].send(cfg)
            node.io['manip_img'].send(img)
Helper Functions
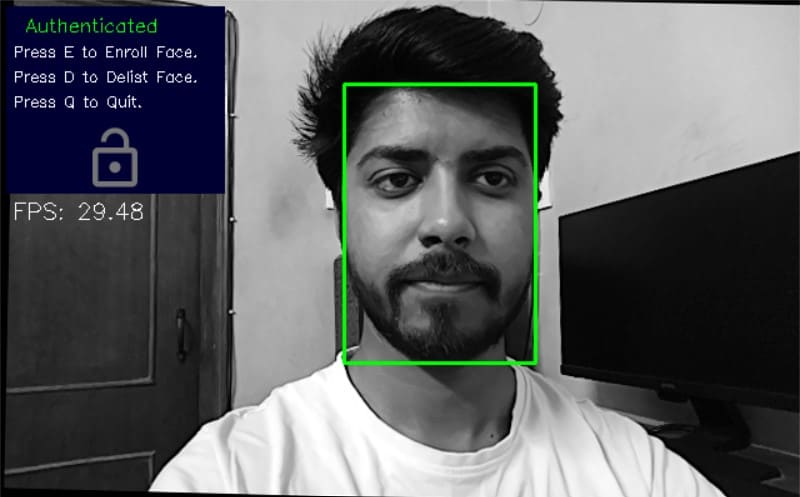
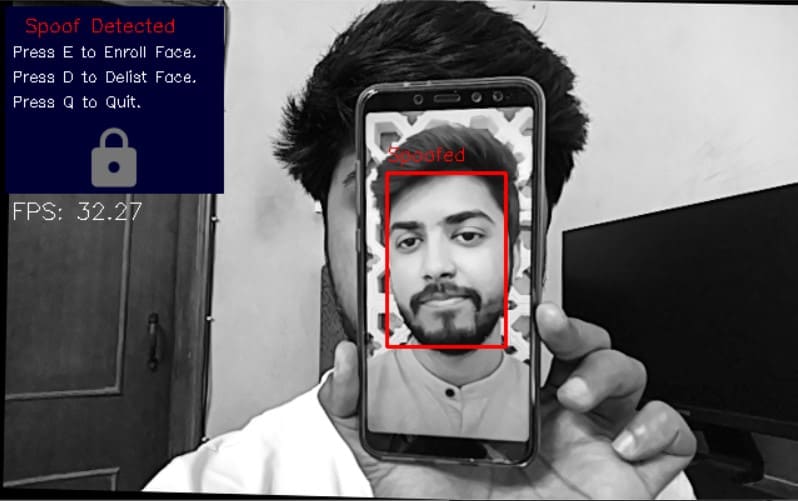
We use the overlay_symbol and display_info function to display the Lock/Unlock symbol and other information on the output frame.
# Load image of a lock in locked position
locked_img = cv2.imread(os.path.join('data', 'images', 'lock_grey.png'), -1)
# Load image of a lock in unlocked position
unlocked_img = cv2.imread(os.path.join('data', 'images', 'lock_open_grey.png'), -1)


# Overlay lock/unlock symbol on the frame
def overlay_symbol(frame, img, pos=(65, 100)):
    """
    This function overlays the image of lock/unlock
    if the authentication of the input frame
    is successful/failed.
    """
    # Offset value for the image of the lock/unlock
    symbol_x_offset = pos[0]
    symbol_y_offset = pos[1]

    # Find top left and bottom right coordinates
    # where to place the lock/unlock image
    y1, y2 = symbol_y_offset, symbol_y_offset + img.shape[0]
    x1, x2 = symbol_x_offset, symbol_x_offset + img.shape[1]

    # Scale down alpha channel between 0 and 1
    mask = img[:, :, 3]/255.0
    # Inverse of the alpha mask
    inv_mask = 1-mask

    # Iterate over the 3 channels - R, G and B
    for c in range(0, 3):
        # Add the lock/unlock image to the frame
        frame[y1:y2, x1:x2, c] = (mask * img[:, :, c] +
                                  inv_mask * frame[y1:y2, x1:x2, c])


# Display info on the frame
def display_info(frame, bbox, status, status_color, fps):
    # Display bounding box
    cv2.rectangle(frame, bbox, status_color[status], 2)

    # If spoof detected
    if status == 'Spoof Detected':
        # Display "Spoof detected" status on the bbox
        cv2.putText(frame, "Spoofed", (bbox[0], bbox[1] - 10), cv2.FONT_HERSHEY_SIMPLEX, 0.5, status_color[status])

    # Create background for showing details
    cv2.rectangle(frame, (5, 5, 175, 150), (50, 0, 0), -1)

    # Display authentication status on the frame
    cv2.putText(frame, status, (20, 25), cv2.FONT_HERSHEY_SIMPLEX, 0.5, status_color[status])

    # Display lock symbol
    if status == 'Authenticated':
        overlay_symbol(frame, unlocked_img)
    else:
        overlay_symbol(frame, locked_img)

    # Display instructions on the frame
    cv2.putText(frame, 'Press E to Enroll Face.', (10, 45), cv2.FONT_HERSHEY_SIMPLEX, 0.4, (255, 255, 255))
    cv2.putText(frame, 'Press D to Delist Face.', (10, 65), cv2.FONT_HERSHEY_SIMPLEX, 0.4, (255, 255, 255))
    cv2.putText(frame, 'Press Q to Quit.', (10, 85), cv2.FONT_HERSHEY_SIMPLEX, 0.4, (255, 255, 255))
    cv2.putText(frame, f'FPS: {fps:.2f}', (10, 175), cv2.FONT_HERSHEY_SIMPLEX, 0.6, (255, 255, 255))
face_auth.py Module
We have created a face_auth.py module to handle face authentication.
We use three functions from face_auth i.e authenticate_face, enlist_face and delist_face.
authenticate_face
Input: image_frame
Returns: boolean (to indicate if the detected face is authenticated or not), bounding box for the detected face
enroll_face
It takes the image as input and saves the face embedding for the detected face.
Input: image_frame
delist_face
It takes the image as input and removes the face embedding for the detected face.
Input: image_frame
from scipy import spatial

# Feature embedding vector of enrolled faces
enrolled_faces = []

# The minimum distance between two faces
# to be called unique
authentication_threshold = 0.30


def enroll_face(embeddings):
    """
    This function adds the feature embedding
    for given face to the list of enrolled faces.
    This entire process is equivalent to
    face enrolment.
    """
    # Get feature embedding vector
    for embedding in embeddings:
        # Add feature embedding to list of
        # enrolled faces
        enrolled_faces.append(embedding)


def delist_face(embeddings):
    """
    This function removes a face from the list
    of enrolled faces.
    """
    # Get feature embedding vector for input images
    global enrolled_faces
    if len(embeddings) > 0:
        for embedding in embeddings:
            # List of faces remaining after delisting
            remaining_faces = []
            # Iterate over the enrolled faces
            for idx, face_emb in enumerate(enrolled_faces):
                # Compute distance between feature embedding
                # for input images and the current face's
                # feature embedding
                dist = spatial.distance.cosine(embedding, face_emb)
                # If the above distance is more than or equal to
                # threshold, then add the face to remaining faces list
                # Distance between feature embeddings
                # is equivalent to the difference between
                # two faces
                if dist >= authentication_threshold:
                    remaining_faces.append(face_emb)
            # Update the list of enrolled faces
            enrolled_faces = remaining_faces


def authenticate_emb(embedding):
    """
    This function checks if a similar face
    embedding is present in the list of
    enrolled faces or not.
    """
    # Set authentication to False by default
    authentication = False

    if embedding is not None:
        # Iterate over all the enrolled faces
        for face_emb in enrolled_faces:
            # Compute the distance between the enrolled face's
            # embedding vector and the input image's
            # embedding vector
            dist = spatial.distance.cosine(embedding, face_emb)
            # If above distance is less the threshold
            if dist < authentication_threshold:
                # Set the authenatication to True
                # meaning that the input face has been matched
                # to the current enrolled face
                authentication = True
        if authentication:
            # If the face was authenticated
            return True
        else:
            # If the face was not authenticated
            return False
    # Default
    return None
Main Loop To Get Frames And Perform Authentication
First, we get the right camera frame, depth frame, and neural network from the output streams.
Once we have the Bounding box from the face detection output, we can use it to get the region of the face from the depth map and feed it into the pipeline to run it through the previously trained depth classifier to check if the face is real or spoofed.
After verifying the face is real, we pass the retrieved feature embedding of the face to the authenticate_face function, which will return a boolean value indicating if the face is authenticated or not.
If the face is not authenticated, we can use the enroll_face function to enroll the face and save its embedding. Similarly, we can use the delist_face function to remove an already enrolled face.
Finally, we display all the info on the frame.
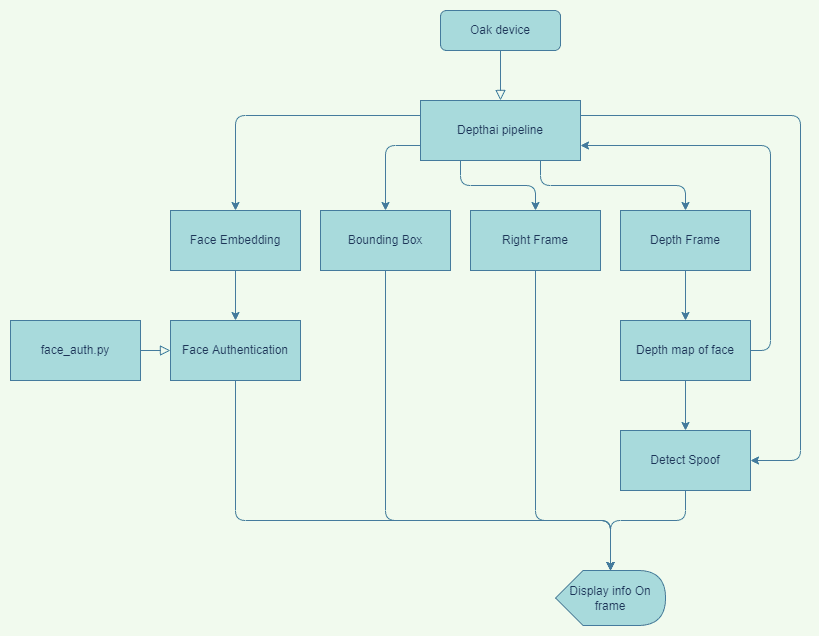
Flow Diagram
frame_count = 0  # Frame count
fps = 0  # Placeholder fps value
prev_frame_time = 0  # Used to record the time when we processed last frames
new_frame_time = 0  # Used to record the time at which we processed current frames

# Set status colors
status_color = {
    'Authenticated': (0, 255, 0),
    'Unauthenticated': (0, 0, 255),
    'Spoof Detected': (0, 0, 255),
    'No Face Detected': (0, 0, 255)
}

# Create Pipeline
pipeline = create_depthai_pipeline()

# Initialize device and start Pipeline
with dai.Device(pipeline) as device:
    # Start pipeline
    device.startPipeline()

    # Output queue to get the right camera frames
    qRight = device.getOutputQueue(name="right", maxSize=4, blocking=False)

    # Output queue to get the disparity map
    qDepth = device.getOutputQueue(name="disparity", maxSize=4, blocking=False)

    # Input queue to send face depth map to the device
    qDepthIn = device.getInputQueue(name="depth_in")

    # Output queue to get Depth Classification nn data
    qDepthNn = device.getOutputQueue(name="depth_nn", maxSize=4, blocking=False)

    # Output queue to get Face Recognition nn data
    qRec = device.getOutputQueue(name="rec_out", maxSize=4, blocking=False)

    # Output queue to get Face Detection nn data
    qDet = device.getOutputQueue(name="det_out", maxSize=4, blocking=False)

    while True:
        # Get right camera frame
        inRight = qRight.get()
        r_frame = inRight.getFrame()
        # r_frame = cv2.flip(r_frame, flipCode=1)

        # Get depth frame
        inDepth = qDepth.get()  # blocking call, will wait until a new data has arrived
        depth_frame = inDepth.getFrame()
        depth_frame = cv2.flip(depth_frame, flipCode=1)
        depth_frame = np.ascontiguousarray(depth_frame)
        depth_frame = cv2.bitwise_not(depth_frame)

        # Apply color map to highlight the disparity info
        depth_frame_cmap = cv2.applyColorMap(depth_frame, cv2.COLORMAP_JET)
        # Show disparity frame
        cv2.imshow("disparity", depth_frame_cmap)

        # Convert grayscale image frame to 'bgr' (opencv format)
        frame = cv2.cvtColor(r_frame, cv2.COLOR_GRAY2BGR)

        # Get image frame dimensions
        img_h, img_w = frame.shape[0:2]

        bbox = None

        # Get detection NN output
        inDet = qDet.tryGet()

        if inDet is not None:
            # Get face bbox detections
            detections = inDet.detections

            if len(detections) is not 0:
                # Use first detected face bbox
                detection = detections[0]
                # print(detection.confidence)
                x = int(detection.xmin * img_w)
                y = int(detection.ymin * img_h)
                w = int(detection.xmax * img_w - detection.xmin * img_w)
                h = int(detection.ymax * img_h - detection.ymin * img_h)
                bbox = (x, y, w, h)

        face_embedding = None
        authenticated = False

        # Check if a face was detected in the frame
        if bbox:

            # Get face roi depth frame
            face_d = depth_frame[max(0, bbox[1]):bbox[1] + bbox[3], max(0, bbox[0]):bbox[0] + bbox[2]]
            cv2.imshow("face_roi", face_d)

            # Preprocess face depth map for classification
            resized_face_d = cv2.resize(face_d, DEPTH_NN_INPUT_SIZE)
            resized_face_d = resized_face_d.astype('float16')

            # Create Depthai Imageframe
            img = dai.ImgFrame()
            img.setFrame(resized_face_d)
            img.setWidth(DEPTH_NN_INPUT_SIZE[0])
            img.setHeight(DEPTH_NN_INPUT_SIZE[1])
            img.setType(dai.ImgFrame.Type.GRAYF16)

            # Send face depth map to depthai pipeline for classification
            qDepthIn.send(img)

            # Get Depth Classification NN output
            inDepthNn = qDepthNn.tryGet()

            is_real = None

            if inDepthNn is not None:
                # Get prediction
                cnn_output = inDepthNn.getLayerFp16("dense_2/Sigmoid")
                # print(cnn_output)
                if cnn_output[0] > .5:
                    prediction = 'spoofed'
                    is_real = False
                else:
                    prediction = 'real'
                    is_real = True
                print(prediction)

            if is_real:
                # Check if the face in the frame was authenticated

                # Get recognition NN output
                inRec = qRec.tryGet()
                if inRec is not None:
                    # Get embedding of the face
                    face_embedding = inRec.getFirstLayerFp16()
                    # print(len(face_embedding))

                    authenticated = authenticate_emb(face_embedding)

                if authenticated:
                    # Authenticated
                    status = 'Authenticated'
                else:
                    # Unauthenticated
                    status = 'Unauthenticated'
            else:
                # Spoof detected
                status = 'Spoof Detected'
        else:
            # No face detected
            status = 'No Face Detected'

        # Display info on frame
        display_info(frame, bbox, status, status_color, fps)

        # Calculate average fps
        if frame_count % 10 == 0:
            # Time when we finish processing last 10 frames
            new_frame_time = time.time()

            # Fps will be number of frame processed in one second
            fps = 1 / ((new_frame_time - prev_frame_time)/10)
            prev_frame_time = new_frame_time

        # Capture the key pressed
        key_pressed = cv2.waitKey(1) & 0xff

        # Enrol the face if e was pressed
        if key_pressed == ord('e'):
            if is_real:
                enroll_face([face_embedding])
        # Delist the face if d was pressed
        elif key_pressed == ord('d'):
            if is_real:
                delist_face([face_embedding])
        # Stop the program if q was pressed
        elif key_pressed == ord('q'):
            break

        # Display the final frame
        cv2.imshow("Authentication Cam", frame)

        # Increment frame count
        frame_count += 1

# Close all output windows
cv2.destroyAllWindows()
9. Demo
10. Where It Fails
The proposed anti-spoofing system prevents the popular attacks from bypassing authentication that is attempted using an image and even stops the video attacks used to bypass liveliness detection systems. However, there are still situations where it fails, such as a colored 3d print of the face geometry can be used to bypass it.
And there is the 3d mask attack can be challenging to detect for any system because of how similar it makes the attacker’s face to the authenticated person’s face
11. Future Improvements
The current implementation can be improved in multiple ways in terms of the ability to detect spoofs.
As mentioned in the fail case, the system can be bypassed by using a 3d faceprint that mimics the 3d contours of the face, to avoid this, we can use this in conjunction with liveness detection with the help of which we can detect if the face is real and alive and not just a simulation.
Right now, the classification model is trained with simple examples for demonstration. We can train a more robust classification model that accounts for all the variations in the image and video attacks.
12. Conclusion- The Ideal System – Anti Spoofing Face Recognition
As you must have understood by now, how each of the spoof preventive methods targets a particular attack and fail in the case of other attacks.
The Liveliness detection method only saves from the image attacks and fails for any other attacks.
The Depth detection method saves from the image as well as video attacks but fails for 3d print attacks.
Depth detection is still to be preferred if only a single method is to be deployed, as it prevents most attacks. Also, the attacks it prevents are the most common and can be performed easily.
But an ideal Anti-Spoofing system should not rely on a single method but must incorporate multiple methods working together to prevent spoofing attempts in as many cases as possible.
Must Read Articles
| We have crafted the following articles, especially for you. 1. What is Face Detection? – The Ultimate Guide 2. Face Recognition with ArcFace 3. Face Recognition: An Introduction for Beginners 4. Face Detection – OpenCV, Dlib and Deep Learning ( C++ / Python ) |





100K+ Learners
Join Free OpenCV Bootcamp3 Hours of Learning