This post will go over how to use OpenCV DNN Module with Nvidia GPU on Windows operating system. If you sthave an Ubuntu system, you can check https://learnopencv.com/opencv-dnn-with-gpu-support/.
OpenCV DNN module frequently finds its place in face detection, pose estimation, object detection, etc. However, the module had a significant drawback – it was only able to carry out inference using CPU memory. This resulted in slow applications.
During Google Summer of Code 2019, Yashas Samaga added Nvidia GPU support to the OpenCV DNN module, and these changes were made public since version 4.2.0. The changes made to the module allowed the use of Nvidia GPUs to speed up the inference.
- Prepping the Windows system for OpenCV build
- Initialise variables
- Create and Configure Python Environment
- Get OpenCV source code
- Build OpenCV
- Set Environment Variable
- Test DNN with GPU
Step 1. Preparing the system
Visual Studio
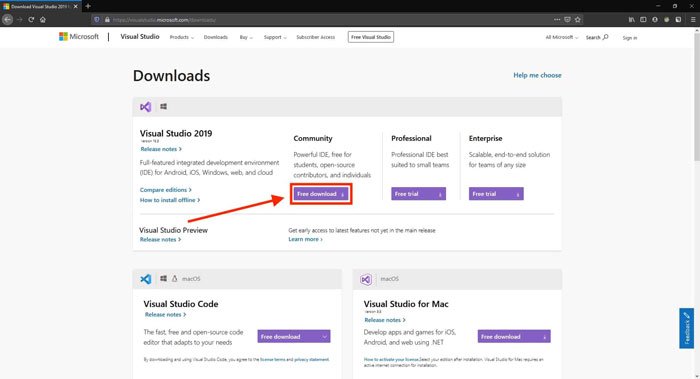
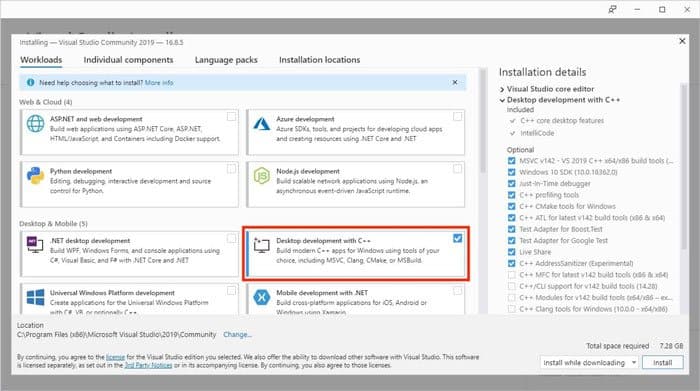
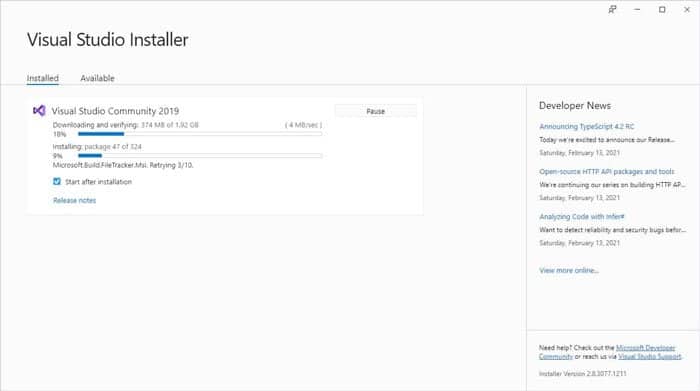
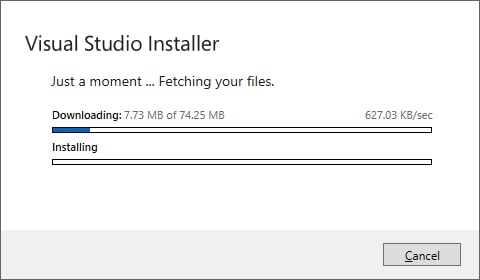
Download and install Visual Studio from https://visualstudio.microsoft.com/downloads/. Run the installer, select Desktop Development with C++ and click install.
Anaconda
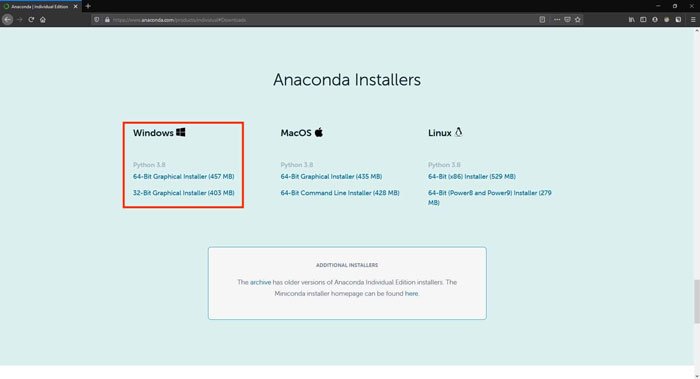
Download and install Anaconda from https://www.anaconda.com/products/individual. Follow the on-screen instructions. Check the option Add Anaconda to PATH Environment variable during the installation.
CMake
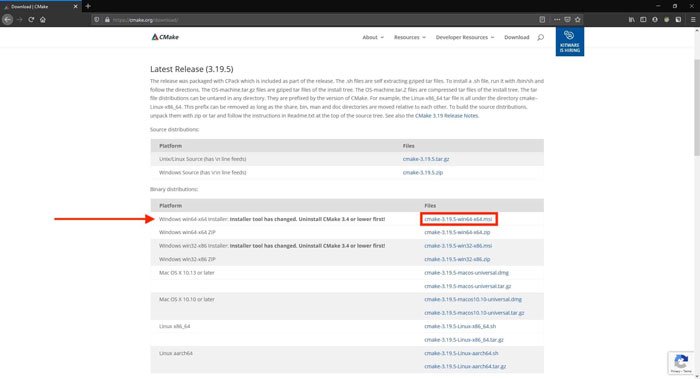
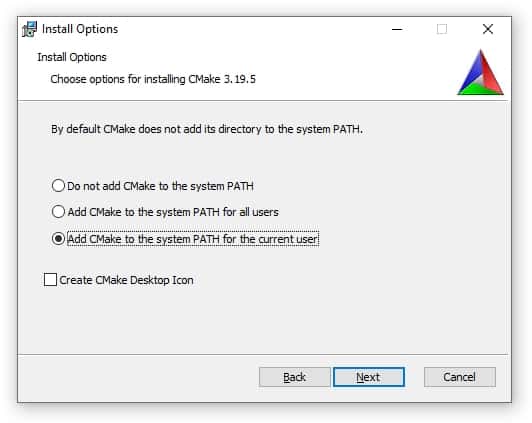
Download and install the latest version of CMake from https://cmake.org/download/. Check the option Add CMake to the system PATH for the current user during the installation.
We are using CMake version 3.19.5, but new or old versions of CMake should also work.
Git
Download and install Git from https://git-scm.com/downloads/. Check the option Git from the command line and also from 3rd party software during installation.
We are using Git version 2.30.1, but new or old versions of Git should also work.

CUDA
Download and install the latest version of CUDA from https://developer.nvidia.com/cuda-downloads. You can also get the archived CUDA versions from https://developer.nvidia.com/cuda-toolkit-archive.
Follow the CUDA installation guide for Windows at https://docs.nvidia.com/cuda/cuda-installation-guide-microsoft-windows/index.html.
For this post, we have used CUDA 11.2, but you can work with other CUDA versions as well.
cuDNN
Answer cuDNN survey on https://developer.nvidia.com/cudnn-download-survey and download your preferred version of cuDNN.
Follow the cuDNN installation guide for Windows at https://docs.nvidia.com/deeplearning/cudnn/install-guide/index.html#install-windows.
For this post, we have used cuDNN 11.2, but you can work with other cuDNN versions as well.
Step 2. Essential Variables for Installation
For ease in installing, we will initialise variables that will help us in the installation commands.
Note: Do not close the command prompt till the last step, as it will destroy all the variables.
Start a new command prompt session. Navigate to the directory you want to build OpenCV in. We will save this location as cwd.
set cwd=%cd%
Now, select a suitable name for the python virtual environment. Here, the OpenCV-Python API will be built
set envName=env
Finally, select the OpenCV version you want to build. We will be building for OpenCV 4.5.1.
set opencv-version=4.5.1
Step 3. Create and Configure Python Virtual Environment
We are going to build OpenCV in a python virtual environment. With virtual environments, you can build multiple versions of OpenCV on your system. You can activate any virtual environment and use your custom OpenCV library with just a single command.
conda create -y --name %envName% numpy
Step 4. Get the OpenCV Source Code
We will be using git to fetch the OpenCV source code from Github. The advantage is that we can build any version of OpenCV that we want. We specify the %opencv-version% during git checkout.
cd %cwd%
git clone https://github.com/opencv/opencv.git
cd opencv
git checkout tags/%opencv-version%

cd %cwd%
git clone https://github.com/opencv/opencv_contrib.git
cd opencv_contrib
git checkout tags/%opencv-version%
Step 5. Build OpenCV with CUDA support
The first step is to configure the OpenCV build using CMake. We pass several options to the CMake CLI. These are:
- -G: It specifies the Visual Studio compiler used to build
- -T: Specify the host tools architecture
- CMAKE_BUILD_TYPE: It specified
RELEASEorDEBUGmode of installation - CMAKE_INSTALL_PREFIX: It specified the installation directory
- OPENCV_EXTRA_MODULES_PATH: It is set to the location of the opencv_contrib modules
- PYTHON_EXECUTABLE: It is set to the python3 executable, which is used for the build.
- PYTHON3_LIBRARY: It points to the python3 library.
- WITH_CUDA: To build OpenCV with CUDA
- WITH_CUDNN: To build OpenCV with cuDNN
- OPENCV_DNN_CUDA: This is enabled to build the DNN module with CUDA support
- WITH_CUBLAS: Enabled for optimisation.
Additionally, there are two more optimization flags, ENABLE_FAST_MATH and CUDA_FAST_MATH, which are used to optimise and speed up the math operations. However, the results of floating-point calculations are not guaranteed to be IEEE compliant when you enable these flags. If you want quick calculations and precision is not an issue, you can go ahead with these options. This link explains in detail the problems with accuracy.
conda activate %envName%
set CONDA_PREFIX=%CONDA_PREFIX:\=/%

cd %cwd%

mkdir OpenCV-%opencv-version%
cd opencv
mkdir build
cd build

cmake ^
-G "Visual Studio 16 2019" ^
-T host=x64 ^
-DCMAKE_BUILD_TYPE=RELEASE ^
-DCMAKE_INSTALL_PREFIX=%cwd%/OpenCV-%opencv-version% ^
-DOPENCV_EXTRA_MODULES_PATH=%cwd%/opencv_contrib/modules ^
-DINSTALL_PYTHON_EXAMPLES=OFF ^
-DINSTALL_C_EXAMPLES=OFF ^
-DPYTHON_EXECUTABLE=%CONDA_PREFIX%/python3 ^
-DPYTHON3_LIBRARY=%CONDA_PREFIX%/libs/python3 ^
-DWITH_CUDA=ON ^
-DWITH_CUDNN=ON ^
-DOPENCV_DNN_CUDA=ON ^
-DWITH_CUBLAS=ON ^
..
If CMake can find CUDA and cuDNN installed on your system, you should see this output.
OpenCV is ready to be built now. Run the following command to build it.
cmake --build . --config Release --target INSTALL
Once OpenCV is built, you can delete unnecessary folders (opencv and opencv_contrib) to free up space.
rmdir /s /q opencv opencv_contrib
Step 6. Set Environment Variable
Now that you are done with the installation, we will be setting up Environment variables. Environment variables store the libraries and binaries’ address, which are used by linker and loader during a program’s execution.
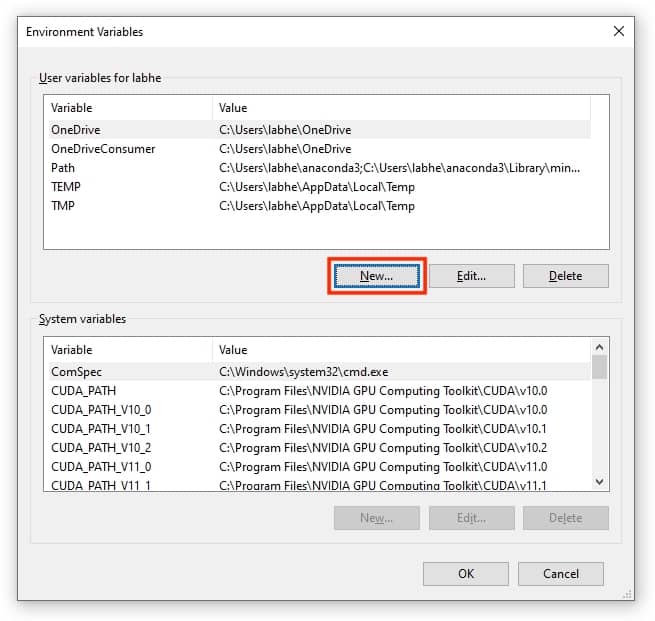
We will be setting OpenCV_DIR and updating the Path variable. Search for Edit environment variables for your account in the start menu.
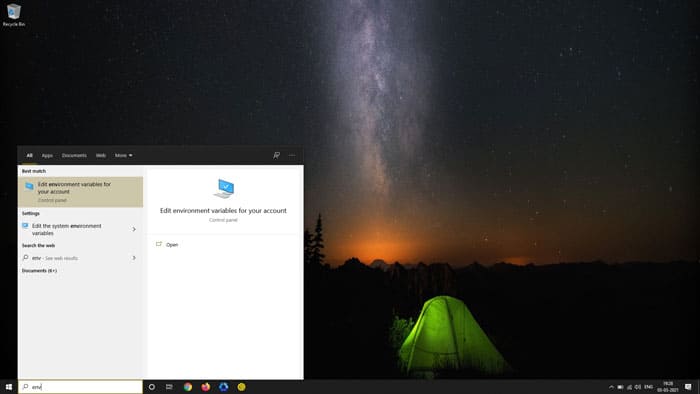
To set OpenCV_DIR, click on New. In the Variable Name field type “OpenCV_DIR“. In the Variable value field give the address to the OpenCV folder. In our case, it is C:\OpenCV-4.5.1. Click on OK.
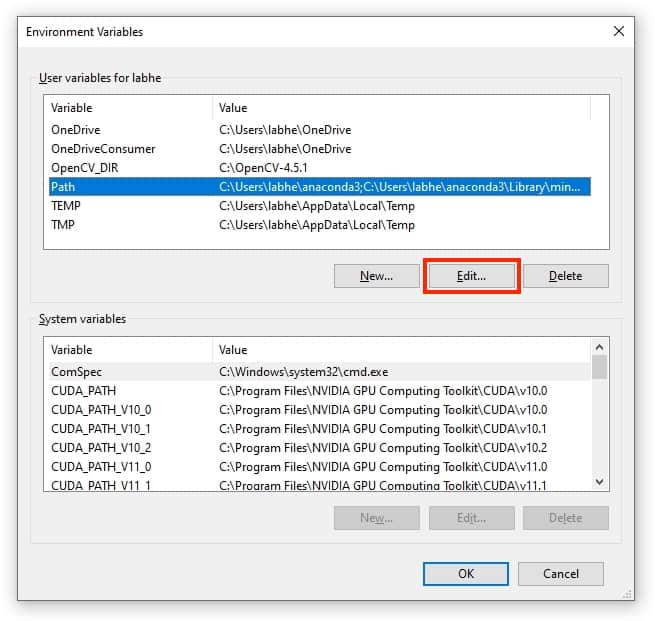
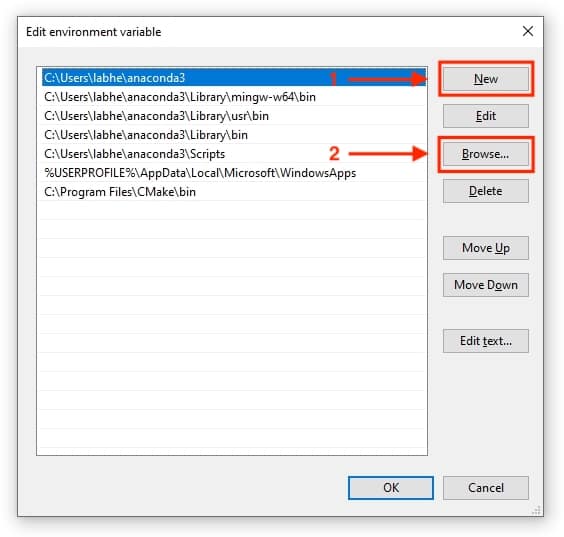
To update the Path variable, click on it and click on Edit. When the pop-up window opens, click on New, and click on Browse. Navigate to the bin directory. The path should be similar to C:\OpenCV-4.5.1\x64\vc16\bin. Click on OK.
Note: Do not use the folder C:\OpenCV-4.5.1\bin.
The environment variables will be updated in the next command prompt session.
Step 7. Test OpenCV DNN Module with Nvidia GPU on Windows
We will be testing the OpenPose code, which is available in the post https://learnopencv.com/deep-learning-based-human-pose-estimation-using-opencv-cpp-python/.
Read models
C++:
// Specify the paths for the 2 files
string protoFile = "pose/mpi/pose_deploy_linevec_faster_4_stages.prototxt";
string weightsFile = "pose/mpi/pose_iter_160000.caffemodel";

// Read the network into Memory
Net net = readNetFromCaffe(protoFile, weightsFile);
Python:
# Specify the paths for the 2 files
protoFile = "pose/mpi/pose_deploy_linevec_faster_4_stages.prototxt"
weightsFile = "pose/mpi/pose_iter_160000.caffemodel"

# Read the network into Memory
net = cv2.dnn.readNetFromCaffe(protoFile, weightsFile)
Read Image and preprocess
C++:
// Read Image
Mat frame = imread("single.jpg");
// Specify the input image dimensions
int inWidth = 368;
int inHeight = 368;

// Prepare the frame to be fed to the network
Mat inpBlob = blobFromImage(frame, 1.0 / 255, Size(inWidth, inHeight), Scalar(0, 0, 0), false, false);

// Set the prepared object as the input blob of the network
net.setInput(inpBlob);
Python:
# Read image
frame = cv2.imread("single.jpg")

# Specify the input image dimensions
inWidth = 368
inHeight = 368

# Prepare the frame to be fed to the network
inpBlob = cv2.dnn.blobFromImage(frame, 1.0 / 255, (inWidth, inHeight), (0, 0, 0), swapRB=False, crop=False)

# Set the prepared object as the input blob of the network
net.setInput(inpBlob)
Make prediction and pass key point
C++:
Mat output = net.forward()

int H = output.size[2];
int W = output.size[3];

// find the position of the body parts
vector<Point> points(nPoints);
for (int n=0; n < nPoints; n++)
{
    // Probability map of corresponding body's part.
    Mat probMap(H, W, CV_32F, output.ptr(0,n));

    Point2f p(-1,-1);
    Point maxLoc;
    double prob;
    minMaxLoc(probMap, 0, &prob, 0, &maxLoc);
    if (prob > thresh)
    {
        p = maxLoc;
        p.x *= (float)frameWidth / W ;
        p.y *= (float)frameHeight / H ;

        circle(frameCopy, cv::Point((int)p.x, (int)p.y), 8, Scalar(0,255,255), -1);
        cv::putText(frameCopy, cv::format("%d", n), cv::Point((int)p.x, (int)p.y), cv::FONT_HERSHEY_COMPLEX, 1, cv::Scalar(0, 0, 255), 2);

    }
    points[n] = p;
}
Python:
output = net.forward()

H = out.shape[2]
W = out.shape[3]
# Empty list to store the detected keypoints
points = []
for i in range(len()):
    # confidence map of corresponding body's part.
    probMap = output[0, i, :, :]

    # Find global maxima of the probMap.
    minVal, prob, minLoc, point = cv2.minMaxLoc(probMap)

    # Scale the point to fit on the original image
    x = (frameWidth * point[0]) / W
    y = (frameHeight * point[1]) / H

    if prob > threshold :
        cv2.circle(frame, (int(x), int(y)), 15, (0, 255, 255), thickness=-1, lineType=cv.FILLED)
        cv2.putText(frame, "{}".format(i), (int(x), int(y)), cv2.FONT_HERSHEY_SIMPLEX, 1.4, (0, 0, 255), 3, lineType=cv2.LINE_AA)

        # Add the point to the list if the probability is greater than the threshold
        points.append((int(x), int(y)))
    else :
        points.append(None)

cv2.imshow("Output-Keypoints",frame)
cv2.waitKey(0)
cv2.destroyAllWindows()
Draw Skeleton
C++:
for (int n = 0; n < nPairs; n++)
{
    // lookup 2 connected body/hand parts
    Point2f partA = points[POSE_PAIRS[n][0]];
    Point2f partB = points[POSE_PAIRS[n][1]];

    if (partA.x<=0 || partA.y<=0 || partB.x<=0 || partB.y<=0)
        continue;

    line(frame, partA, partB, Scalar(0,255,255), 8);
    circle(frame, partA, 8, Scalar(0,0,255), -1);
    circle(frame, partB, 8, Scalar(0,0,255), -1);
}
Python:
for pair in POSE_PAIRS:
    partA = pair[0]
    partB = pair[1]

    if points[partA] and points[partB]:
        cv2.line(frameCopy, points[partA], points[partB], (0, 255, 0), 3)
Let’s test this code and compare the performance. My system configuration is:
- Processor: AMD Ryzen 7 4800H, 2900Mhz
- Number of cores: 8
- GPU: Nvidia GeForce GTX 1650 4GB
- RAM: 16GB
To run the code with CUDA backend, we do a simple addition to the C++ and Python code:
C++:
net.setPreferableBackend(DNN_BACKEND_CUDA);
net.setPreferableTarget(DNN_TARGET_CUDA);
Python:
net.setPreferableBackend(cv2.dnn.DNN_BACKEND_CUDA)
net.setPreferableTarget(cv2.dnn.DNN_TARGET_CUDA)
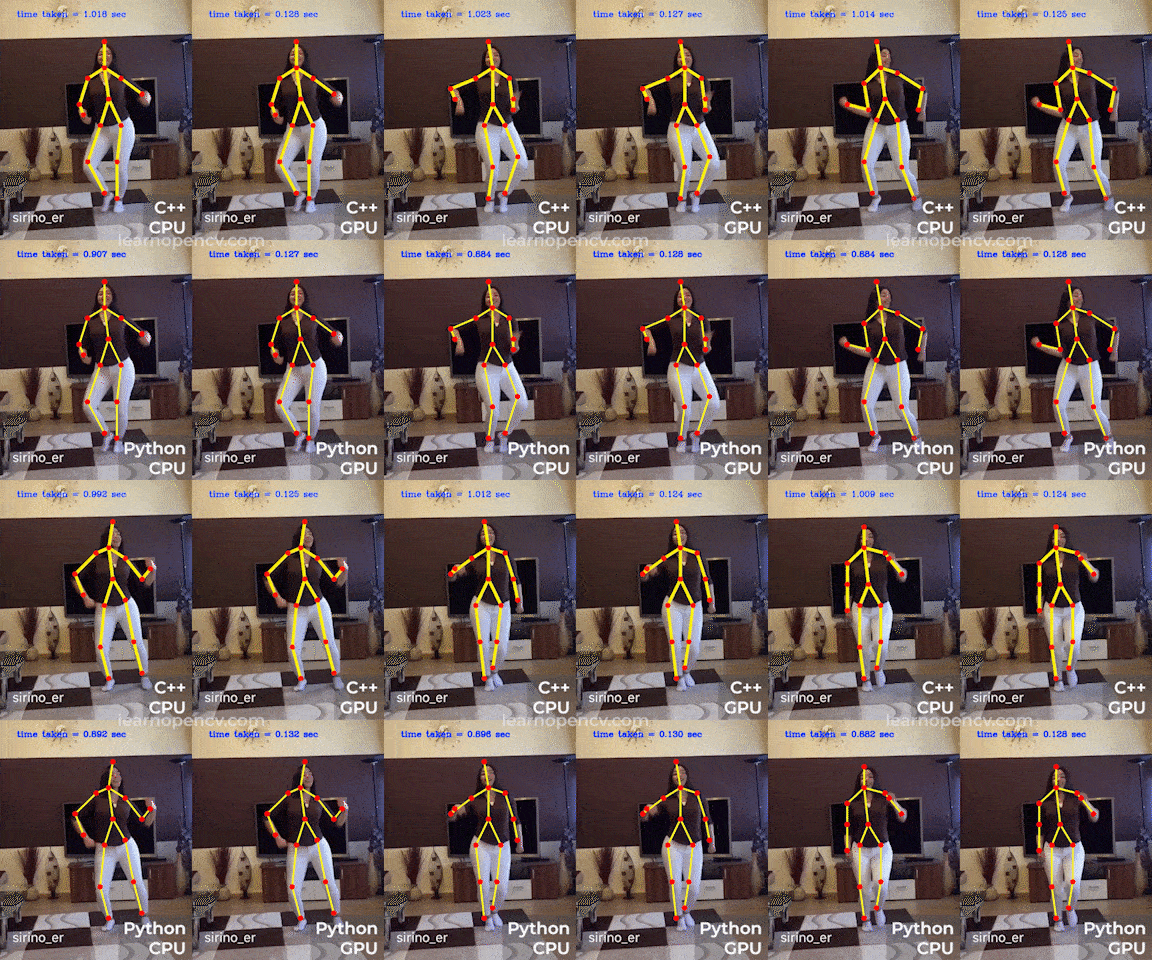
This video is speed up to help us visualise easily. In reality, the CPU version is rendered much slower than GPU.
With GPU, we get 7.48 fps, and with CPU, we get 1.04 fps.
Summary
The OpenCV DNN module allows the use of Nvidia GPUs to speed up the inference. In this article, we learned how to build the OpenCV DNN module with CUDA support on Windows OS. We discussed installing (with appropriate settings), various packages needed for building the OpenCV DNN module, initialising variables for ease during installation, creating and configuring the Python Virtual Environment, and configuring the OpenCV build using CMake. Once all of these steps and procedures were complete, we built the OpenCVdownload. Finally, we tested the DNN with GPU by running the OpenPose code available here.










100K+ Learners
Join Free OpenCV Bootcamp3 Hours of Learning