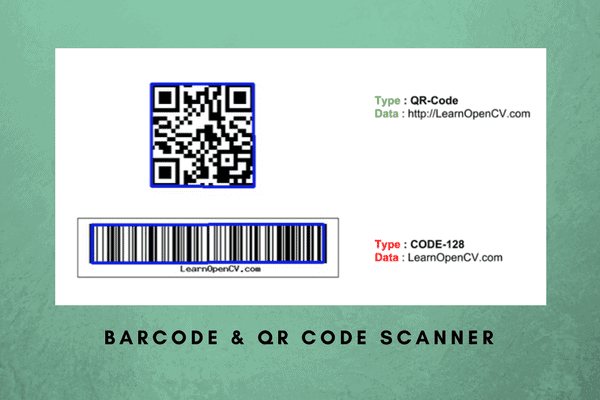
In this post, we will share C++ and Python code for writing a barcode and QR code scanner using a library called ZBar and OpenCV. The Python code works in both Python 2 and Python 3.
If you have never seen a barcode or a QR code, please send me the address of your cave so I can send you a sample by mail. Jokes aside, barcodes and QR codes are everywhere. In fact, I have a QR code on the back of my business card as well! Pretty cool, huh?
How to Detect and Decode Barcodes and QR Codes in an Image?
Step 1 : Install ZBar
The best library for detecting and decoding barcodes and QR codes of different types is called ZBar. Before we begin, you must download and install ZBar by following the instructions.
macOS users can simply install using Homebrew
brew install zbar
Ubuntu users can install using
sudo apt-get install libzbar-dev libzbar0
Step 2 : Install pyzbar (for Python users only)
The official version of ZBar does not support Python 3. So we recommend using pyzbar which supports both ython 2 and Python 3. If you want to work with python 2, you can install zbar and skip installing pyzbar.
Install ZBar
# NOTE: Official zbar version does not support Python 3
pip install zbar
Install pyzbar
pip install pyzbar
Step 3: Understanding the structure of a barcode / QR code
A barcode / QR code object returned by ZBar has three fields
- Type: If the symbol detected by ZBar is a QR code, the type is QR-Code. If it is barcode, the type is one of the several kinds of barcodes ZBar is able to read. In our example, we have used a barcode of type CODE-128
- Data: This is the data embedded inside the barcode / QR code. This data is usually alphanumeric, but other types ( numeric, byte/binary etc. ) are also valid.
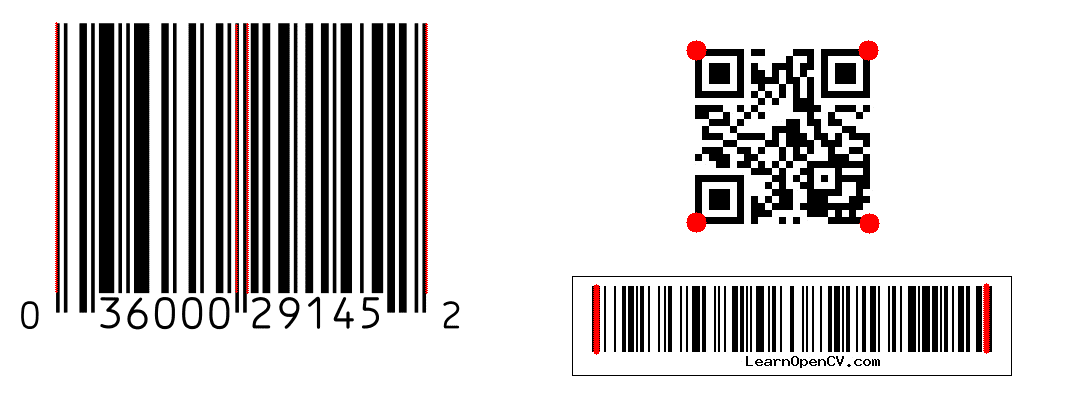
- Location: This is a collection of points that locate the code. For QR codes, it is a list of four points corresponding to the four corners of the QR code quad. For barcodes, location is a collection of points that mark the barcode’s start and end of word boundaries. The location points are plotted for a few different kinds of symbols below.

Step 3a : C++ code for scanning barcode and QR code using ZBar + OpenCV
We first define a structure to hold the information about a barcode or QR code detected in an image.
typedef struct
{
  string type;
  string data;
  vector <Point> location;
} decodedObject;
The type, data, and location fields are explained in the previous section.
Let’s look at the decode function that takes in an image and returns all barcodes and QR codes found.
// Find and decode barcodes and QR codes
void decode(Mat &im, vector<decodedObject>&decodedObjects)
{

  // Create zbar scanner
  ImageScanner scanner;

  // Configure scanner
  scanner.set_config(ZBAR_NONE, ZBAR_CFG_ENABLE, 1);

  // Convert image to grayscale
  Mat imGray;
  cvtColor(im, imGray,CV_BGR2GRAY);

  // Wrap image data in a zbar image
  Image image(im.cols, im.rows, "Y800", (uchar *)imGray.data, im.cols * im.rows);

  // Scan the image for barcodes and QRCodes
  int n = scanner.scan(image);

  // Print results
  for(Image::SymbolIterator symbol = image.symbol_begin(); symbol != image.symbol_end(); ++symbol)
  {
    decodedObject obj;

    obj.type = symbol->get_type_name();
    obj.data = symbol->get_data();

    // Print type and data
    cout << "Type : " << obj.type << endl;
    cout << "Data : " << obj.data << endl << endl;

    // Obtain location
    for(int i = 0; i< symbol->get_location_size(); i++)
    {
      obj.location.push_back(Point(symbol->get_location_x(i),symbol->get_location_y(i)));
    }

    decodedObjects.push_back(obj);
  }
}
First, in lines 5-9 we create an instance of a ZBar ImageScanner and configure it to detect all kinds of barcodes and QR codes. If you want only a specific kind of symbol detected, you must change ZBAR_NONE to a different type listed here. We then convert the image to grayscale ( lines 11-13). We then convert the grayscale image to a ZBar compatible format in line 16 . Finally, we scan the image for symbols (line 19). Finally, we iterate over the symbols, extract the type, data, and location information, and push it in the vector of detected objects (lines 21-40).
Next, we will explain the code for displaying all the symbols. The code below takes in the input image and a vector of decoded symbols from the previous step. If the points form a quad ( e.g. in a QR code ), we draw the quad ( line 14 ). If the location is not a quad, we draw the outer boundary of all the points ( also called the convex hull ) of all the points. This is done using OpenCV function called convexHull shown in line 12.
// Display barcode and QR code location
void display(Mat &im, vector<decodedObject>&decodedObjects)
{
  // Loop over all decoded objects
  for(int i = 0; i < decodedObjects.size(); i++)
  {
    vector<Point> points = decodedObjects[i].location;
    vector<Point> hull;

    // If the points do not form a quad, find convex hull
    if(points.size() > 4)
      convexHull(points, hull);
    else
      hull = points;

    // Number of points in the convex hull
    int n = hull.size();

    for(int j = 0; j < n; j++)
    {
      line(im, hull[j], hull[ (j+1) % n], Scalar(255,0,0), 3);
    }

  }

  // Display results
  imshow("Results", im);
  waitKey(0);

}
Finally, we have the main function shared below that reads an image, decodes the symbols using the decode function described above, and displays the location using the display function described above.
int main(int argc, char* argv[])
{

  // Read image
  Mat im = imread("zbar-test.jpg");

  // Variable for decoded objects
  vector<decodedObject> decodedObjects;

  // Find and decode barcodes and QR codes
  decode(im, decodedObjects);

  // Display location
  display(im, decodedObjects);

  return EXIT_SUCCESS;
}
Step 3b : Python code for scanning barcode and QR code using ZBar + OpenCV
For Python, we use pyzbar, which has a simple decode function to locate and decode all symbols in the image. The decode function in lines 6-15 warps pyzbar’s decode function and loops over the located barcodes and QR codes and prints the data.
The decoded symbols from the previous step are passed on to the display function (lines 19-41). If the points form a quad ( e.g. in a QR code ), we draw the quad ( line 30 ). If the location is not a quad, we draw the outer boundary of all the points ( also called the convex hull ) of all the points. This is done using OpenCV function called cv2.convexHull shown in line 27.
Finally, the main function reads an image, decodes it and displays the results.
from __future__ import print_function
import pyzbar.pyzbar as pyzbar
import numpy as np
import cv2

def decode(im) :
  # Find barcodes and QR codes
  decodedObjects = pyzbar.decode(im)

  # Print results
  for obj in decodedObjects:
    print('Type : ', obj.type)
    print('Data : ', obj.data,'\n')

  return decodedObjects

# Display barcode and QR code location
def display(im, decodedObjects):

  # Loop over all decoded objects
  for decodedObject in decodedObjects:
    points = decodedObject.polygon

    # If the points do not form a quad, find convex hull
    if len(points) > 4 :
      hull = cv2.convexHull(np.array([point for point in points], dtype=np.float32))
      hull = list(map(tuple, np.squeeze(hull)))
    else :
      hull = points;

    # Number of points in the convex hull
    n = len(hull)

    # Draw the convext hull
    for j in range(0,n):
      cv2.line(im, hull[j], hull[ (j+1) % n], (255,0,0), 3)

  # Display results
  cv2.imshow("Results", im);
  cv2.waitKey(0);

# Main
if __name__ == '__main__':

  # Read image
  im = cv2.imread('zbar-test.jpg')

  decodedObjects = decode(im)
  display(im, decodedObjects)
Some Results


