This summer I am doing an internship at Big Vision LLC under the guidance of Dr. Satya Mallick. In this post, I will describe the problem I was asked to solve to qualify for the internship. For a beginner who is just starting out in AI, this problem was just outside my comfort zone. A difficult task, but achievable with effort. It helped me stretch my abilities and learn new ideas and tools and test my patience. It took me about 30 hours to do this project, but the best part is that Big Vision would have paid for my time even if I did not qualify!
The first receipient of the prestigious Turing Award, Dr. Alan Perlis once said this about the difficulty and the magic of AI —
” A year spent in Artificial Intelligence is enough to make one believe in God.”
For me, as a beginner, spending 30 hours for this project was equal to believe that AI has its own magic.
As we know, even beginners in AI these days are used to working with very large datasets. Most of these datasets are created manually and with a lot of effort. For example, many beginners use MNIST or CIFAR-10 or use the pre-trained ImageNet model. All these datasets were created manually. Most of the time it is not feasible for an individual to create a large dataset by themselves. It often requires a large team of annotators.
Sometimes, we get lucky, and the problem at hand can be solved by creating a synthetic dataset.
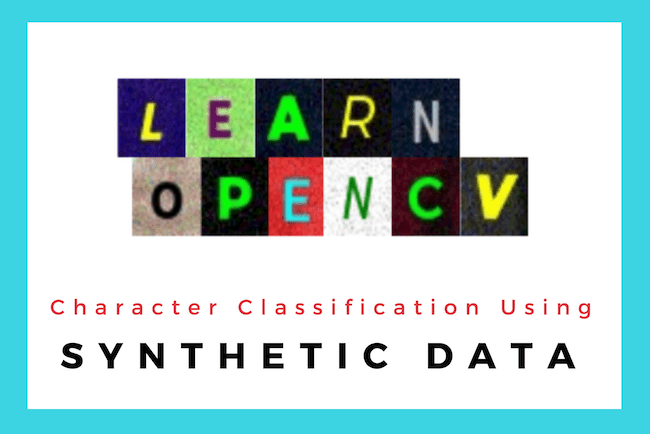
In this post, we will learn how to create a synthetic dataset and use it to train a model for recognizing a single printed character with an arbitrary background, blur, noise and other artifacts. In this case, the synthetic dataset is easy to prepare and a single programmer with access to reasonable computing power can create a dataset of millions of images.
The trained model can later be fine-tuned using a small amount of real data to produce spectacular results.
Let’s go over the process step by step, and as we go through the steps, please remember, we are not going over the state of art in character recognition, we are going over a beginner’s journey into the world of AI.
- Step 1: Install ImageMagick: ImageMagick is an open-source free software to create, edit and compose Images in around 200 formats. We will use ImageMagick to create synthetic characters with an arbitrary background, fonts, warps, noise etc. See the above figure to understand the workflow.
- Step 2: Download Backgrounds: Since we need many random backgrounds, we will use a downloader to automatically download images from Google Search for certain keywords. Remember, there is only one person doing the work and we need automation at every step.
- Step 3: Download Google Fonts: The characters need to be rendered using different fonts. I found Google Fonts to be an awesome resource for this purpose.
- Step 4: Synthesize Data: We use a python script to call ImageMagick commands to produce synthetic data.
- Step 5: Define the Network Architecture: Create a basic model based on a modified version of LeNet architecture using Keras.
- Step 6: Train and Test our data set: Split the dataset into 80% for training and 20% for test and report the results.
Now let us look at the details of each step.
Step 1: Install ImageMagick on your Operating System:
You can refer this to download ImageMagick for Windows/Linux/MAC according to the version.
Install ImageMagick on Windows:
1. Download the ImageMagick binary install package from the above link for Windows.
2. At the prompt, type:
convert -version
3. If ImageMagick is already installed, a message will be displayed with the version and copyright notices
Install ImageMagick on Linux/Mac:
1. First, download the latest version of the program sources ImageMagick.tar.gz from this link
2. Unzip the file using:
gunzip -c ImageMagick.tar.gz | tar xvf -
3. In the folder where you have unzipped the file, run:
./configure
4. Once Step 3 is successful, run:
make install
5. To check whether the installation has completed successfully, run:
convert -version
Step 2: Download Backgrounds
I used Google Image Downloader to download thousands of images using keywords like “Background”, “Texture”, “Pattern” etc. It is easy to install and it works like a charm. In addition, if you are developing a commercial application, you can download images with permissible licenses only to be on the safe side using the usage_rights (-r) command line argument.
Step 3: Download Google Fonts
Google has an amazing collection of fonts at Google Fonts. I downloaded about 25 fonts for my project. In real-world application, you would download pretty much all the fonts.
Note: Even if your application domain is restricted to a small set of fonts, it is a good idea to train a much larger collection of fonts to avoid over-fitting.
Step 4: Create synthetic data

I used ImageMagick to generate synthetic data in this project. The figure above shows the workflow. Regular readers of this blog may be thinking why I did not use OpenCV? The reason is that OpenCV has a limited set of fonts.
In this section, I am sharing ImageMagick commands used in my python script. I used a python wrapper to select random fonts, backgrounds, color, warps, noise etc. To start with, we will first see how to use convert function of ImageMagick to generate images having characters(A-Z) and digits(0-9) printed on them.
The operations which are to be performed on any image is done using operators called Image Operators such as crop, blur, evaluate Gaussian-noise, distort Perspective, gravity, font, weight.
Crop 32×32 background regions: The input image size in our architecture is 32×32. So we first crop 10 regions of size 32×32 from every background image we have. These cropped regions are used in the next step as backgrounds for the text.You can crop the image using the following command of ImageMagick
# Crop a rectangle of size 32x32 starting at a random coordinate (72, 43)
magick convert input.png -crop 32x32+72+43 output.png
Render Text: Now we have thousands of 32×32 sized background images. The commands below show how to use ImageMagick command convert to render text on an image.
# Add text to the center of background.jpg
# If the line below does not work for you, remove "-font Courier-Oblique"
magick convert background.jpg -fill Black -font Courier-Oblique -weight 50 -pointsize 12 -gravity center -annotate +0+0 "Some text"
Add artifacts: The following ImageMagick commands help blur, add noise, and perspectively distort the image.
# Add blur of kernel size 8 to the image.
magick convert image.jpg -blur  0x8 output.jpg

# Add Gaussian noise of amoung 3
magick convert image.jpg -evaluate Gaussian-noise 3 ouput.jpg

# Add perspective distortion to image.
# In the following example, the coordinate (0,0) is mapped to (0,5),
# (0,32) to (2,29), (32,32) to (29,29) and (32,0) and (29,2).
magick convert image.jpg -distort Perspective \
'0,0 0,5   0,32 2,29   32,32 29,29   32,0 29,2' output.jpg
Compose Image: In ImageMagick multiple operations can be pipelined into a single line of command.
# Wrap all the Image operators to generate text
magick convert image.jpg -fill Black -font Courier-Oblique -weight 50 -pointsize 12 -gravity center -blur 0x8 -evaluate Gaussian-noise 1.2 -annotate 0+0 "Some text" output_image.jpg
I used a python script, to generate 800 images each for 36 classes (26 characters and 10 digits) for training purpose and 200 images each for test purpose.
I have used train_datagen.flow_from_directory and test_datagen.flow_from_directory which takes images according to their label names only.
Step 5: Define the Network Architecture

You can click on the above Image to enlarge it.
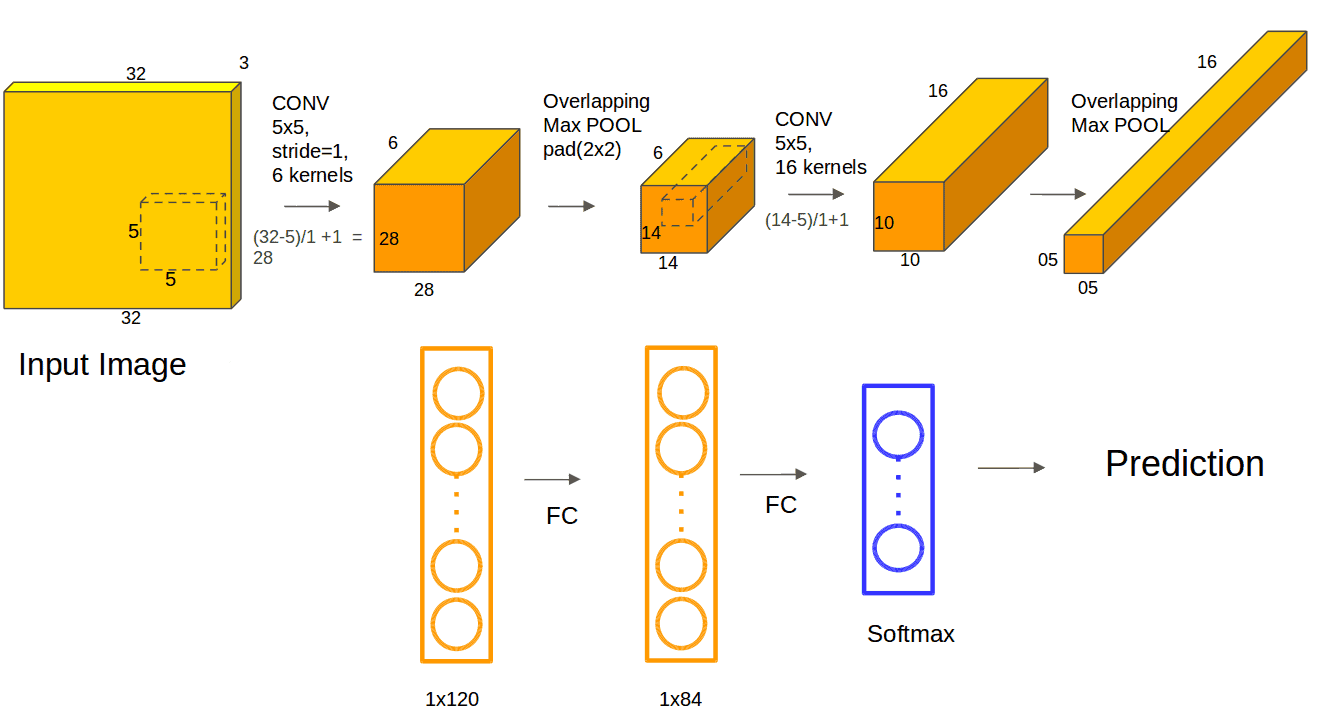
The above figure represents a basic LeNet structure to classify 10 Labels. LeNet architecture consists of two sets of convolution, activation, and max pooling layers, followed by a fully-connected layer, activation, another fully-connected, and finally a softmax classifier. But, do you think that the same architecture with only 2 layers will work for our 36 label classification as well?
Actually, it will work, but as a beginner I wanted to experiment to see if I using a deeper network would produce better results. For this, we extend our network to 3 layers each with a number of filters 32, 32, and 64 respectively and a dropout layer added at the end.
Step 5.1: Define the modified LeNet architecture in Keras
Next, we show how to define the model architecture in Keras. If you have never used Keras, read our beginner’s guide to Keras.
The architecture shown in the figure above translates to the following lines of code.
model = Sequential()
model.add(Conv2D(32, (3, 3), input_shape=input_shape)) # First convolution Layer
model.add(Activation('relu'))
model.add(MaxPooling2D(pool_size=(2, 2)))

model.add(Conv2D(32, (3, 3)))
model.add(Activation('relu'))
model.add(MaxPooling2D(pool_size=(2, 2))) #Second Convolution Layer

model.add(Conv2D(64, (3, 3)))
model.add(Activation('relu'))
model.add(MaxPooling2D(pool_size=(2, 2)))

model.add(Flatten()) #Flatten the layers
model.add(Dense(256)) # FC layer with 256 neurons
model.add(Activation('relu'))
model.add(Dropout(0.5))

model.add(Dense(36)) #As classes are 36, model.add(Dense(36))
model.add(Activation('softmax'))
Compile loss of model using model.compile
model.compile(loss='categorical_crossentropy', optimizer='rmsprop', metrics=['accuracy']) # Use categorical_crossentropy as the number of classes are more than one.
Create train_generator and validation_generator
# To fetch training data from train directory
train_generator = train_datagen.flow_from_directory( train_data_dir, target_size=(img_width, img_height), batch_size=batch_size, class_mode='categorical')
# To fetch test data from test directory
validation_generator = test_datagen.flow_from_directory( validation_data_dir, target_size=(img_width, img_height), batch_size=batch_size, class_mode='categorical')
Dropout
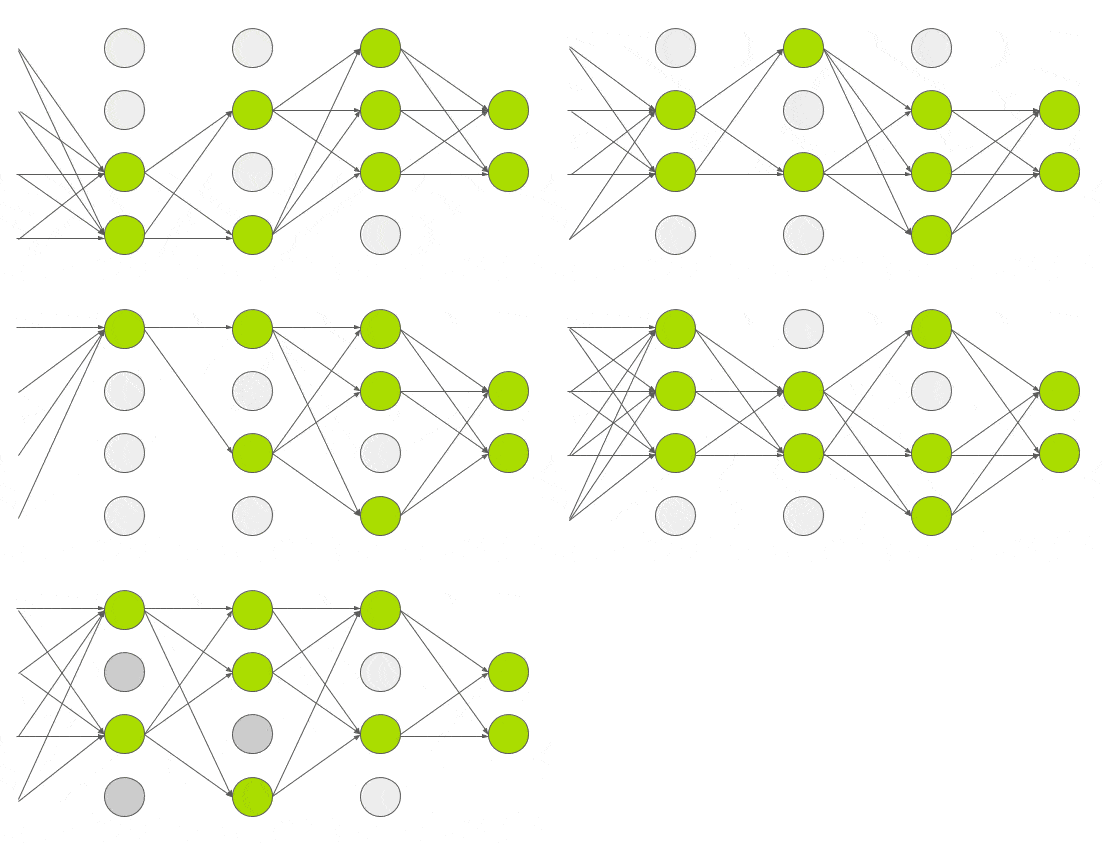
It is a method which is applied to reduce over-fitting. In this method, we randomly remove the neurons in the layers so that the network makes better guesses and does not simply “memorize” the input data.
In my architecture, I added dropout to an FC layer.
model.add(Dropout(0.5)) # Dropout neurons with probability of 0.5
Remember school days? When we used to do hard work but didn’t get the best marks, but when we did smart work, our performance improved? So is the case with dropout.
When we added dropout layer to our model, its test accuracy improved by 0.5 percent.
For more information, you can refer this to improve accuracy score using data augmentation as well.
Step 6: Training and Testing a Model
As mentioned earlier, our dataset was split into 80% training and 20% test set. I trained the model for 80 epochs. The code snipped below shows how it is done in Keras.
history = model.fit_generator(train_generator,
steps_per_epoch=nb_train_samples / batch_size,
epochs=epochs,
validation_data=validation_generator,
validation_steps=validationSamples/validation_batch_size)
model.save_weights('model.h5')
Step 6.1: Plotting Loss and Accuracy
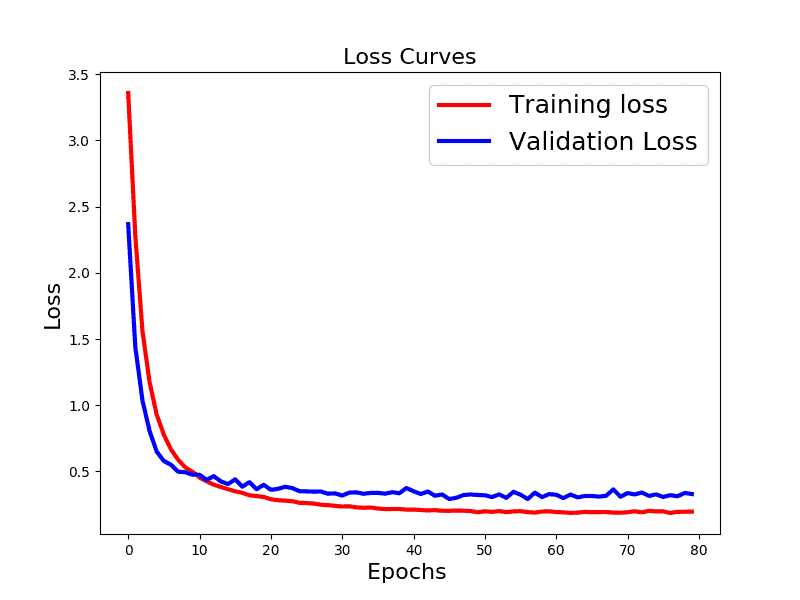
The training accuracy after 80 epochs was 96.3% and the validation accuracy was 94.08%.
The training loss and the validation loss decrease over time and the test loss settles a little above the training loss. The curve looks great with no signs of overfitting. The plot of accuracy is shown below.
Can it be improved? Of course! This is just my first attempt.
Qualitative Results
The character classification model does a very reasonable job. In the image above, all the characters were classified correctly even though some of the characters are challenging.
Now, let us look at some failure cases.

You will notice, similar looking characters ( 0 and O, 6 and G, 1 and I etc.) called Homographs are sometimes misclassified. In other cases, the background texture is either dominant ( 2 misclassified as X ) or it conspires with the background to look like a different character (D misclassified as B) and in some cases the character is very close to the boundary and appears to be part of a different character (N misclassified as M).
References:
http://www.besavvy.com/documentation/4-5/Editor/031350_installimgk.htm


