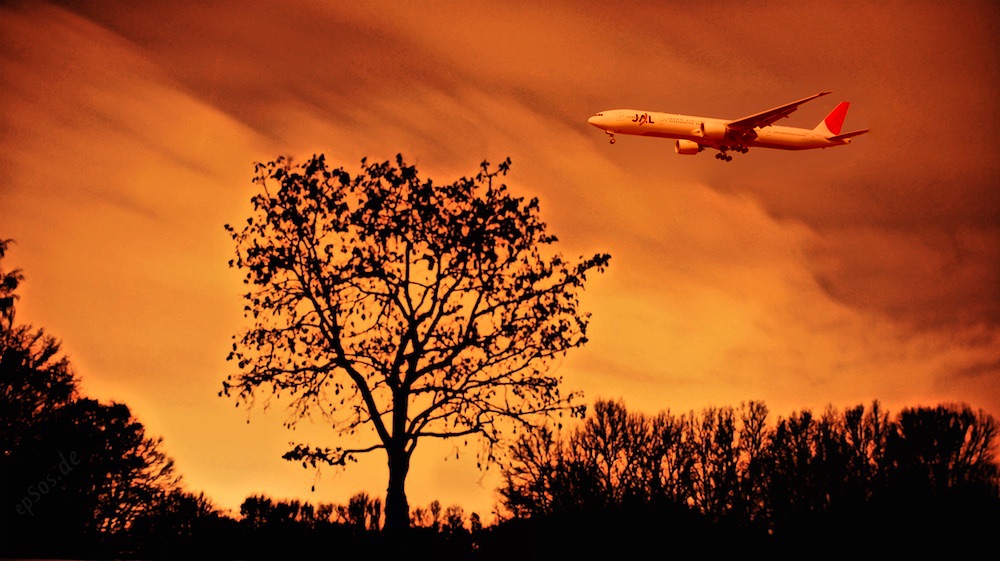
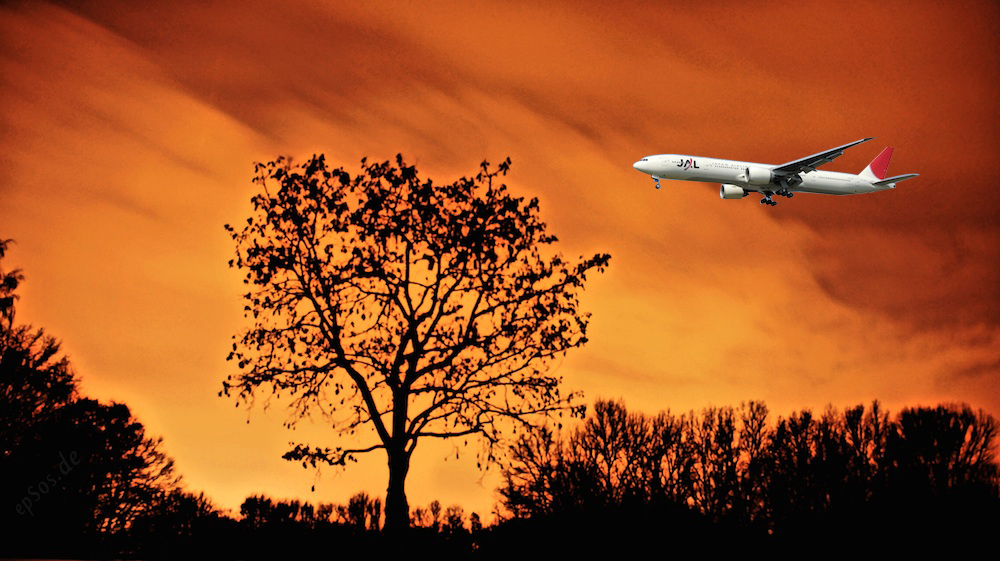
One of the exciting new features introduced in OpenCV 3 is called Seamless Cloning. With this new feature you can copy an object from one image, and paste it into another image making a composition that looks seamless and natural. The above image was created using a scene of a sky and that of an airplane. If I had simply overlaid the airplane image on top of the sky image, the result would look ridiculous (See Figure 2).
Now of course nobody in their right mind would do a composition like that. You would obviously mask the image out carefully, and perhaps after spending half a day in Photoshop get an image that looks like Figure 3.
If you are an artist you would spend another half day and carefully adjust the lighting on the airplane to the lighting of the sky image and create a beautiful composition.
There are two problems however. First, you don’t have half a day to spend. Second, you are probably not an artist!
Wouldn’t it be cool if you could make a very rough mask around the airplane, and yet create a beautiful composition that looks like Figure 1 ? What if you did it in just 10 lines of code ? Now that won’t just be cool, it would be seriously badass!
Before I show you the code, let me spend an hour explaining the exciting theory behind seamless cloning. Oh wait, I got a better idea. Let’s dive into the code first.
Seamless Cloning Example
A quick look at the usage first
Python
output = cv2.seamlessClone(src, dst, mask, center, flags)
C++
seamlessClone(Mat src, Mat dst, Mat mask, Point center, Mat output, int flags)
| src | Source image that will be cloned into the destination image. In our example it is the airplane. |
| dst | Destination image into which the source image will be cloned. In our example it is the sky image. |
| mask | A rough mask around the object you want to clone. This should be the size of the source image. Set it to an all white image if you are lazy! |
| center | Location of the center of the source image in the destination image. |
| flags | The two flags that currently work are NORMAL_CLONE and MIXED_CLONE. I have included an example to show the difference. |
| output | Output / result image. |
Now let’s look at the code that I used to generate the images above.
Python Example
# Standard imports
import cv2
import numpy as np

# Read images
src = cv2.imread("images/airplane.jpg")
dst = cv2.imread("images/sky.jpg")

# Create a rough mask around the airplane.
src_mask = np.zeros(src.shape, src.dtype)
poly = np.array([ [4,80], [30,54], [151,63], [254,37], [298,90], [272,134], [43,122] ], np.int32)
cv2.fillPoly(src_mask, [poly], (255, 255, 255))

# This is where the CENTER of the airplane will be placed
center = (800,100)

# Clone seamlessly.
output = cv2.seamlessClone(src, dst, src_mask, center, cv2.NORMAL_CLONE)

# Save result
cv2.imwrite("images/opencv-seamless-cloning-example.jpg", output);
C++ Example
using namespace cv;

// Read images : src image will be cloned into dst
Mat src = imread("images/airplane.jpg");
Mat dst = imread("images/sky.jpg");

// Create a rough mask around the airplane.
Mat src_mask = Mat::zeros(src.rows, src.cols, src.depth());

// Define the mask as a closed polygon
Point poly[1][7];
poly[0][0] = Point(4, 80);
poly[0][1] = Point(30, 54);
poly[0][2] = Point(151,63);
poly[0][3] = Point(254,37);
poly[0][4] = Point(298,90);
poly[0][5] = Point(272,134);
poly[0][6] = Point(43,122);

const Point* polygons[1] = { poly[0] };
int num_points[] = { 7 };

// Create mask by filling the polygon

fillPoly(src_mask, polygons, num_points, 1, Scalar(255,255,255));

// The location of the center of the src in the dst
Point center(800,100);

// Seamlessly clone src into dst and put the results in output
Mat output;
seamlessClone(src, dst, src_mask, center, output, NORMAL_CLONE);

// Save result
imwrite("images/opencv-seamless-cloning-example.jpg", output);
In the above example, the cloning type ( flags ) I used was NORMAL_CLONE. There is another type, MIXED_CLONE, that is subtly different from NORMAL_CLONE. Let’s see how the two types differ in detail.
Normal Cloning ( NORMAL_CLONE ) versus Mixed Cloning ( MIXED_CLONE )
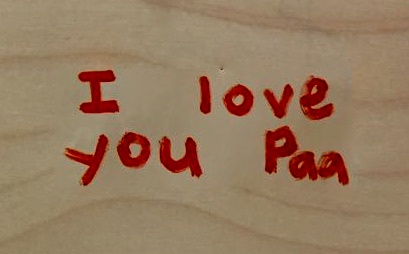
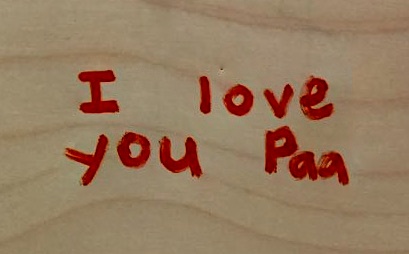
I have a 5 year old son who gives me “I Love You” tickets if I treat him well. There was a time when kids yearned for their parent’s approval, but these days parents have to do their best to earn “I Love You” tickets. Anyway, back to cloning. I am going to use one of these “I Love You Tickets” in the service of Computer Vision (See Figure 4 ).
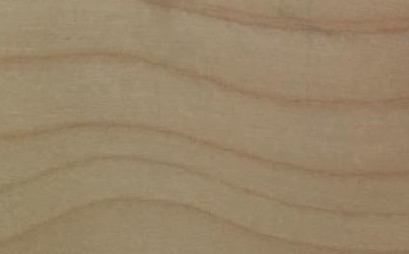
Let’s try to clone this image onto a wooden texture shown in Figure 5. We will be lazy and use a source mask that is all white, and clone the source image right in the center of the wooden texture image.
Python Example
import cv2
import numpy as np

# Read images : src image will be cloned into dst
im = cv2.imread("images/wood-texture.jpg")
obj= cv2.imread("images/iloveyouticket.jpg")

# Create an all white mask
mask = 255 * np.ones(obj.shape, obj.dtype)

# The location of the center of the src in the dst
width, height, channels = im.shape
center = (height/2, width/2)

# Seamlessly clone src into dst and put the results in output
normal_clone = cv2.seamlessClone(obj, im, mask, center, cv2.NORMAL_CLONE)
mixed_clone = cv2.seamlessClone(obj, im, mask, center, cv2.MIXED_CLONE)

# Write results
cv2.imwrite("images/opencv-normal-clone-example.jpg", normal_clone)
cv2.imwrite("images/opencv-mixed-clone-example.jpg", mixed_clone)
C++ Example
using namespace cv;
Mat src = imread("images/iloveyouticket.jpg");
Mat dst = imread("images/wood-texture.jpg");

// Create an all white mask
Mat src_mask = 255 * Mat::ones(src.rows, src.cols, src.depth());

// The location of the center of the src in the dst
Point center(dst.cols/2,dst.rows/2);

// Seamlessly clone src into dst and put the results in output
Mat normal_clone;
Mat mixed_clone;

seamlessClone(src, dst, src_mask, center, normal_clone, NORMAL_CLONE);
seamlessClone(src, dst, src_mask, center, mixed_clone, MIXED_CLONE);

// Save results
imwrite("images/opencv-normal-clone-example.jpg", normal_clone);
imwrite("images/opencv-mixed-clone-example.jpg", mixed_clone);
Normal Cloning Result
If we use Normal Cloning by using the NORMAL_CLONE flag, we will get the result shown in Figure 6. Now we did not use a good mask and you can see excessive smoothing between the words “I” and “Love”, and between “you” and “Paa”. Sure we were lazy. We could have created a rough mask and improved the result. But if you are lazy and smart, you would use Mixed Cloning.
Mixed Cloning Result
In Normal Cloning the texture ( gradient ) of the source image is preserved in the cloned region. In Mixed Cloning, the texture ( gradient ) of the cloned region is determined by a combination of the source and the destination images. Mixed Cloning does not produce smooth regions because it picks the dominant texture ( gradient ) between the source and destination images. The result of mixed cloning is shown in Figure 7. Notice the texture is no longer smooth between “I” and “Love”, and “you” and “Paa”. Lazy people cheer!
Seamless Cloning Video Result
I took the images of the airplane and the sky, and changed the position of the airplane to create this animation. MIXED_CLONE gave better results, and you hardly notice any artifacts. Cloning a 300×194 image (airplane) onto a 1000×560 image ( sky) takes approximately 0.4 seconds.
Poisson Image Editing
Seamless cloning in OpenCV is an implementation of an influential SIGGRAPH 2003 paper titled “Poisson Image Editing”, by Patrick Perez, Michel Gangnet, and Andrew Blake.
Now we know that if we blend the intensities ( RGB values ) of the source image ( the airplane ) with the destination image ( sky ) using a carefully created mask we will obtain a result like Figure 3. The central insight in the paper is that working with image gradients instead of image intensities can produce much more realistic results. After seamless cloning the intensity of the result image in the masked region is NOT the same as the intensity of the source region in the masked region. Instead, the gradient of the result image in the masked region is about the same as the gradient of the source region in the masked region. Additionally, the intensity of the result image at the boundary of the masked region is the same as the intensity of the destination image (sky).
The authors show that this is done by solving a Poisson equation, and hence the title of the paper — Poisson Image Editing. The theoretical and implementation details of the paper are actually very cool, but beyond the scope of this post. However, if you read the paper and have questions, feel free to ask them in the comments section.
Subscribe & Download Code
If you liked this article and would like to download code (C++ and Python) and example images used in this post, please click here. Alternately, sign up to receive a free Computer Vision Resource Guide. In our newsletter, we share OpenCV tutorials and examples written in C++/Python, and Computer Vision and Machine Learning algorithms and news.Image Credits


